I’m closing out this week of cookies with the quintessential flavor of the season, peppermint! Specifically, a peppermint buttercream sandwich between two chocolate cake mix cookies. Yes, I made the cookies using a cake mix. I’ve shared quite a few cake mix cookie recipes over the years and they’ve always been a success. This recipe is perfect for anyone short on time or just doesn’t want to be measuring flour, baking soda/powder, sugar, etc. One thing to note, the recipe only makes 12 sandwich cookies, as using the cake mix only yields 24 cookies. If you would like more cookies – 24 for example – simply double the cookie recipe – use 2 boxes of chocolate cake mix, 2/3 cup of oil and 4 eggs. The recipe for the peppermint buttercream is enough for the double batch. If you don’t want any left-over filling simply cut the ingredients in half for the buttercream. Here’s an idea though, if you plan on making the Stacked Christmas Confetti Cookies I shared yesterday you could use the leftover buttercream to decorate those. If you don’t feel like tinting the frosting to make the Christmas Tree or Santa Hat, you could pipe a snowflake instead.
1/2 cup unsalted butter (1 stick), at room temperature
1 1/2 cups confectioner’s sugar
2 teaspoons peppermint extract
1 1/2 tablespoons milk
Crushed peppermint candy to decorate the sides of the cookies.
*If you want your cookies to have a more cookie-like texture as opposed to cake-like use 1/3 cup melted butter instead.
Directions:
For the Chocolate Cookies: Preheat the oven to 350 F and line two baking sheets with parchment paper and set aside. In a large bowl combine the cake mix, oil and eggs and beat with a hand mixer on medium speed until well incorporated. Scoop 1 tablespoon of the dough, roll into a ball and place on the prepared baking sheets about 2 inches apart. Bake in the preheated oven for 8-10 minutes. Let cool on the baking sheets for 1 -2 minutes and then transfer to a wire rack to cool completely.
For the Peppermint Buttercream Filling: Add all ingredients to a large bowl and beat with a hand mixer on medium speed until the frosting is light and fluffy. If you would like a stronger peppermint flavor add an additional 1/2 to 1 teaspoon of peppermint extract. If you find that the filling is not a pipeable consistency add about 1/2 tablespoon of milk and beat well to incorporate. You don’t want the consistency to be too thin though. Transfer to a piping bag and snip the end off.
Pipe the filling on the flat side of half of the cookies and top with the other half, pressing down gently so some of the frosting comes out of the sides. Roll the cookies in the crushed peppermint candy and enjoy!
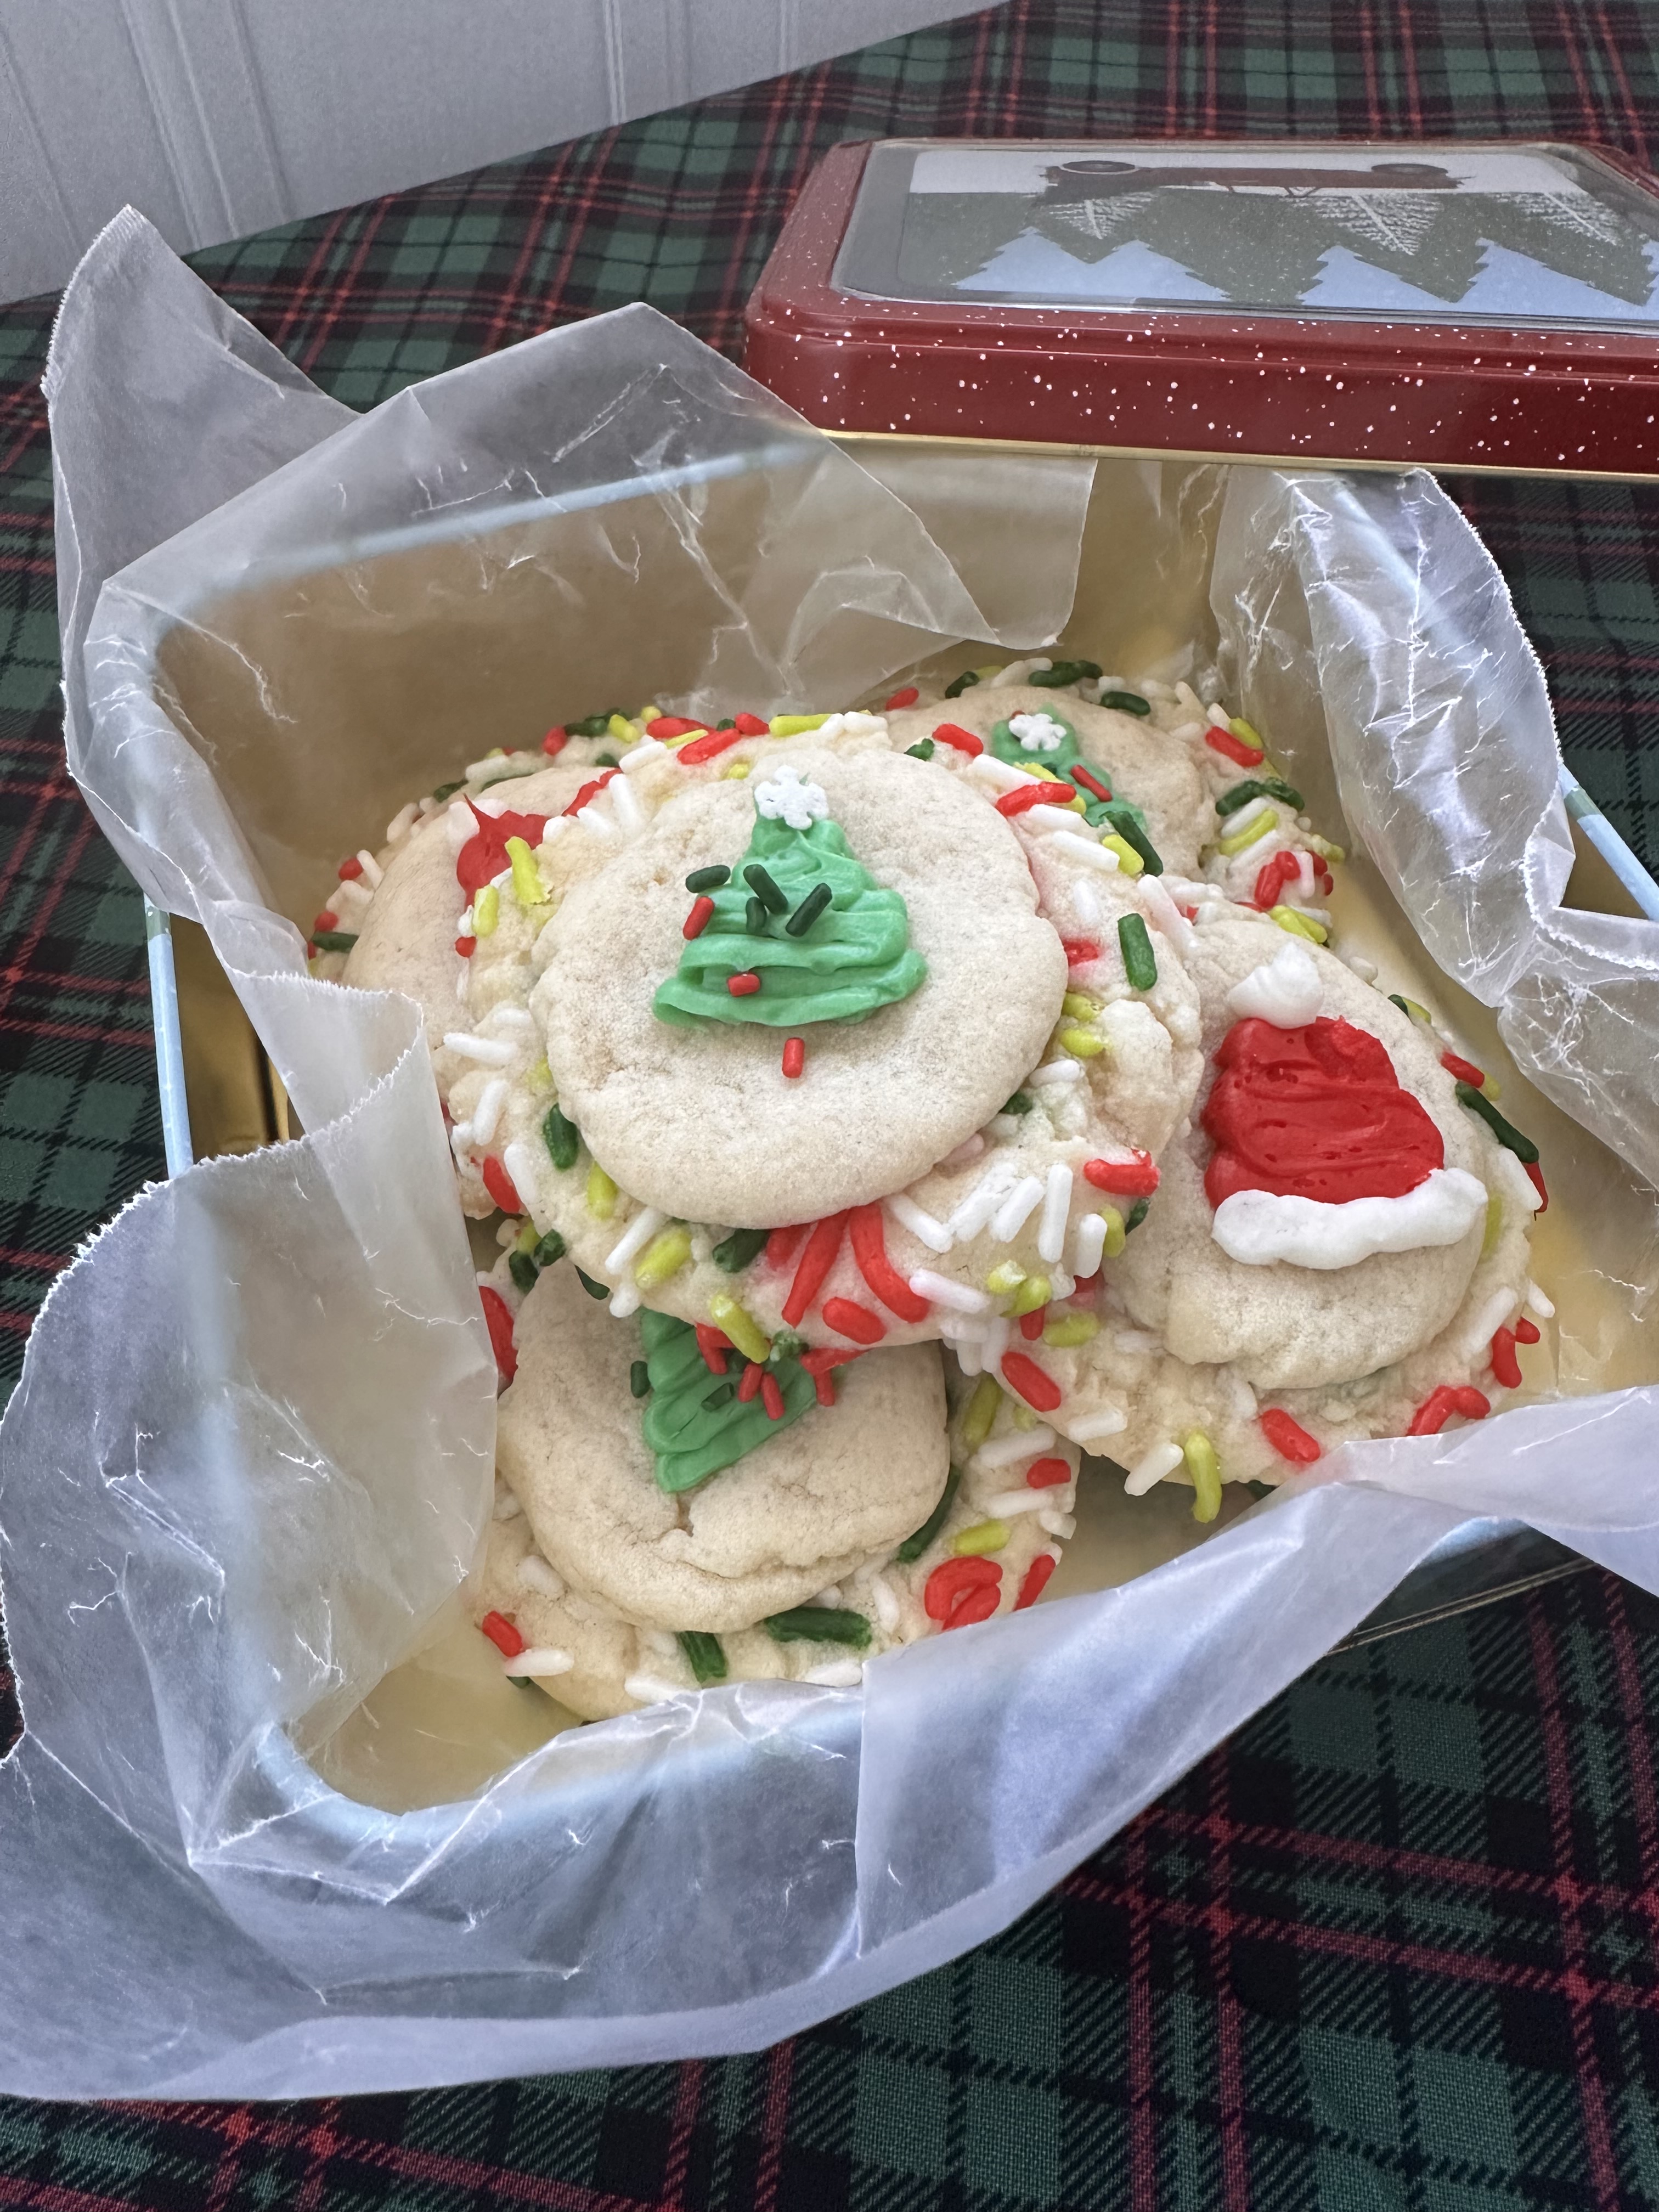
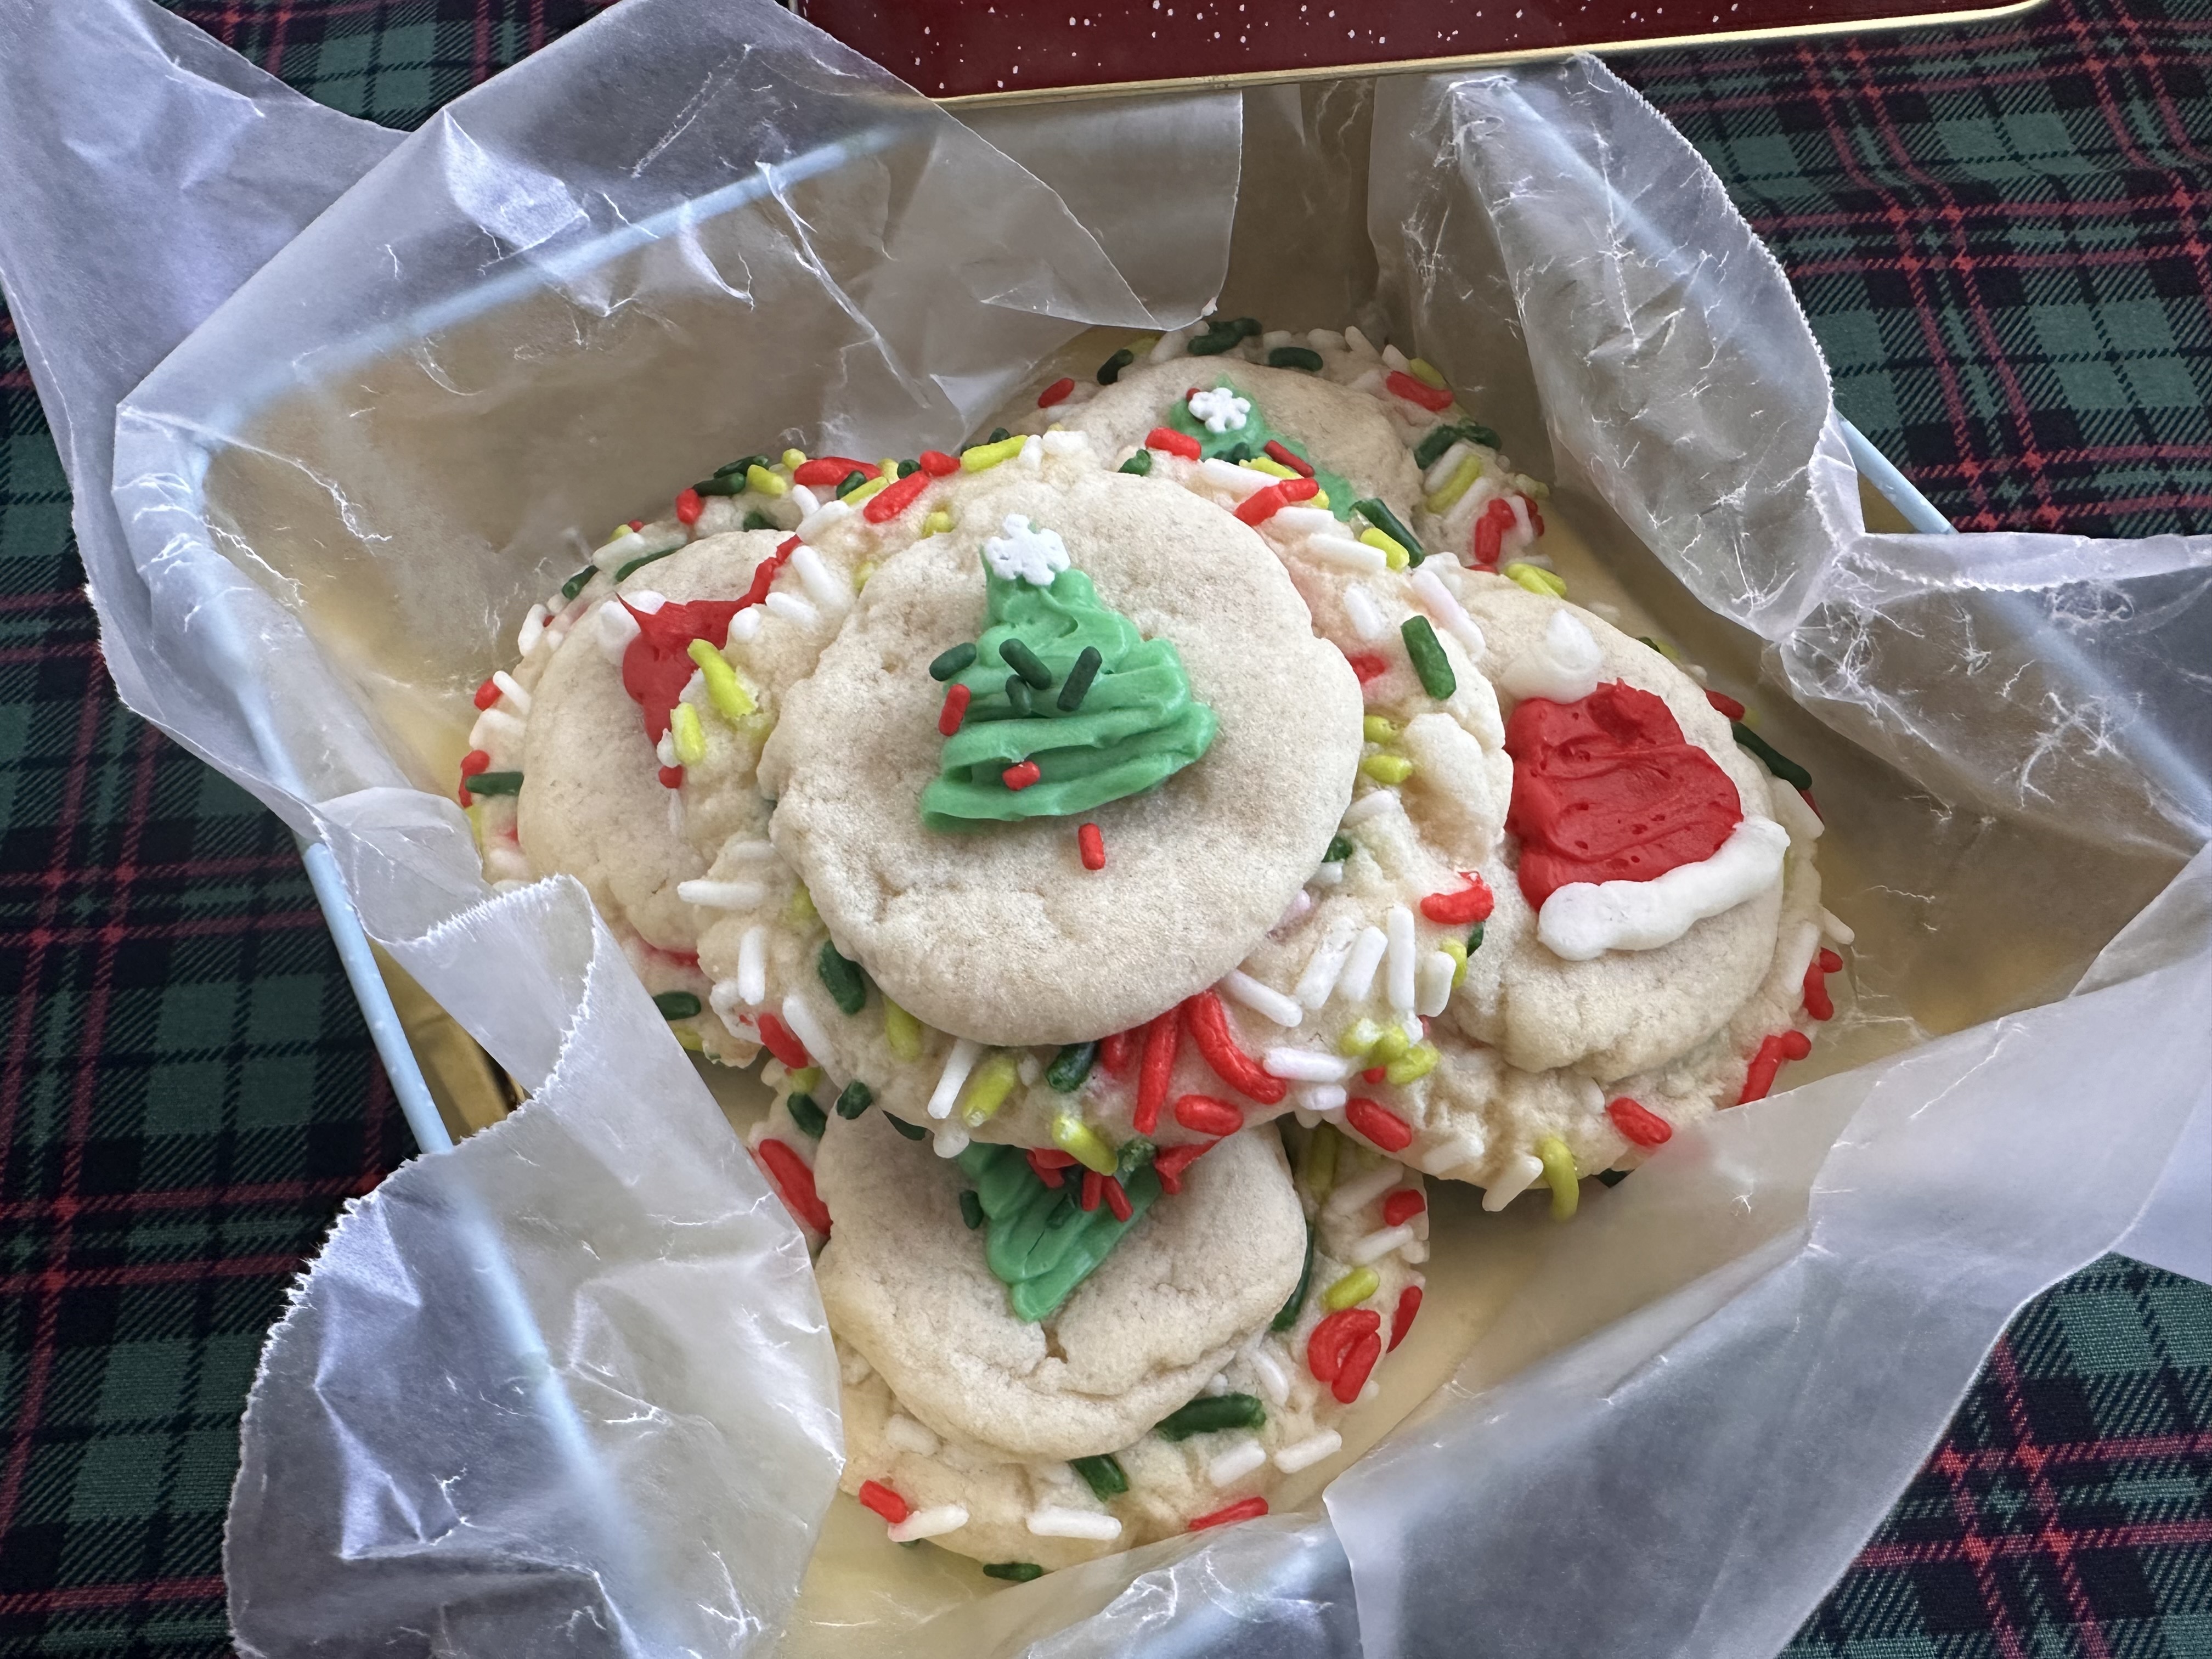
Truth be told I wasn’t sure if I was going to share five cookie recipes this year! Last year I only shared one and this year was looking a little bleak. I had written up recipes for two cookies that I tested and ended up being disappointed with both. So, I was thinking of scraping this year as well. But then, the ideas started flowing again and some random scrolling on Instagram helped to give way to two of the cookies. Today’s cooking being one of them, a Stacked Christmas Confetti Cookie. It’s a mouthful but not as difficult as it may sound.
Apparently, the idea of this cookie came from a viral sensation from last year where people were using the Pillsbury Halloween Shape Sugar Cookie Dough and topping it on top of another cookie, usually a chocolate chip cookie. If you are not familiar with the Pillsbury seasonal cookies I am talking about, click on this link and then scroll to the bottom. The cookie I saw on Instagram didn’t use the Pillsbury dough though; it used sugar cookie dough for both the base of the cookie and the decorated stack. I decided to use my go-to sugar cookie recipe and switch up the steps to create them myself. And I was very happy with the results. One thing I did do as a short-cut for my version though was use store-bought frosting to decorate the cookies. Thankfully this time of the year it’s easy to find red & green frosting. Also, I opted to roll my cookies in sprinkles, but you could also use nonpareils, it just comes down to preference.
1 cup (2 sticks) unsalted butter, at room temperature
1/4 cup (2 ounces) cream cheese, at room temperature
1 1/4 cups sugar
1 large egg
2 teaspoons vanilla extract
1 cup red & green sprinkles
Red, Green & White Frosting for decorating
Directions:
Preheat the oven to 375 F. Line two baking sheets with parchment paper and set aside.
In a medium bowl whisk together the flour, baking powder, baking soda and salt. Set aside.
In a large bowl beat together the butter, cream cheese and sugar with a hand mixer on medium speed until light and fluffy. Add the egg and vanilla extract and continue beating until incorporated. Add in the flour mixture and continue beating until just incorporated. If the dough feels too soft, refrigerate 15-20 minutes to firm up.
Add the sprinkles to a small bowl. Scoop the dough using a medium cookie scoop (1 1/2 tablespoons), roll into a ball and then roll in the sprinkles. Place on the prepared cookie sheet and then use the bottom of a glass cup to press the cookies down about 1/4 inch high.
Using a smaller cookie scoop (2 teaspoons), scoop the dough, roll into a ball and then use your palms to flatten and then place on top of the sprinkled cookie.
To make sure you don’t run out of dough for the stack, work with one batch at a time. In other words, don’t scoop all the dough for the base cookie at once. Scoop enough for one of the baking sheets and then scoop the stack part and then repeat for the other baking sheet.
Bake in the preheated oven for 9 to 10 minutes. Let cool on the baking sheet for 2 minutes and then transfer to a wire rack to cool completely.
Once the cookies are cooled transfer the frosting to piping bags and pipe festive designs on the cookies. You can do Christmas Trees, Santa Hats, Snowmen, Snowflakes, etc.
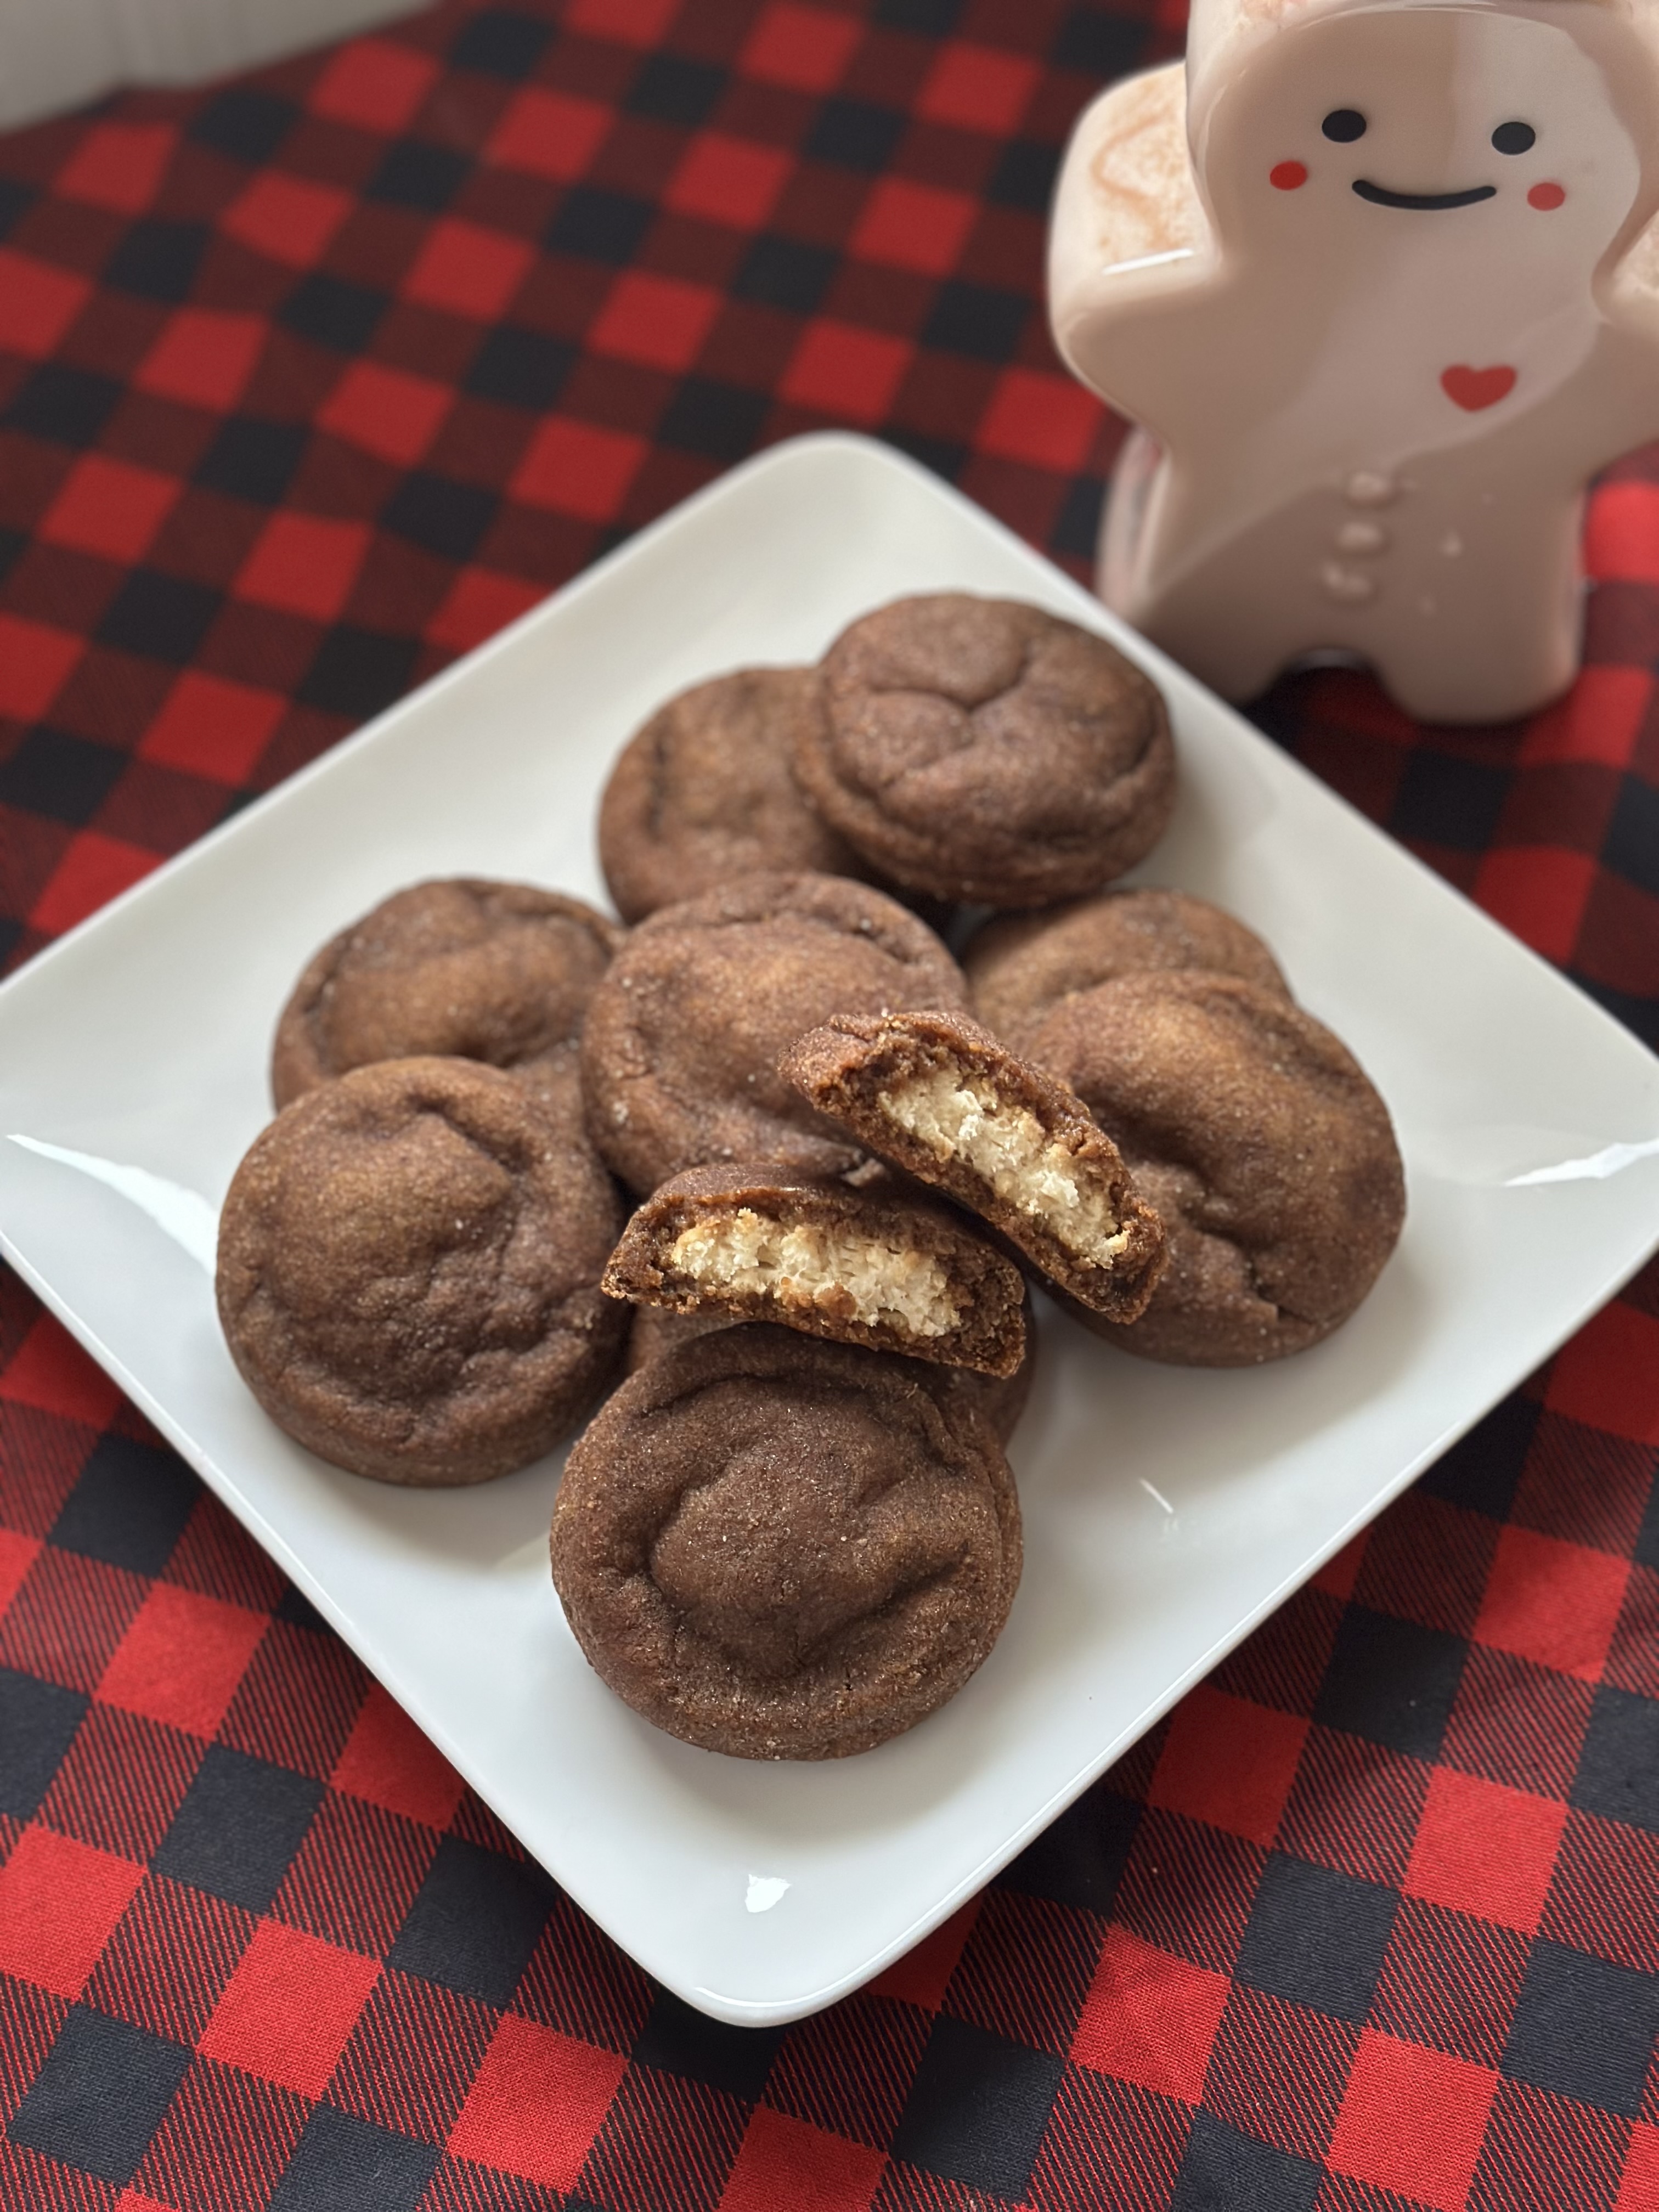
I have made gingerbread cookies from scratch and yes, they are delicious, but they can be a bit time consuming. Especially if you are making Gingerbread cutouts which you are then decorating. One year I decided to try using Betty Crocker’s Gingerbread Cookie Mix and I was very happy with the results, so I always pick up a package or two around the holidays – the only time they are available in stores. One of my favorite flavor combinations for a cake during the holidays is a gingerbread cake with cream cheese frosting so I started wondering if I could recreate this with a cookie and lo and behold my idea worked out just as I had hoped. Today’s cookie, Gingerbread Cheesecake Cookies, uses Betty Crocker’s Gingerbread Cookie mix as the base and then three simple ingredients are whipped together for the cheesecake filling. The cookie is finished by rolling in a gingerbread spiced sugar to up the ante – an appearance – of the cookie.
For the Cheesecake Filling: Line a baking sheet or small cake pan with wax paper and set aside. In a medium bowl combine the cream cheese, sugar and vanilla extract and beat with a hand mixer on medium speed until well combined and the sugar has dissolved. Using a small cookie scoop (2 teaspoons) scoop the mixture and drop onto the prepared pan. You should have 18 portions. Freeze until they are frozen and firm, preferably overnight.
For the Gingerbread Spiced Sugar: Combine the sugar and all the spices in a small bowl and whisk together to combine. Set aside.
For the Gingerbread Cookies: Preheat the oven to 375 F. Line 2 baking sheets with parchment paper and set aside. Add the gingerbread cookie mix along with the butter, egg and water to a large bowl. Beat with a handheld mixer on medium speed until the dough forms.
Using a medium cookie scoop – 1 1/2 tablespoons – scoop the dough into 18 portions and divide amongst the 2 prepared cookie sheets. Working with the dough on one of the cookie sheets – roll the dough into a ball and then slightly flatten. Place a frozen cheesecake ball in the center of the flatten dough and then cover the ball with the cookie dough. Roll into a ball again and then roll in the gingerbread spiced sugar before placing back onto the cookie sheet. Bake in the preheated oven for 9 – 11 minutes. Until the cookie is slightly puffed and edges begin to brown. Let the cookies cool on the sheet for 5 minutes before transferring them to a wire rack to cool completely.
Some things to note, keep the remaining cheesecake balls in the freezer until a few minutes before the first batch of cookies finishes baking. Then remove from the freezer and finish assembling and baking the cookies.
And while I am sure it’s safe to store these cookies at room temperature, I opted to store mine in the refrigerator in an airtight container due to the cream cheese based filling. Just bring to room temperature to before enjoying!
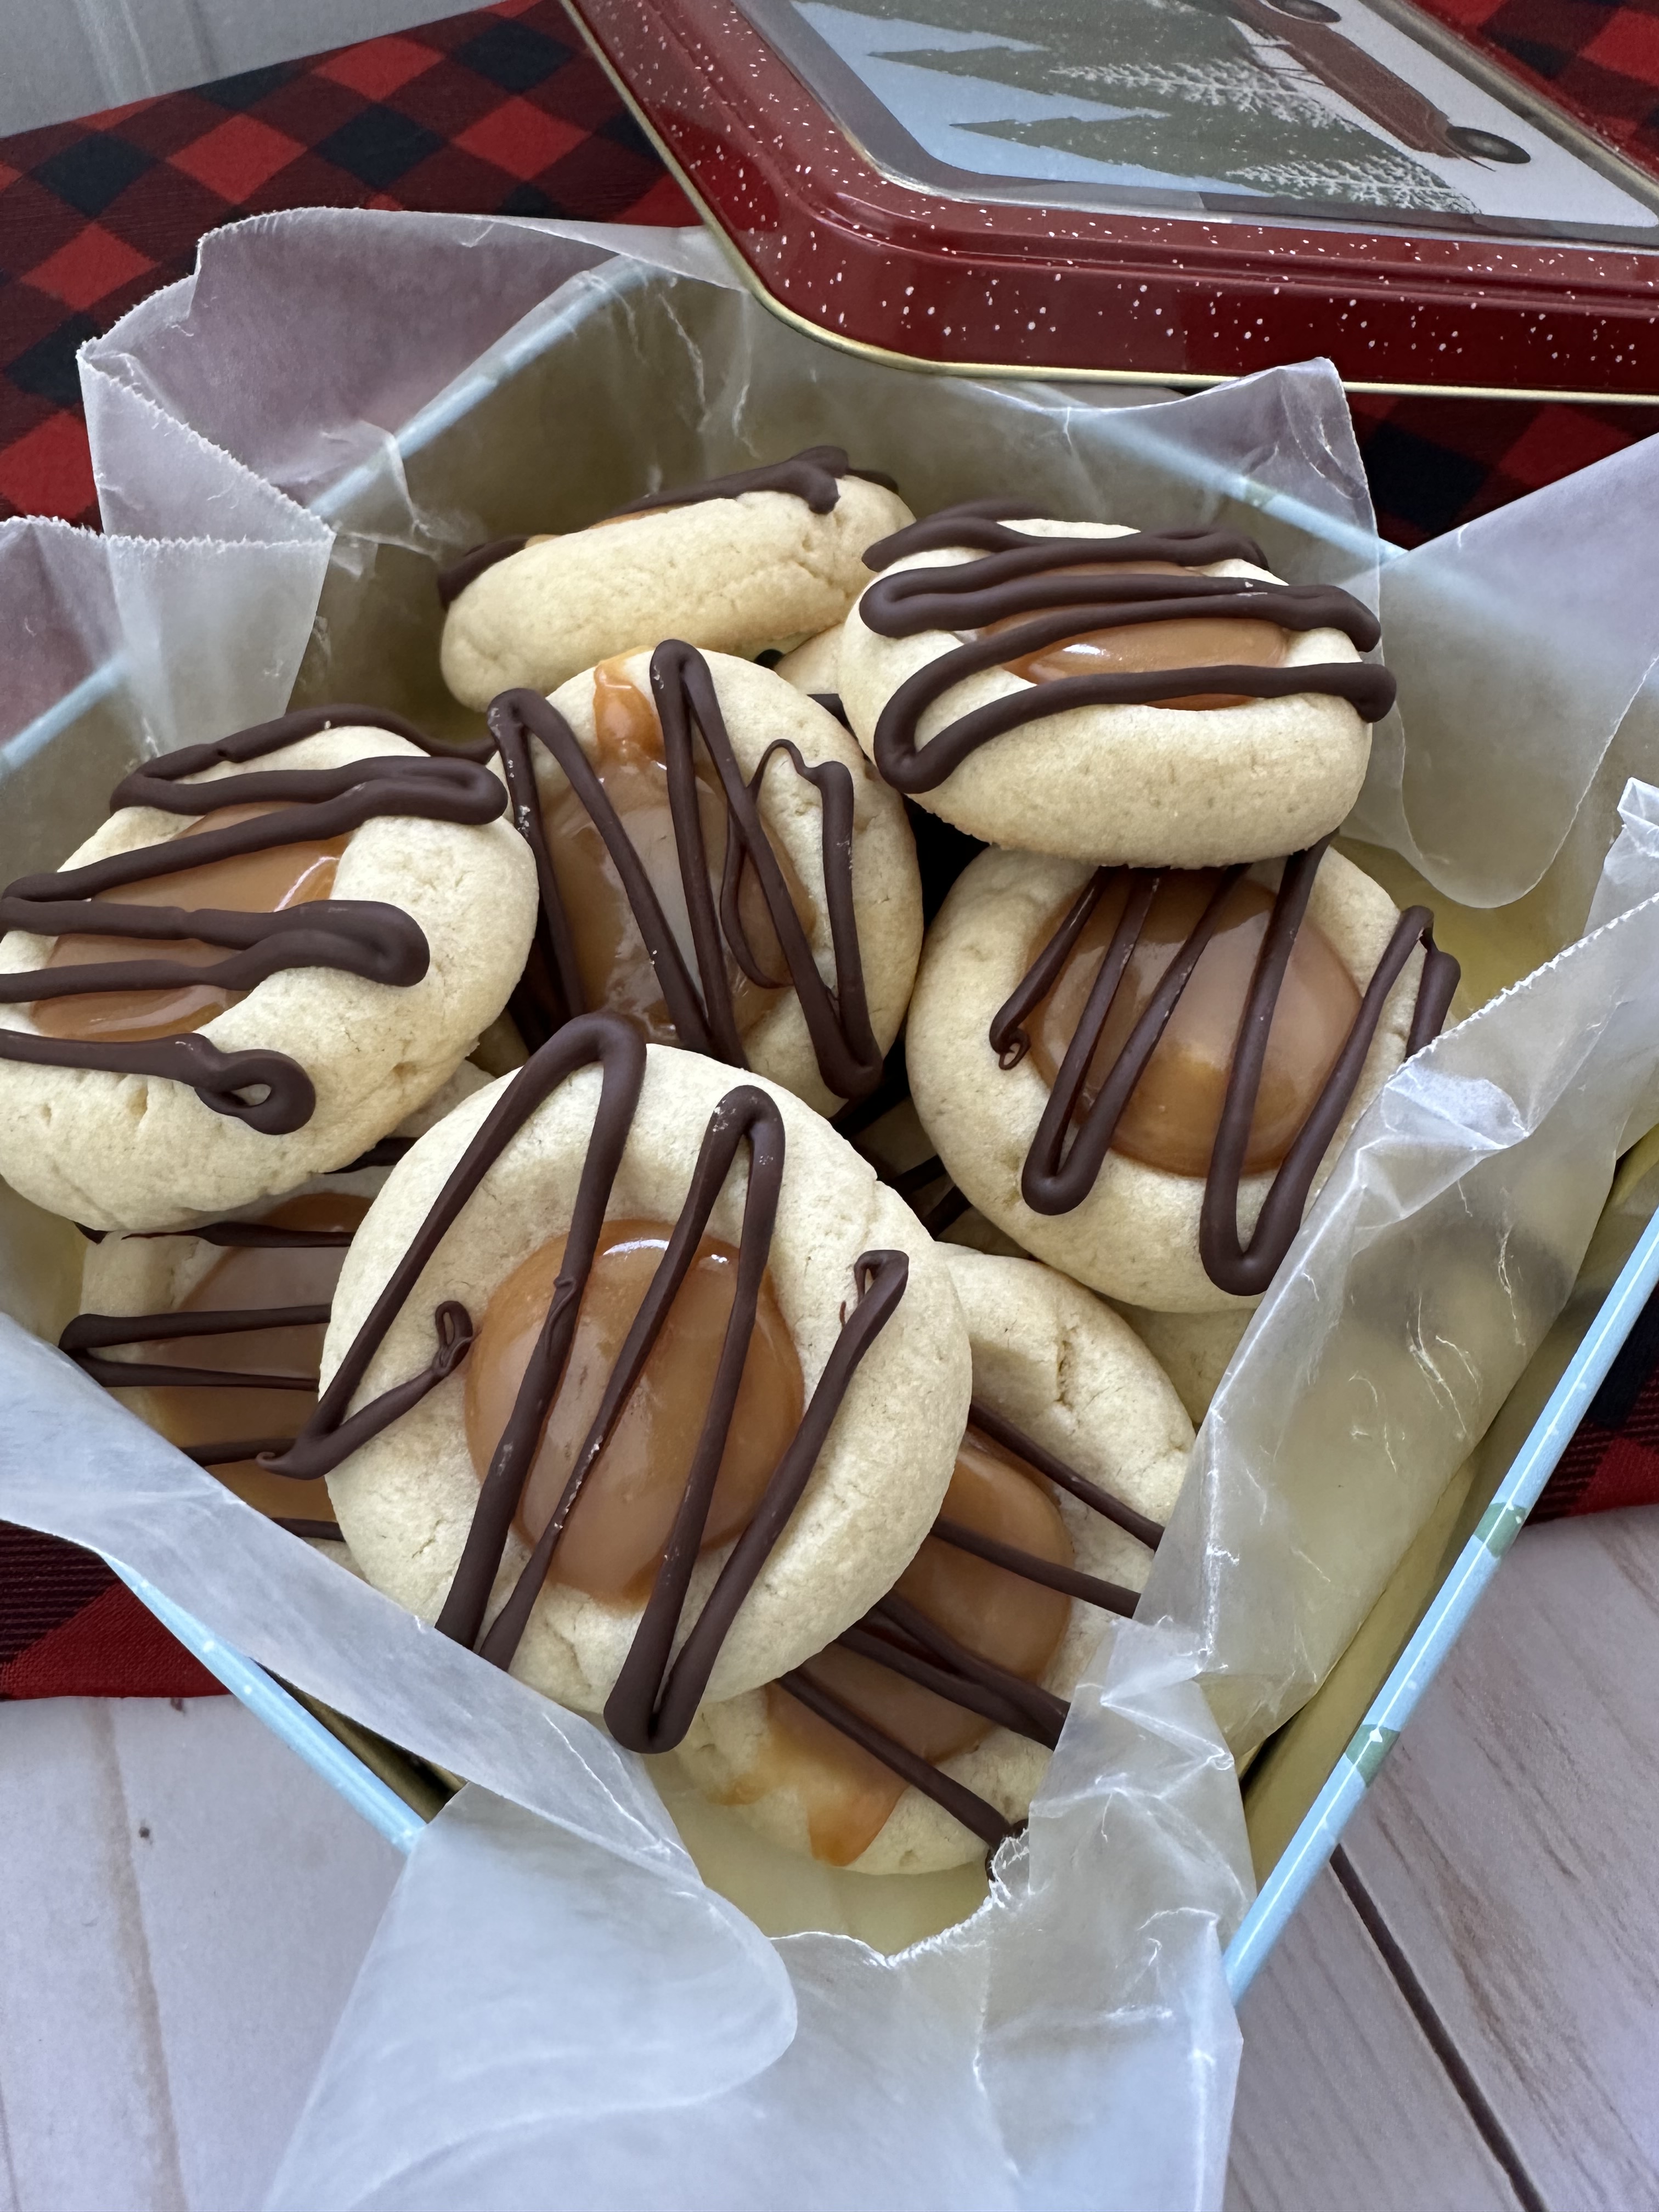
Thumbprints are a popular cookie around the holidays. The simple butter cookie base can be filled with all kinds of yumminess. Jams, curds, chocolate, frosting, etc. The thumbprint I am sharing with you today is filled with caramel and drizzled with melted chocolate… think a Twix bar.
1 cup (2 sticks) unsalted butter, at room temperature
2/3 cup sugar
2 egg yolks, at room temperature
1 teaspoon vanilla extract
2 1/4 cup flour
1/2 teaspoon Kosher salt
For the Caramel Filling:
16 caramels, unwrapped
3 tablespoons heavy cream
For the Chocolate Drizzle:
1/2 cup semi-sweet chocolate chips
Directions:
For the Cookies: Preheat the oven to 350 F. Line 2 baking sheets with parchment paper and set aside. In a large bowl beat together the butter and sugar with hand mixer on medium speed until light and fluffy. Add in the egg yolks and vanilla extract and continue beating until well incorporated. Finally, add the flour and salt and continue beating until the dough forms. Scoop tablespoons of the dough, roll into a ball and drop onto the prepared baking sheets 2 inches apart. Using the bottom of a round teaspoon (or your thumb) press into the center of each ball. Bake in the preheated oven for 12-14 minutes. If necessary, press the center of the cookies down again after removing them from the oven. Transfer to a wire rack to cool completely.
For the Caramel Filling: In a small saucepan melt the caramels with the heavy cream on medium low heat until smooth, stirring occasionally. Fill each cooled cookie with a teaspoon of caramel.
For the Chocolate Drizzle: Melt the chocolate chips in a small saucepan on the stove or in the microwave in 20 second intervals, stirring between each. Transfer the melted chocolate to a piping bag, snip the end and then drizzle over the cookies. Allow the chocolate to set before serving or storing. To speed up the chocolate setting you can place the cookies in the refrigerator for 10-15 minutes.
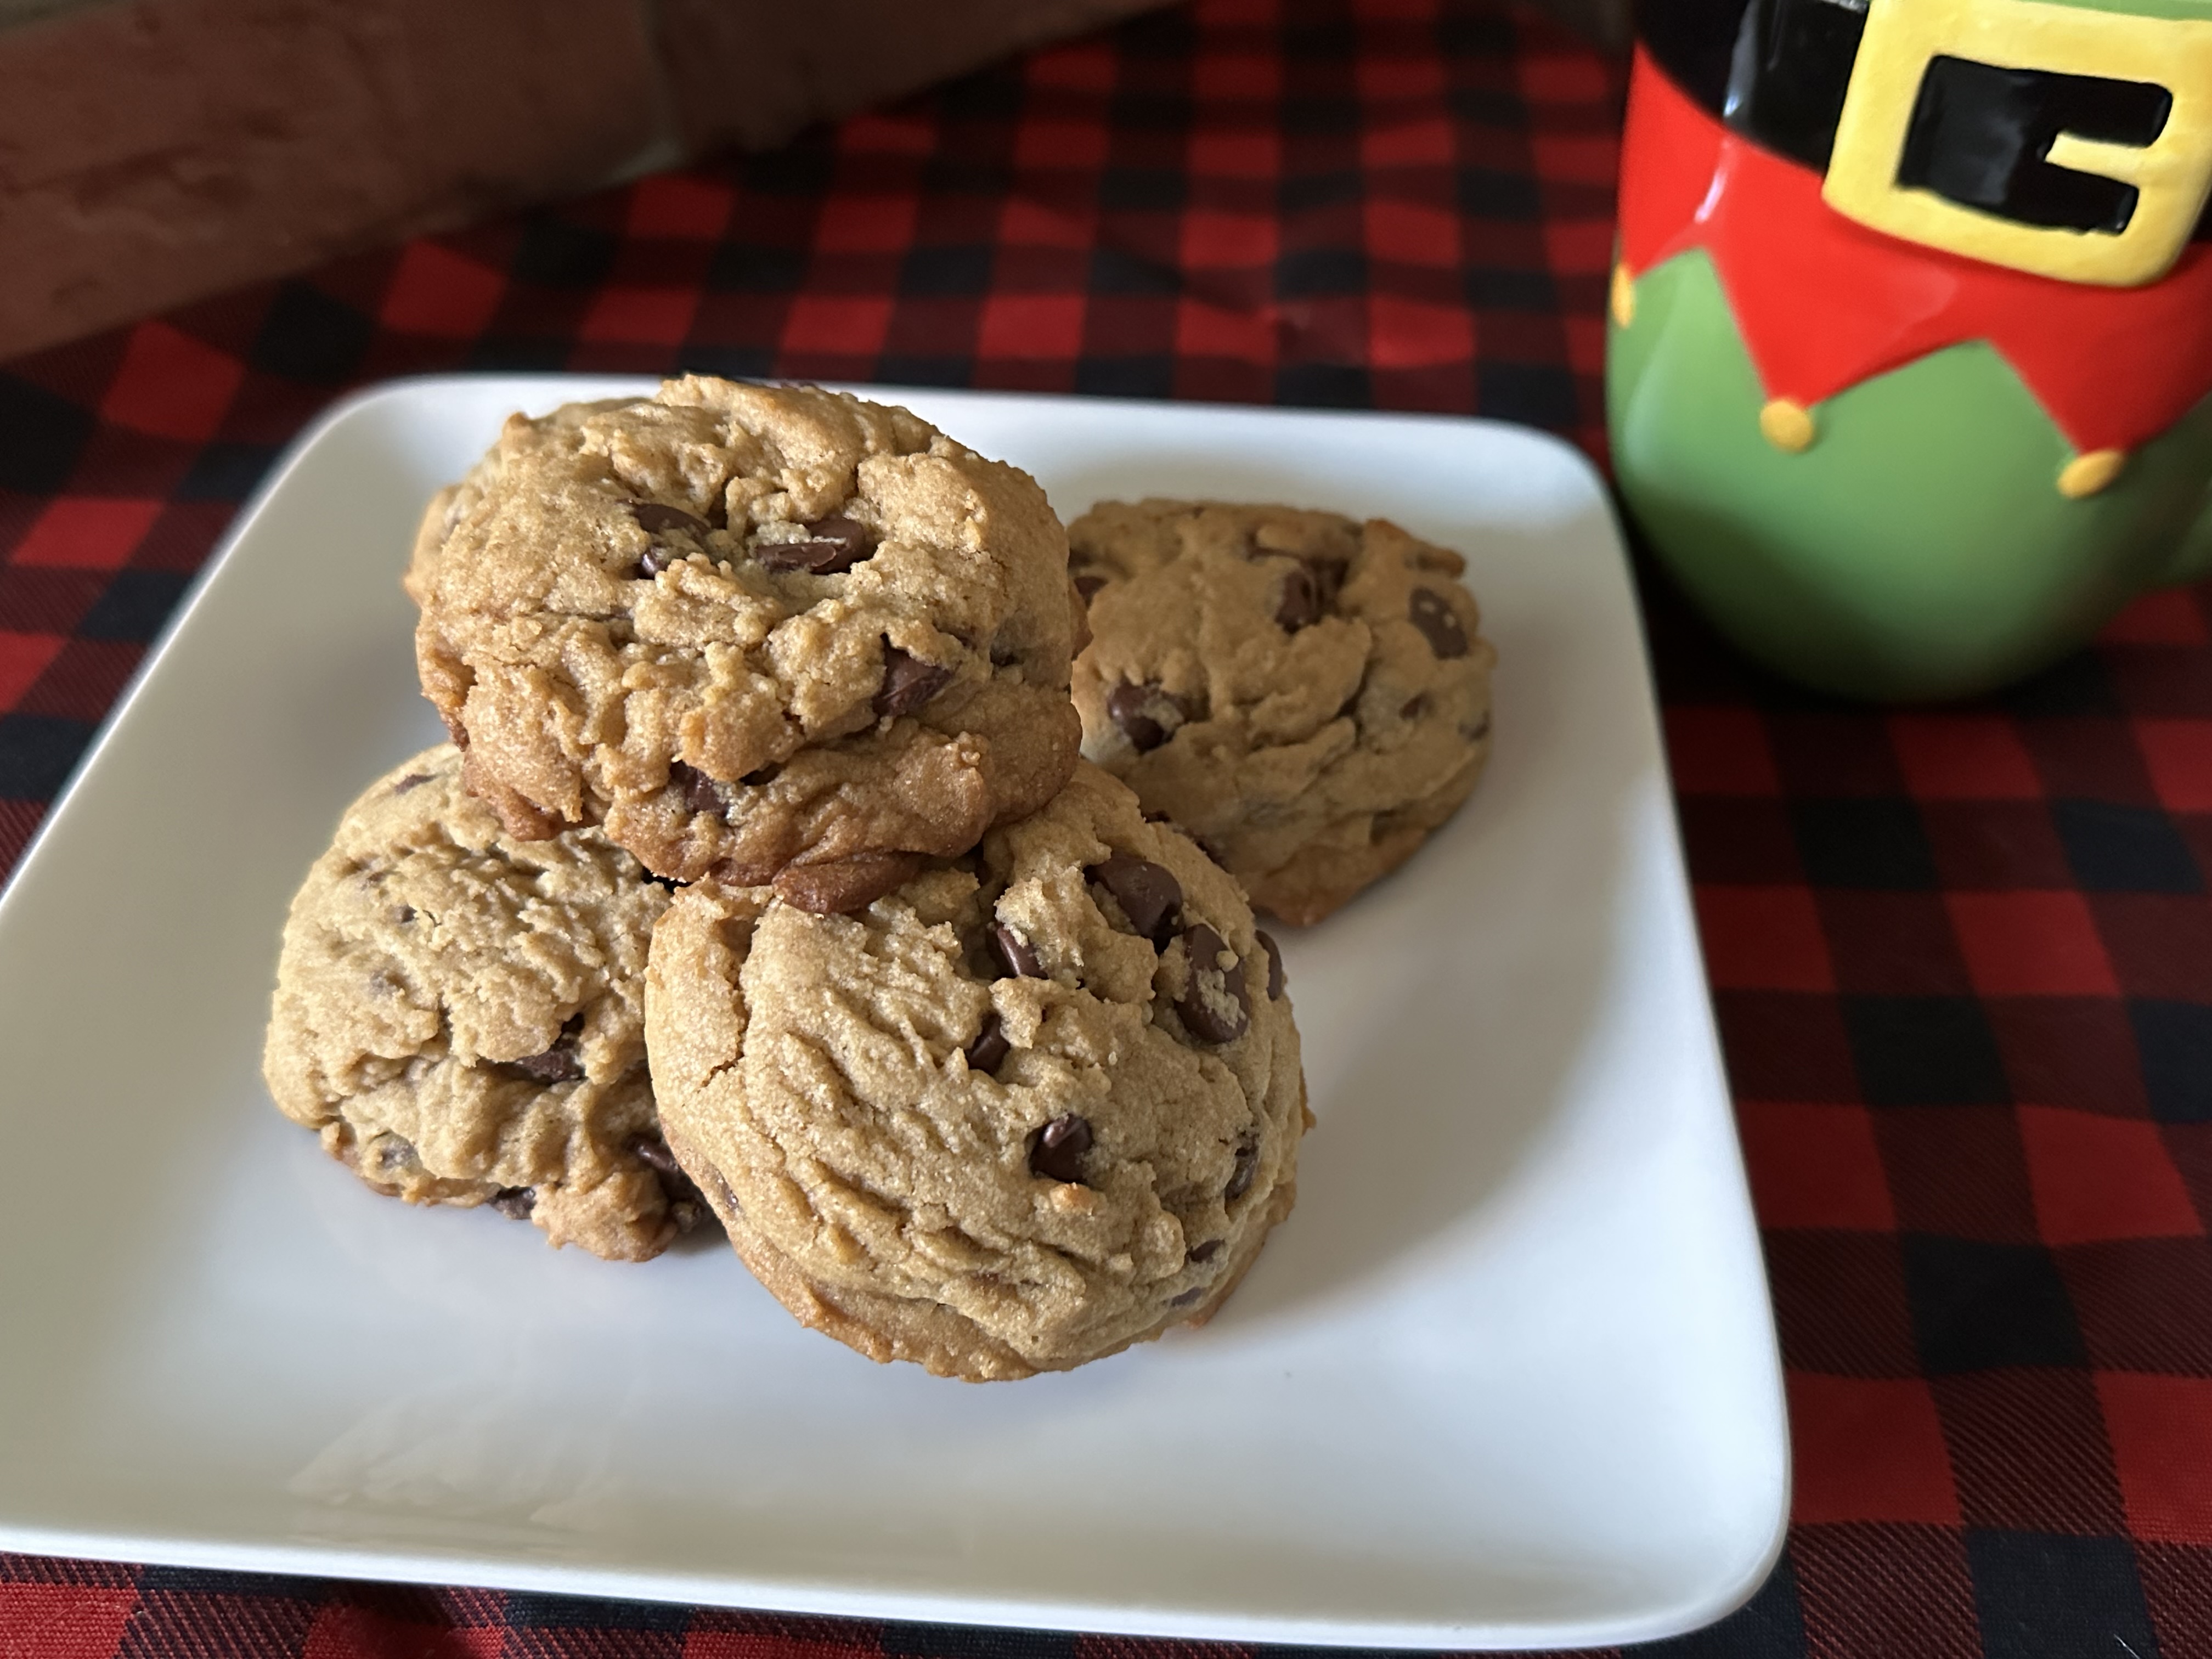
The holidays are upon us. Which means it’s time to whip out the cookie sheets, pie dishes and cake pans to get to baking. Not really sure how much baking I’ll be doing this year, but after taking last year off from sharing a few good cookie recipes I am back this year with five cookie recipes that are sure to be a welcome addition to your baking repertoire. Up first, a Brown Butter Peanut Butter Chocolate Chip Cookie.
While I do love peanut butter cookies, I find that I can only eat one or two before the peanut butter flavor becomes a bit much. With these cookies, the brown butter helps to tone down the peanut butter flavor while adding another layer of dimension. A few things to note about making brown butter. Make sure you use a large enough saucepan, bigger is better just in case it begins to bubble over. You might be tempted to raise the heat, but medium heat is ideal. Once the butter melts and begins to boil/simmer it will turn the desired amber color quite quickly and you don’t want it to burn because then you will have to toss it as it will have a burnt flavor as opposed to the nutty flavor we’re looking for. And once your brown butter is cooled and you make the cookie dough be sure to let it chill in the fridge for at least 15 minutes. These cookies are quite big, and you don’t want them to spread too much while baking. They would still be edible, but they just want have the same oomph!
To make the brown butter: In a medium saucepan melt the butter over medium heat, stirring until it reaches a rich amber color. Pour into a glass measuring cup, including any brown bits in the bottom of the pan, and cool to room temperature.
Preheat the oven to 350 F and line two baking sheets with parchment paper.
In a medium bowl whisk together the dry ingredients – flour, baking soda, baking powder and Kosher salt – and set aside.
In a large bowl whisk together the cooled brown butter and sugar until combined. Add the eggs, vanilla extract and peanut butter and continue to whisk until smooth.
Fold in the flour mixture until just combined and then add in the chocolate chips. Continue folding until the dough forms.
Refrigerate for 15-20 minutes so the dough can firm up.
Scoop 1/4 cup of dough onto the prepared cookie sheets 3 inches apart. Bake in the preheated oven for 11-14 minutes, until the cookies are beginning to darken around the edges and the centers are puffed and look slightly underdone. Cool the cookies on the pan for 2-3 minutes so they can set and then transfer to a wire rack to cool completely.
Two years ago, I had the idea to do a week of semi-simple crochet patterns for Christmas that I would call Crochetmas. I saw it on Instagram, and it sounded like a fun idea. Bringing it to fruition was another story. I came up with the patterns, tested them, but then doing the actual write-up for the blog posts just didn’t happen as I got busy finishing up orders for my Etsy shop and friends last year. So, this year I decided to share three of the patterns in one blog post. They are super simple, the patterns are pretty much variations of each other and you could call them stash busters since they don’t require much yarn to create. They are for a Christmas Tree Garland, Santa Hat Garland and a Light Bulb Garland. If you are feeling creative, you could crochet a few of each pattern to create a very festive garland. Either way, I would suggest using an odd number of components (Tree, Hat or Light Bulb) this way when you hang it it will be symmetrical with a clear middle.
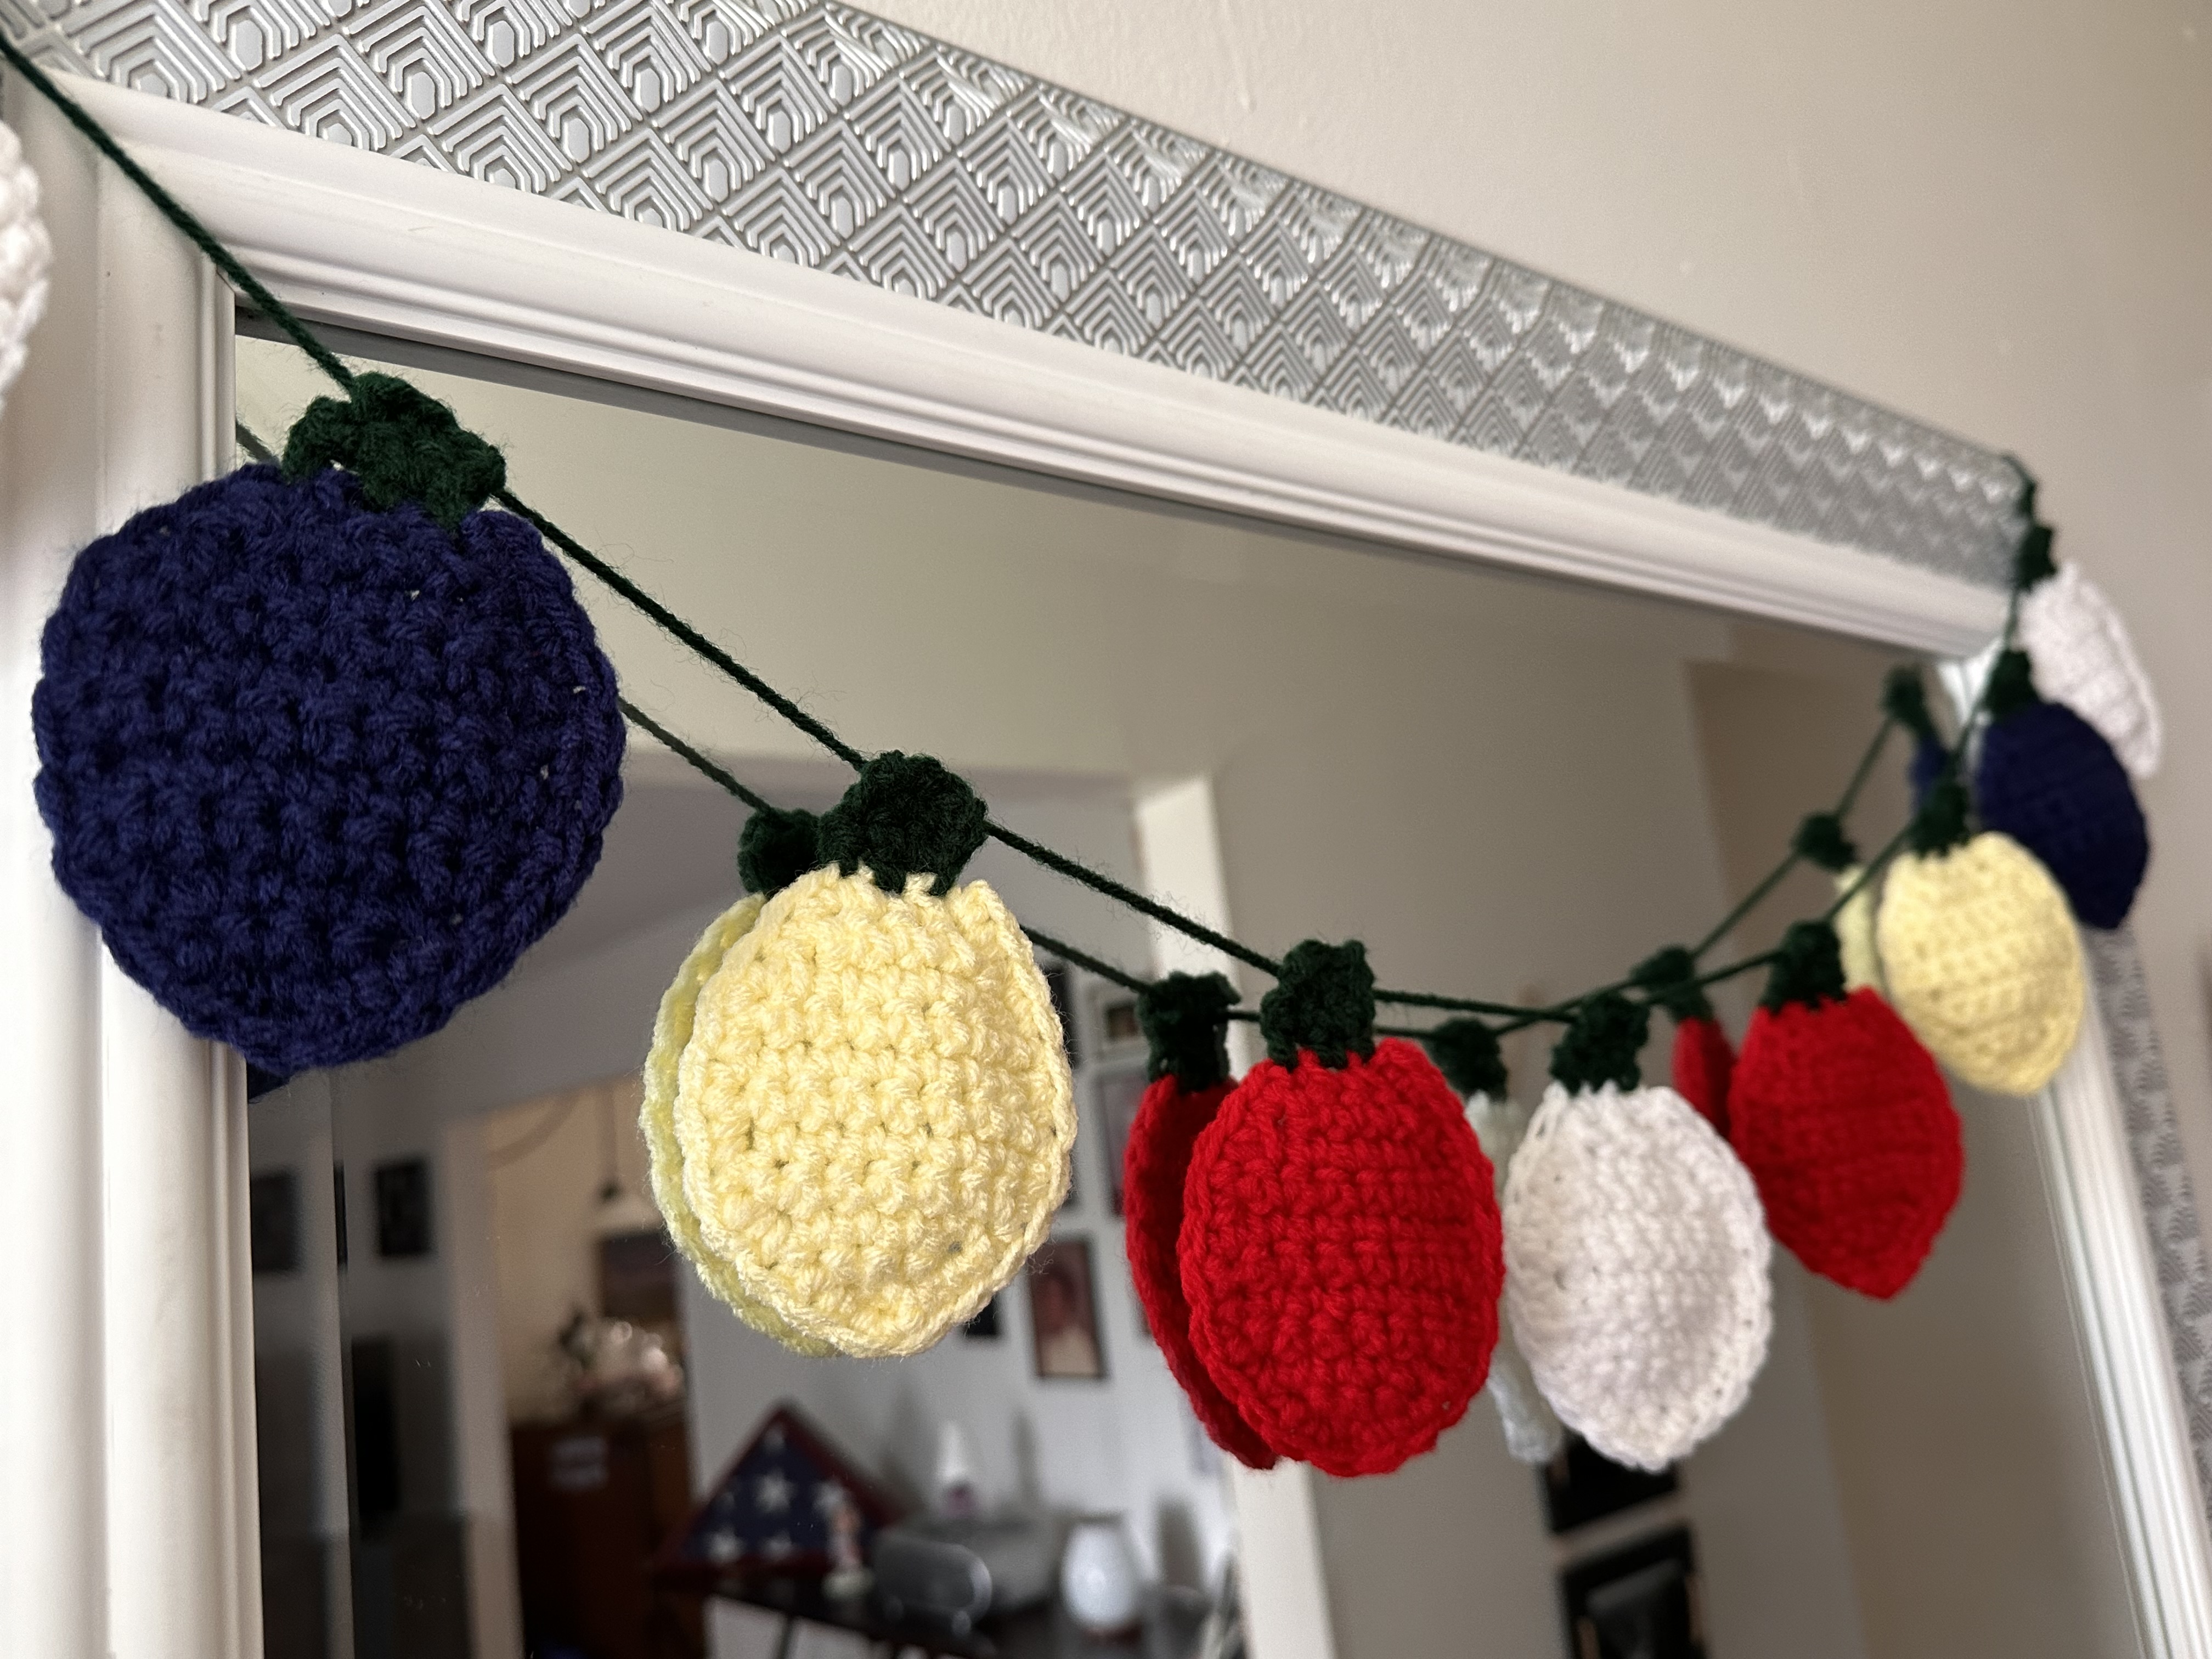
First up, a Light Bulb garland. This project is a great stash buster since you can use whatever color you choose for the bulb part. Make them all one color or get creative with a bunch of colors. The one color I would keep consistent is the one you use for the “socket” and for the “wire.” I am partial to lights strung on green wire, but white is popular as well.
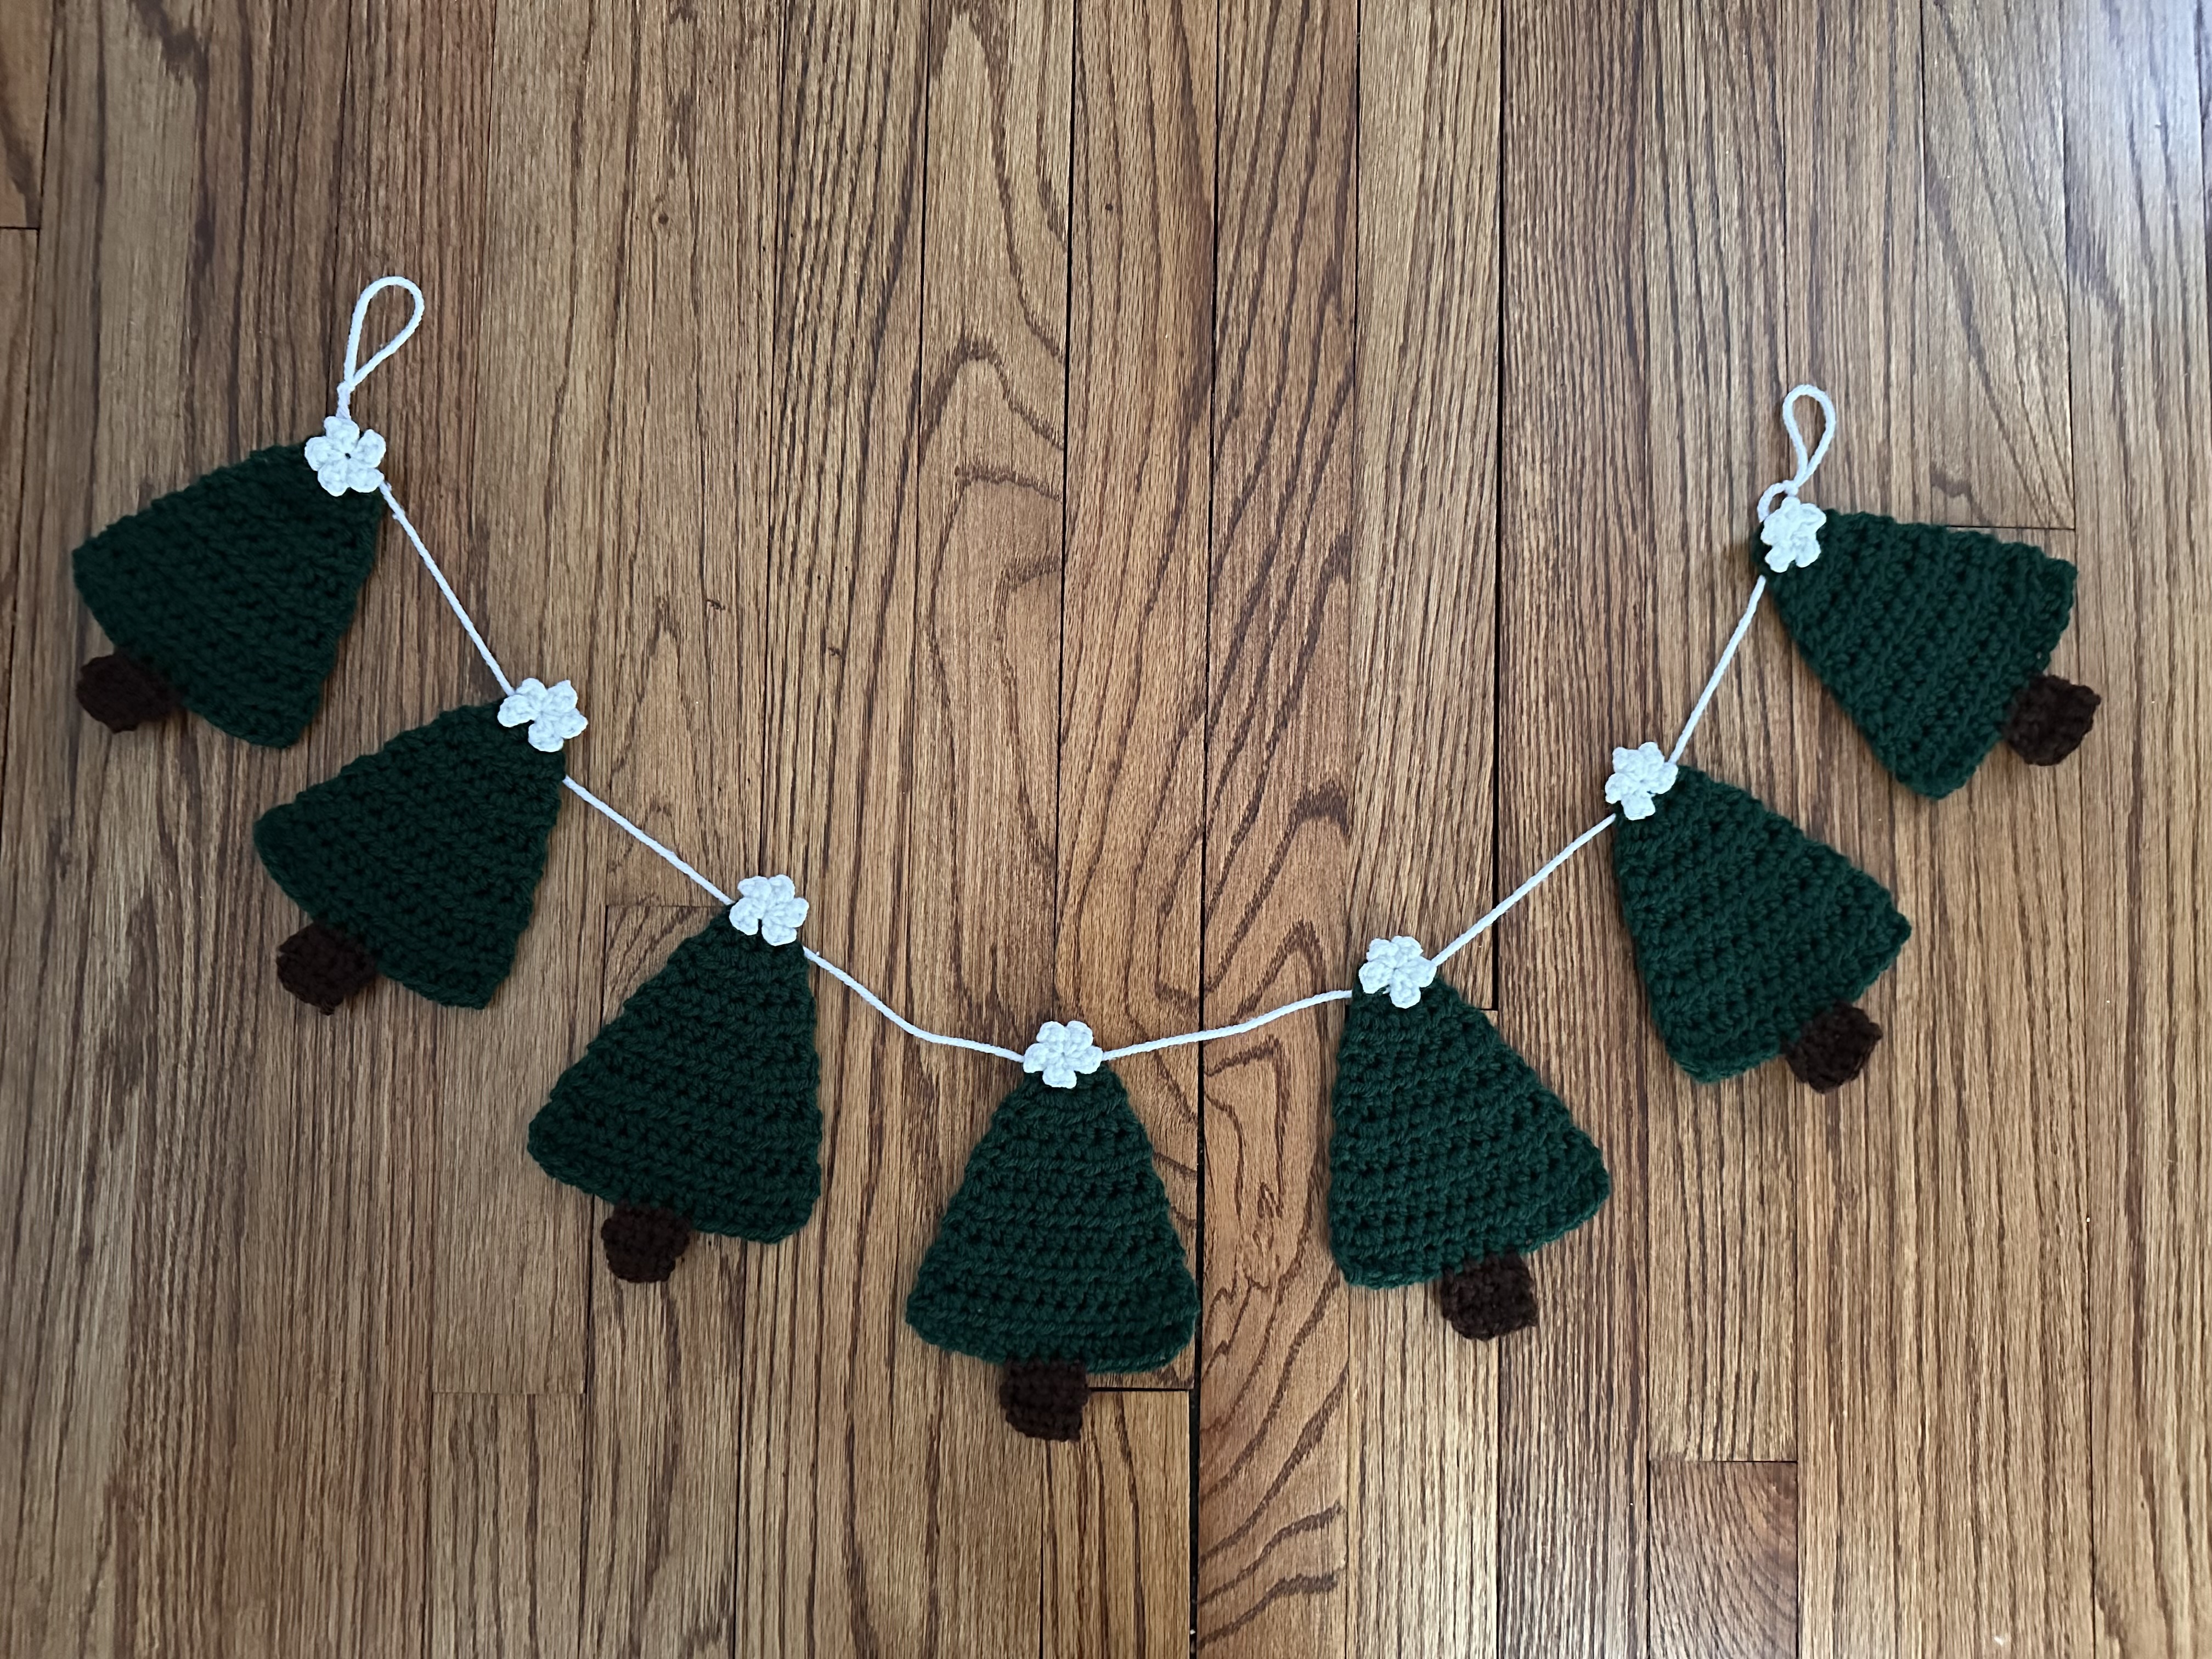
Next up a Christmas Tree garland. I posted a picture of this garland two years ago on Instagram. At the time I wasn’t sure if I was going to share the pattern via a blog post. I posted a bunch of recipes for baked goods that year that I just didn’t know where to fit it in. And then I got the idea to do Crochetmas that I decided to hold-off, but as I mentioned that didn’t come to fruition. But finally, I am sharing it with you today. What’s fun with this one is that depending on the green you choose it can really change the look and feel of the garland. With this lighter green it has more a rustic feel to…
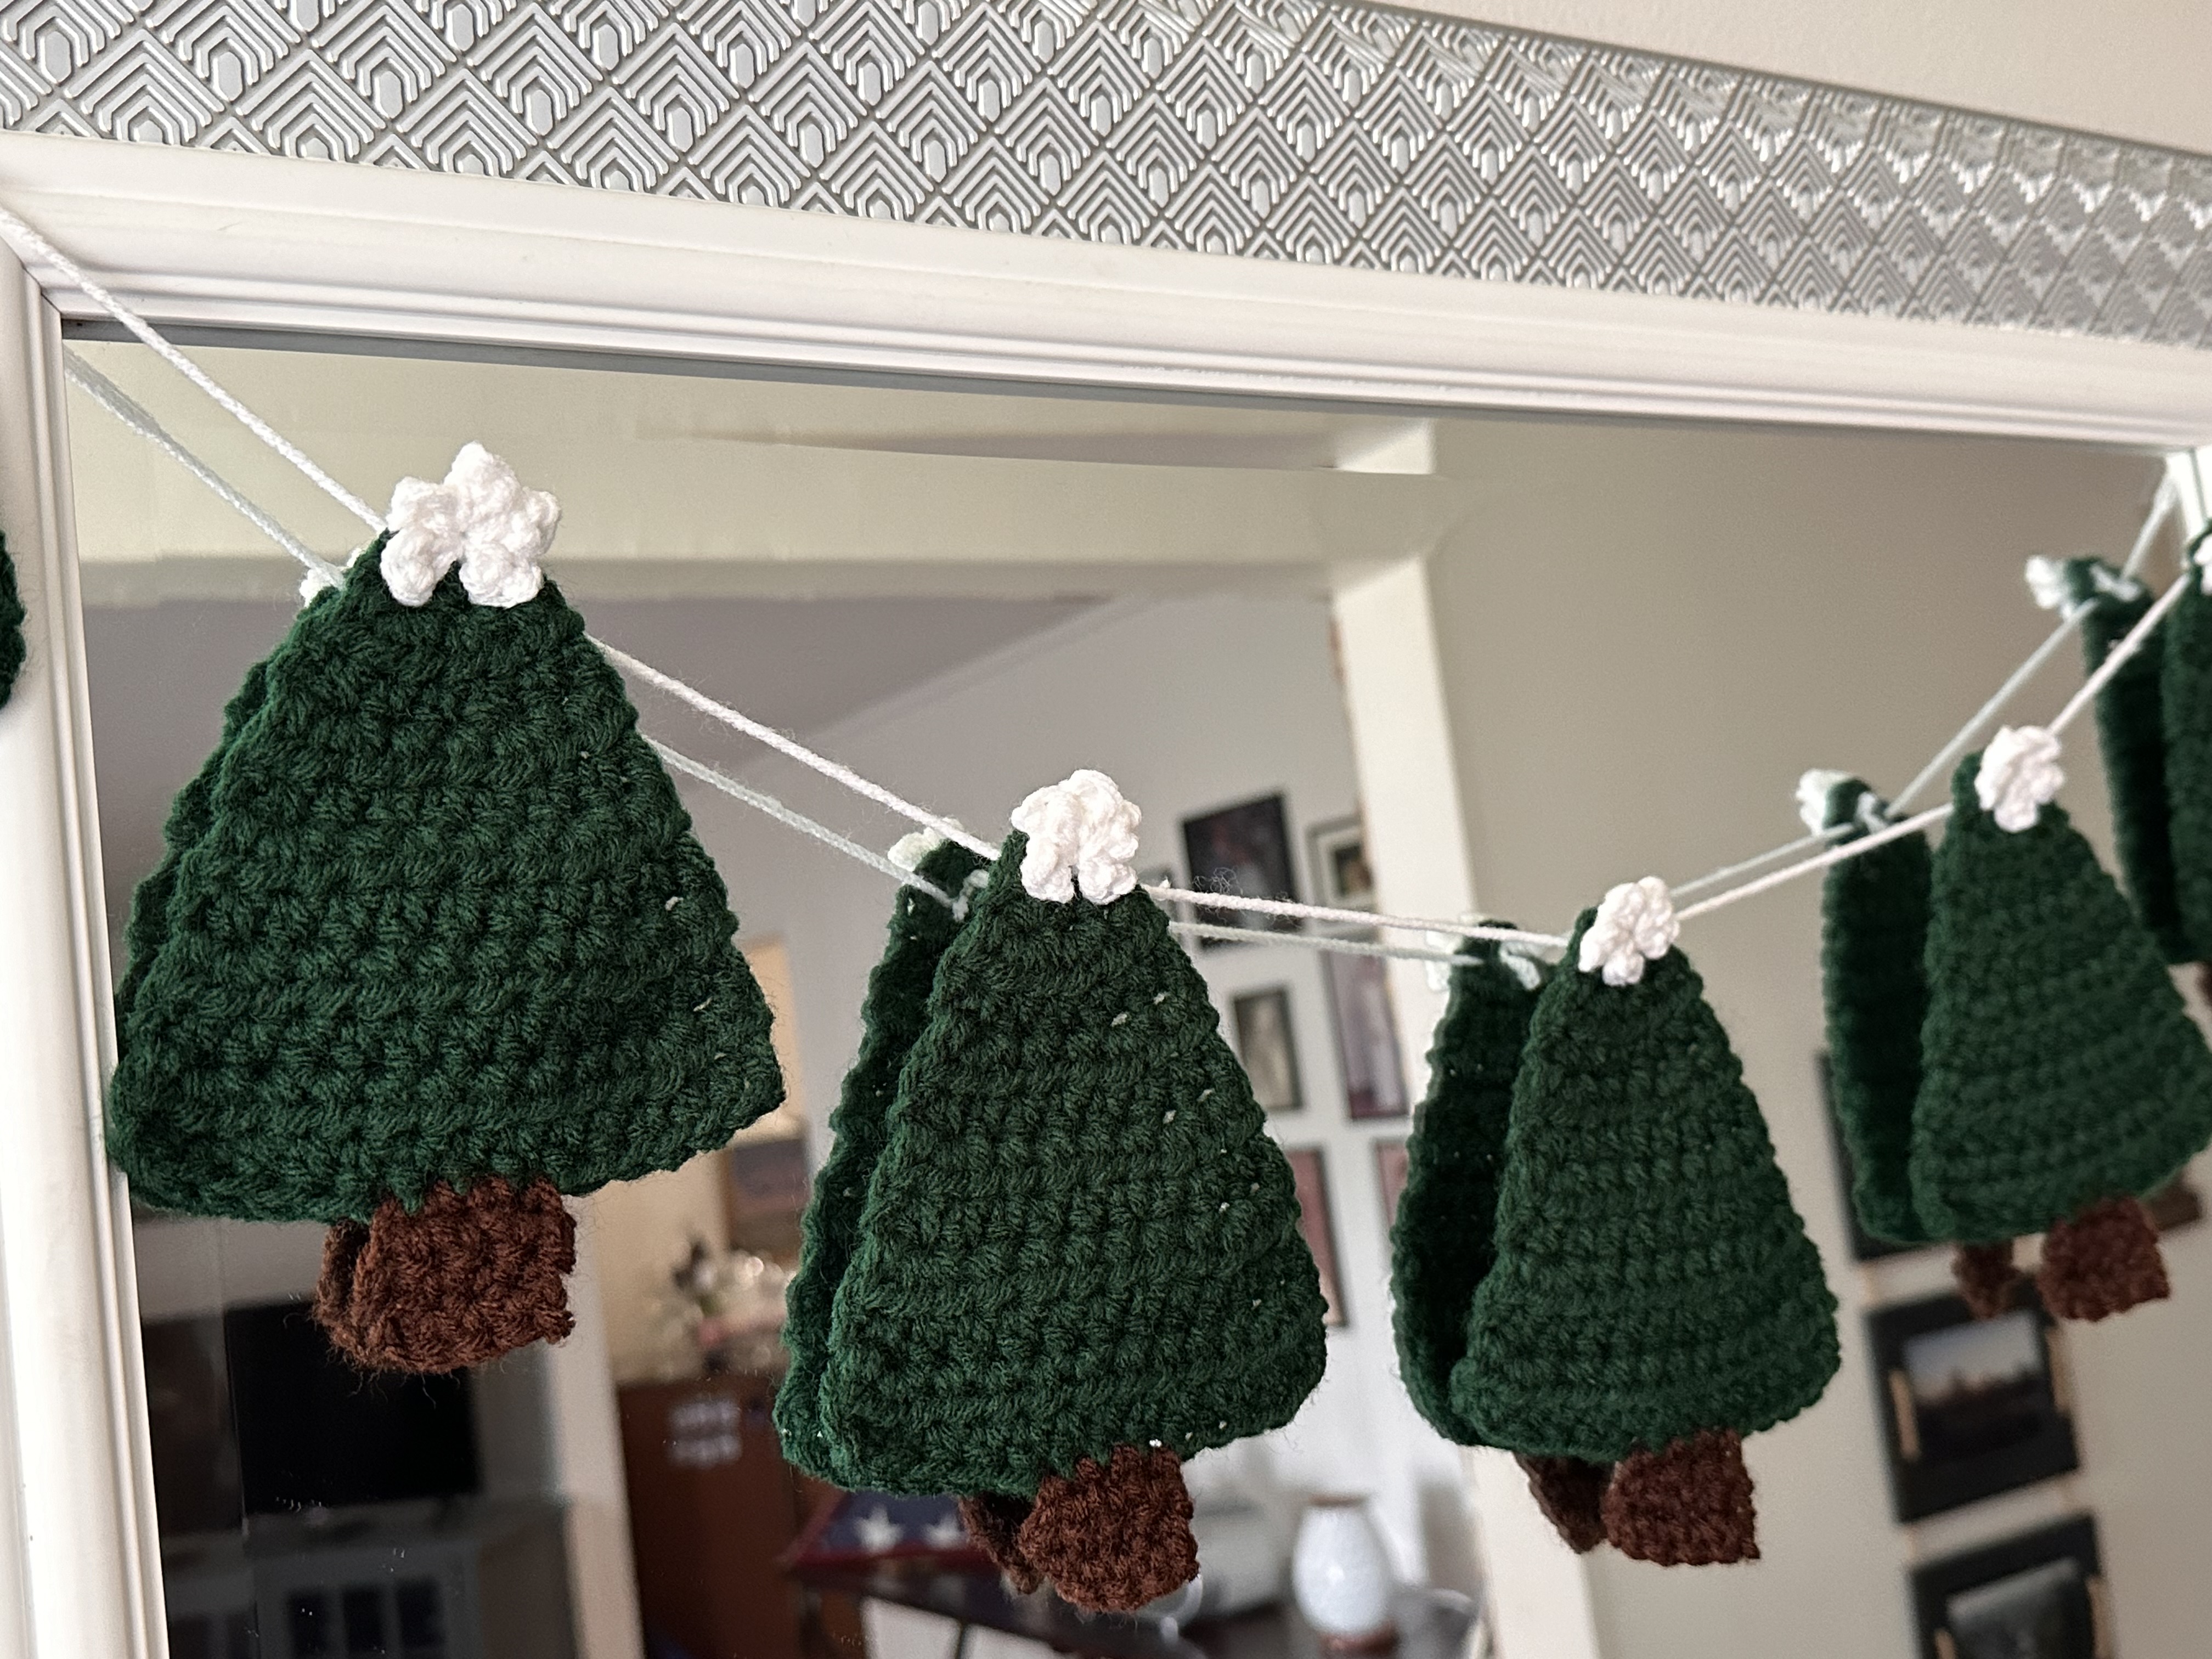
But with a darker green it has more of a traditional feel…
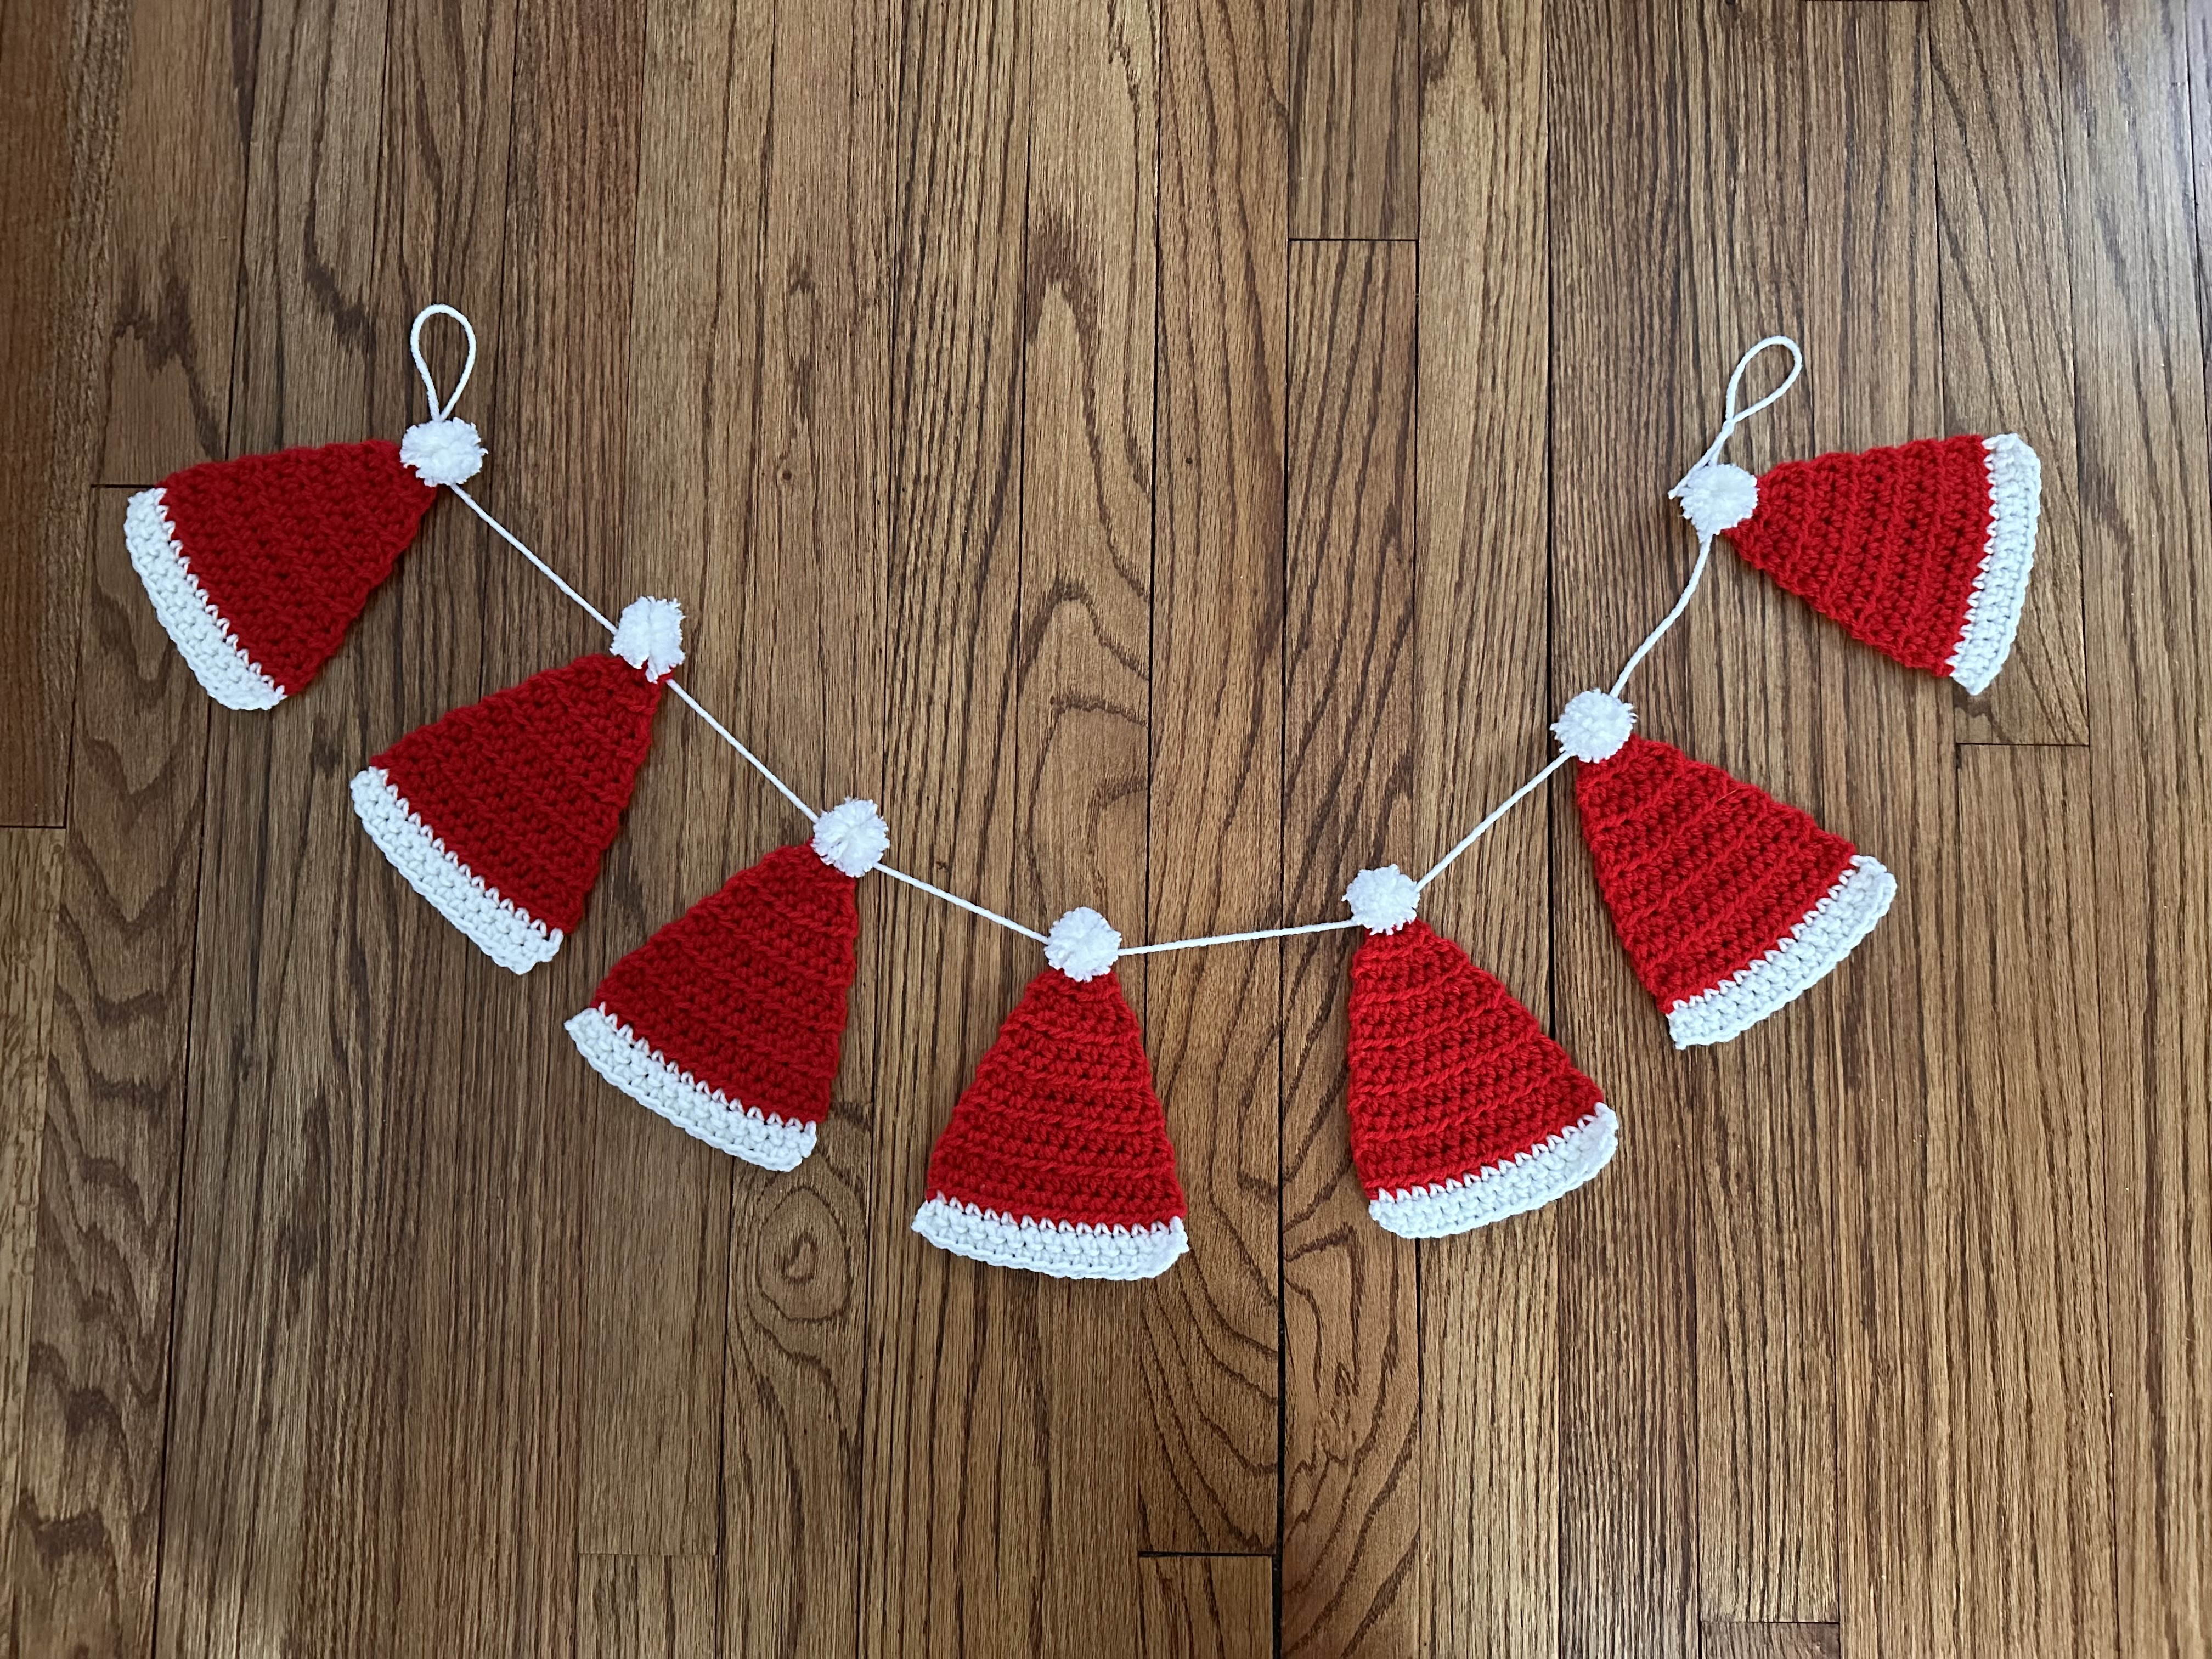
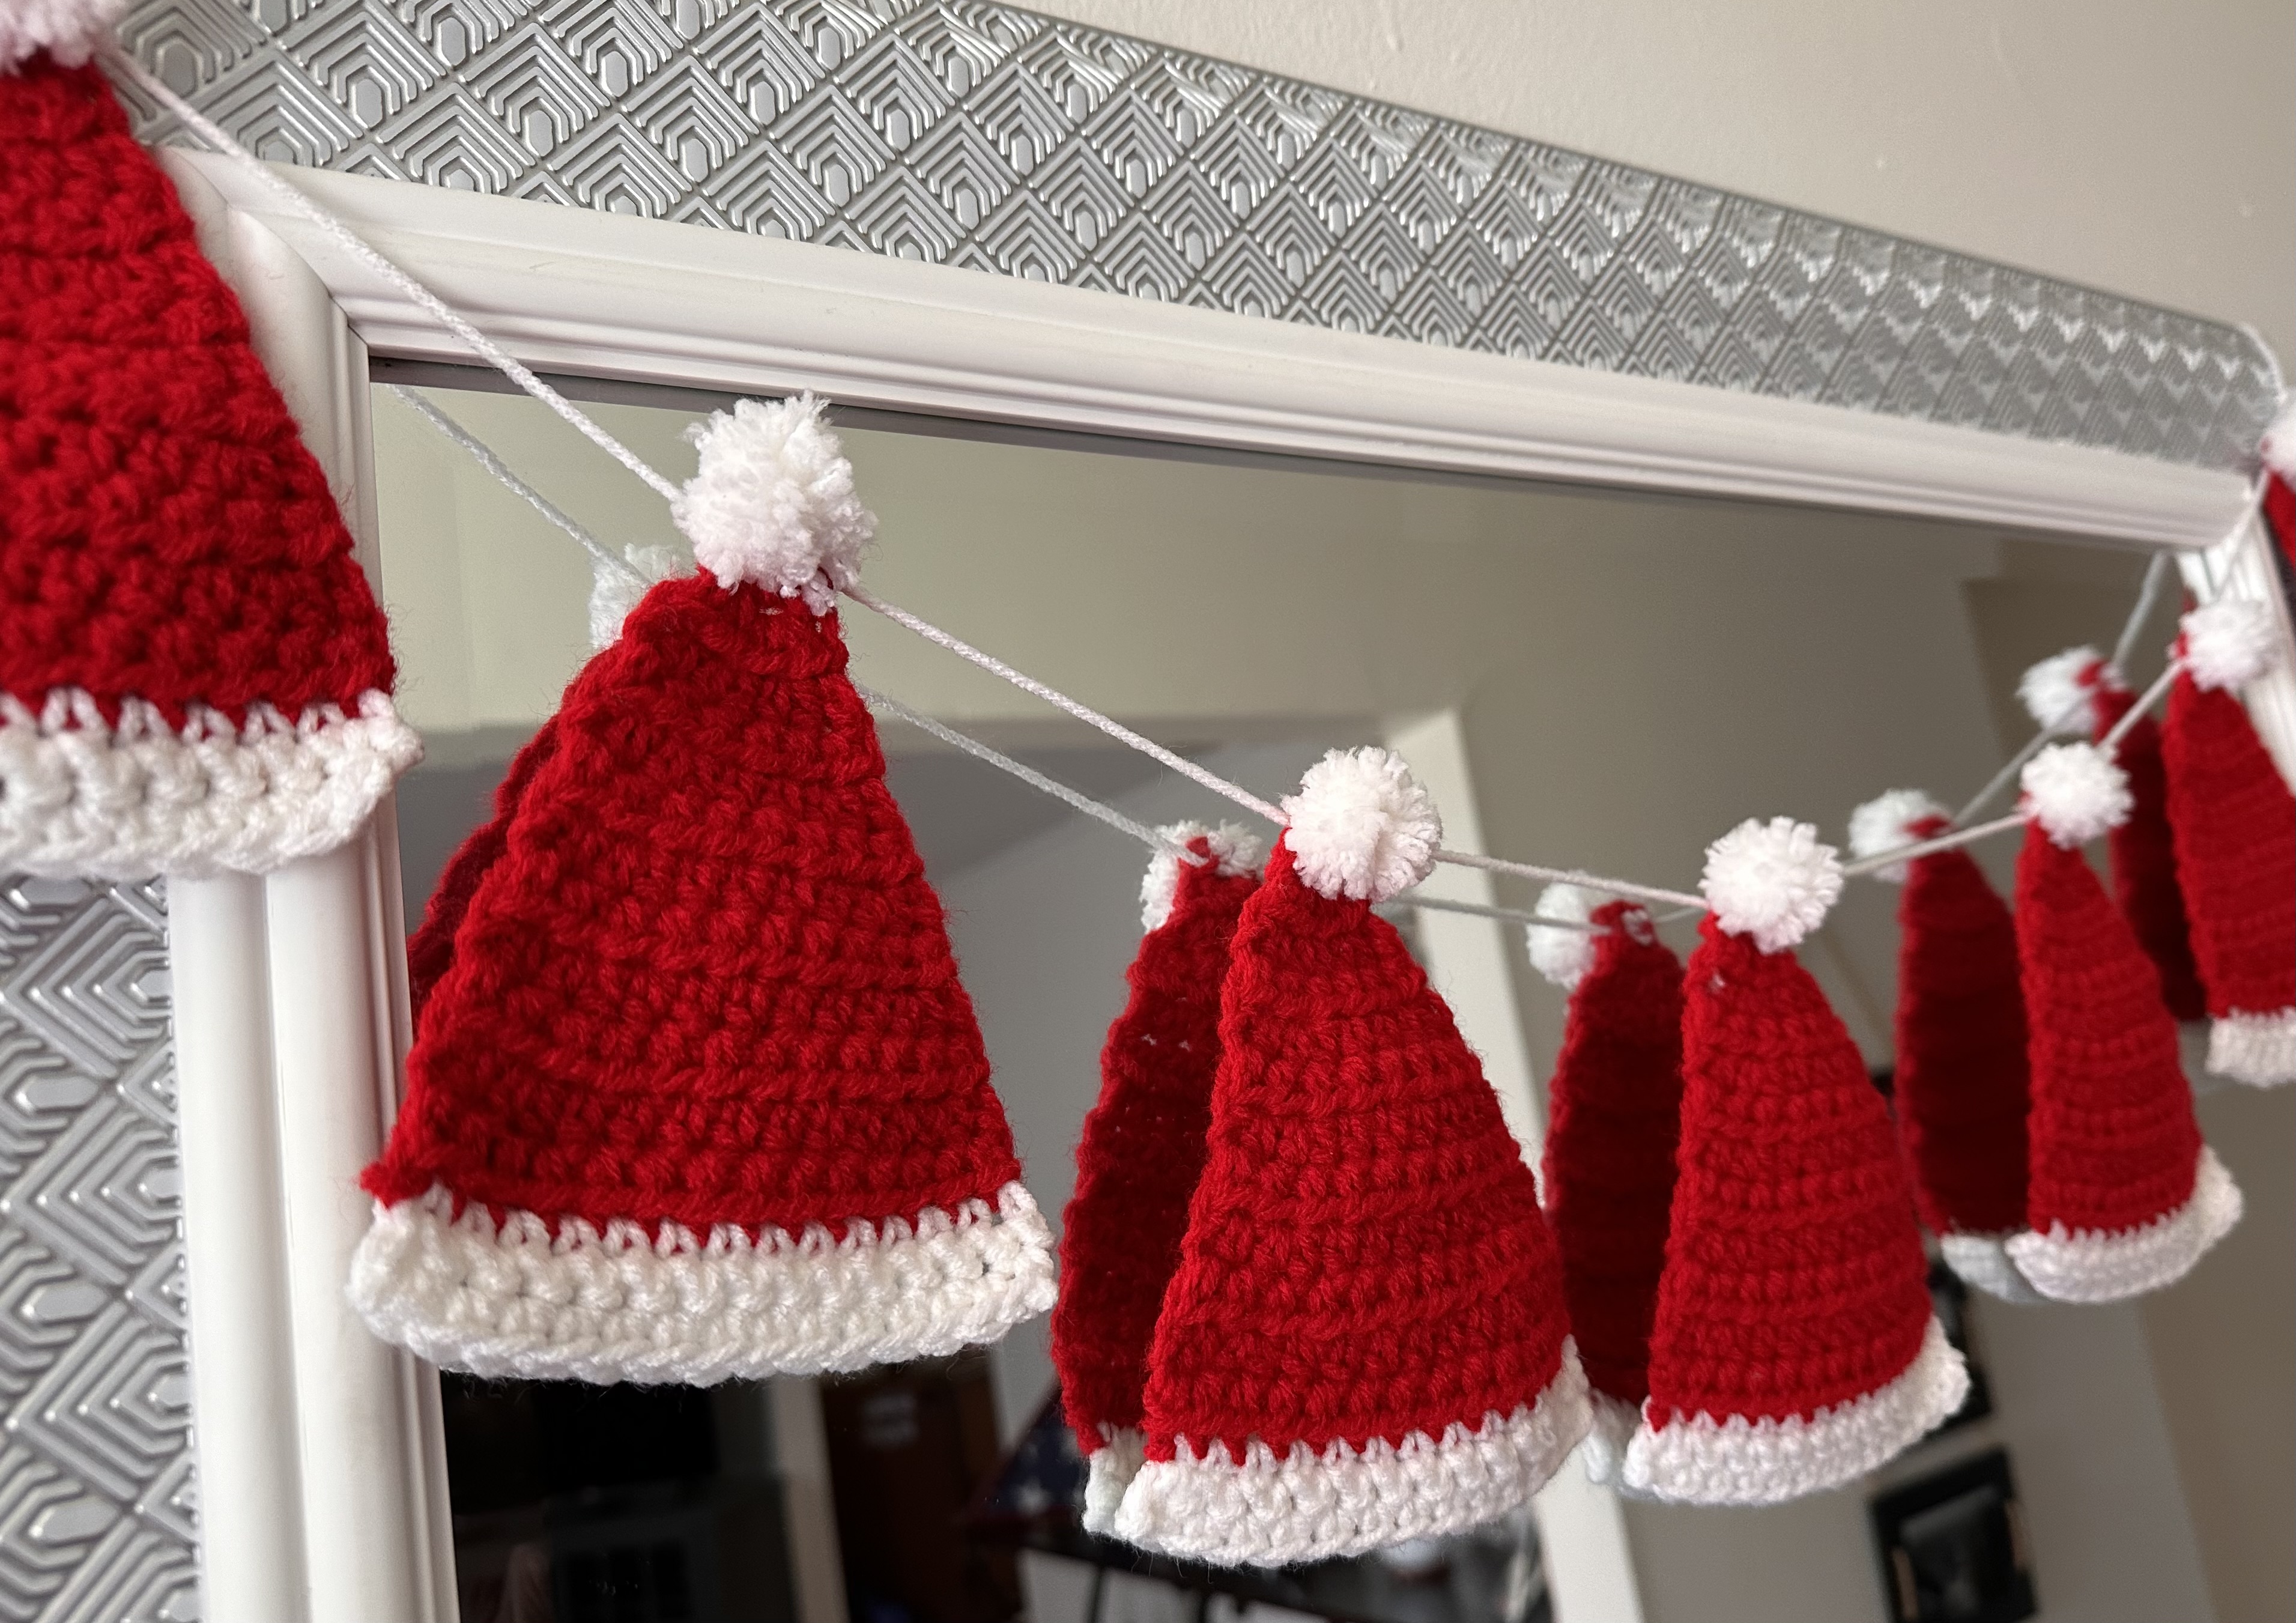
And the final garland, a Santa Hat Garland. This pattern is very similar to the Christmas Tree Garland since both have the same shape, a triangle. The Santa Hat pattern has one extra row added at the beginning to give it a more elongated look and to account for adding a pom-pom on top and three rows of single crochet in white yarn are added to the bottom for the trim.
The Patterns:
For all of these I used Red Heart Super Saver Yarn and worked with a size H-8 (5mm) crochet hook.
To assemble the garlands, thread a large tapestry needle with a long piece of yarn and then weave through the back of each component (Light Bulb, Christmas Tree or Santa Hat). Leave a long tail on each end to create a loop to hang.
Light Bulb
Ch 2
Row 1: SC in 2nd chain, Ch1 & Turn
Row 2: 2 SC, Ch1 & Turn
Row 3: 2 SC in each stitch, Ch1 & Turn
Row 4: 2 SC in first stitch, SC in next 2 stitches, 2 SC in last stitch, Ch1 & Turn
Row 5: 2 SC in first stitch, SC in next 4 stitches, 2 SC in last stitch, Ch1 & Turn
Rows 6 – 9: SC in each stitch, Ch1 & Turn
Row 7: SC2Tog, SC to last 2 stitches in row, SC2Tog, Ch 1 & Turn
Repeat Row 7 until 2 stitches remain.
Final Row: SC2Tog, Ch 1
SC around the entire light bulb. Fasten off and weave in ends.
For the “socket”: (With either green or white yarn, or the color of your choice)
On the top of the light bulb (the straight edge), attach your yarn in the first stich of the right side (right side facing you), Ch1, SC in the next 2 stitches. Ch 1 & Turn.
SC across, Ch 1 & Turn. Repeat this one more time then fasten off and weave in the yarn.
Abbreviations:
Ch – Chain
SC – Single Crochet
SC2Tog – Single Crochet 2 Together
Christmas Tree
With green yarn:
Ch 2
Row 1: 2 HDC in 2nd chain, Ch1 & Turn
Row 2: 2 HDC in each stitch, Ch1 & Turn
Row 3: HDC, 2HDC in next 2 stitches, HDC, Ch1 & Turn
Row 4: HDC in each stitch, Ch1 & Turn
Row 5: HDC, 2HDC, HDC in next 2 stitches, 2HDC, HDC, Ch1 & Turn
Row 6: HDC in each stitch, Ch1 & Turn
Row 7: HDC, 2HDC, HDC in next 4 stitches, 2HDC, HDC, Ch1 & Turn
Row 8: HDC in each stitch, Ch1 & Turn
Row 9: HDC, 2HDC, HDC in next 6 stitches, 2HDC, HDC, Ch1 & Turn
Row 10: HDC in each stitch, Ch1 & Turn
Row 11: HDC, 2HDC, HDC in next 8 stitches, 2HDC, HDC, Ch1 & Turn
Row 12: HDC in each stitch, Fasten off and weave in ends.
With brown yarn:
Row 1: Join brown yarn in 6th stitch from the right. Ch1 (counts as first SC), then SC in next 3 stitches. Ch1 & Turn.
Row 2: SC in the 4 stitches, Ch 1 & Turn
Repeat Row 2 two more times. Fasten off and weave in end.
With white yarn:
Magic Ring. *Ch 2, SC in 2nd chain from hook, Sl st into MR*. Repeat ** until you have 5 points. Pull the ring tight to close the circle and then fasten off. Leave a long tail to sew the star onto the tree.
Abbreviations:
Ch – Chain
HDC – Half Double Crochet
SC – Single Crochet
MR – Magic Ring
Santa Hat
With red yarn:
Ch 2
Row 1: 2 HDC in 2nd chain, Ch1 & Turn
Row 2: HDC in each stitch, Ch1 & Turn
Row 3: 2HDC in each stitch, Ch1 & Turn
Row 4: HDC, 2HDC in next 2 stitches, HDC, Ch1 & Turn
Row 5: HDC in each stitch, Ch1 & Turn
Row 6: HDC, 2HDC, HDC in next 2 stitches, 2HDC, HDC, Ch1 & Turn
Row 7: HDC in each stitch, Ch1 & Turn
Row 8: HDC, 2HDC, HDC in next 4 stitches, 2HDC, HDC, Ch1 & Turn
Row 9: HDC in each stitch, Ch1 & Turn
Row 10: HDC, 2HDC, HDC in next 6 stitches, 2HDC, HDC, Ch1 & Turn
Row 11: HDC in each stitch, Ch1 & Turn
Row 12: HDC, 2HDC, HDC in next 8 stitches, 2HDC, HDC, Ch1 & Turn
Row 13: HDC in each stitch, Fasten off and weave in ends.
With white yarn:
Row 1: Join white yarn in last stitch on bottom of the right side. Ch1 (counts as first SC), then SC across the row. Ch1 & Turn.
Row 2: SC across, Ch1 & Turn
Row 3: Repeat Row 2. Fasten off and weave in ends.
Make a mini pom-pom using a mini pom-pom maker or with a fork, leaving a long tail, and then attach to the top of the Santa Hat.
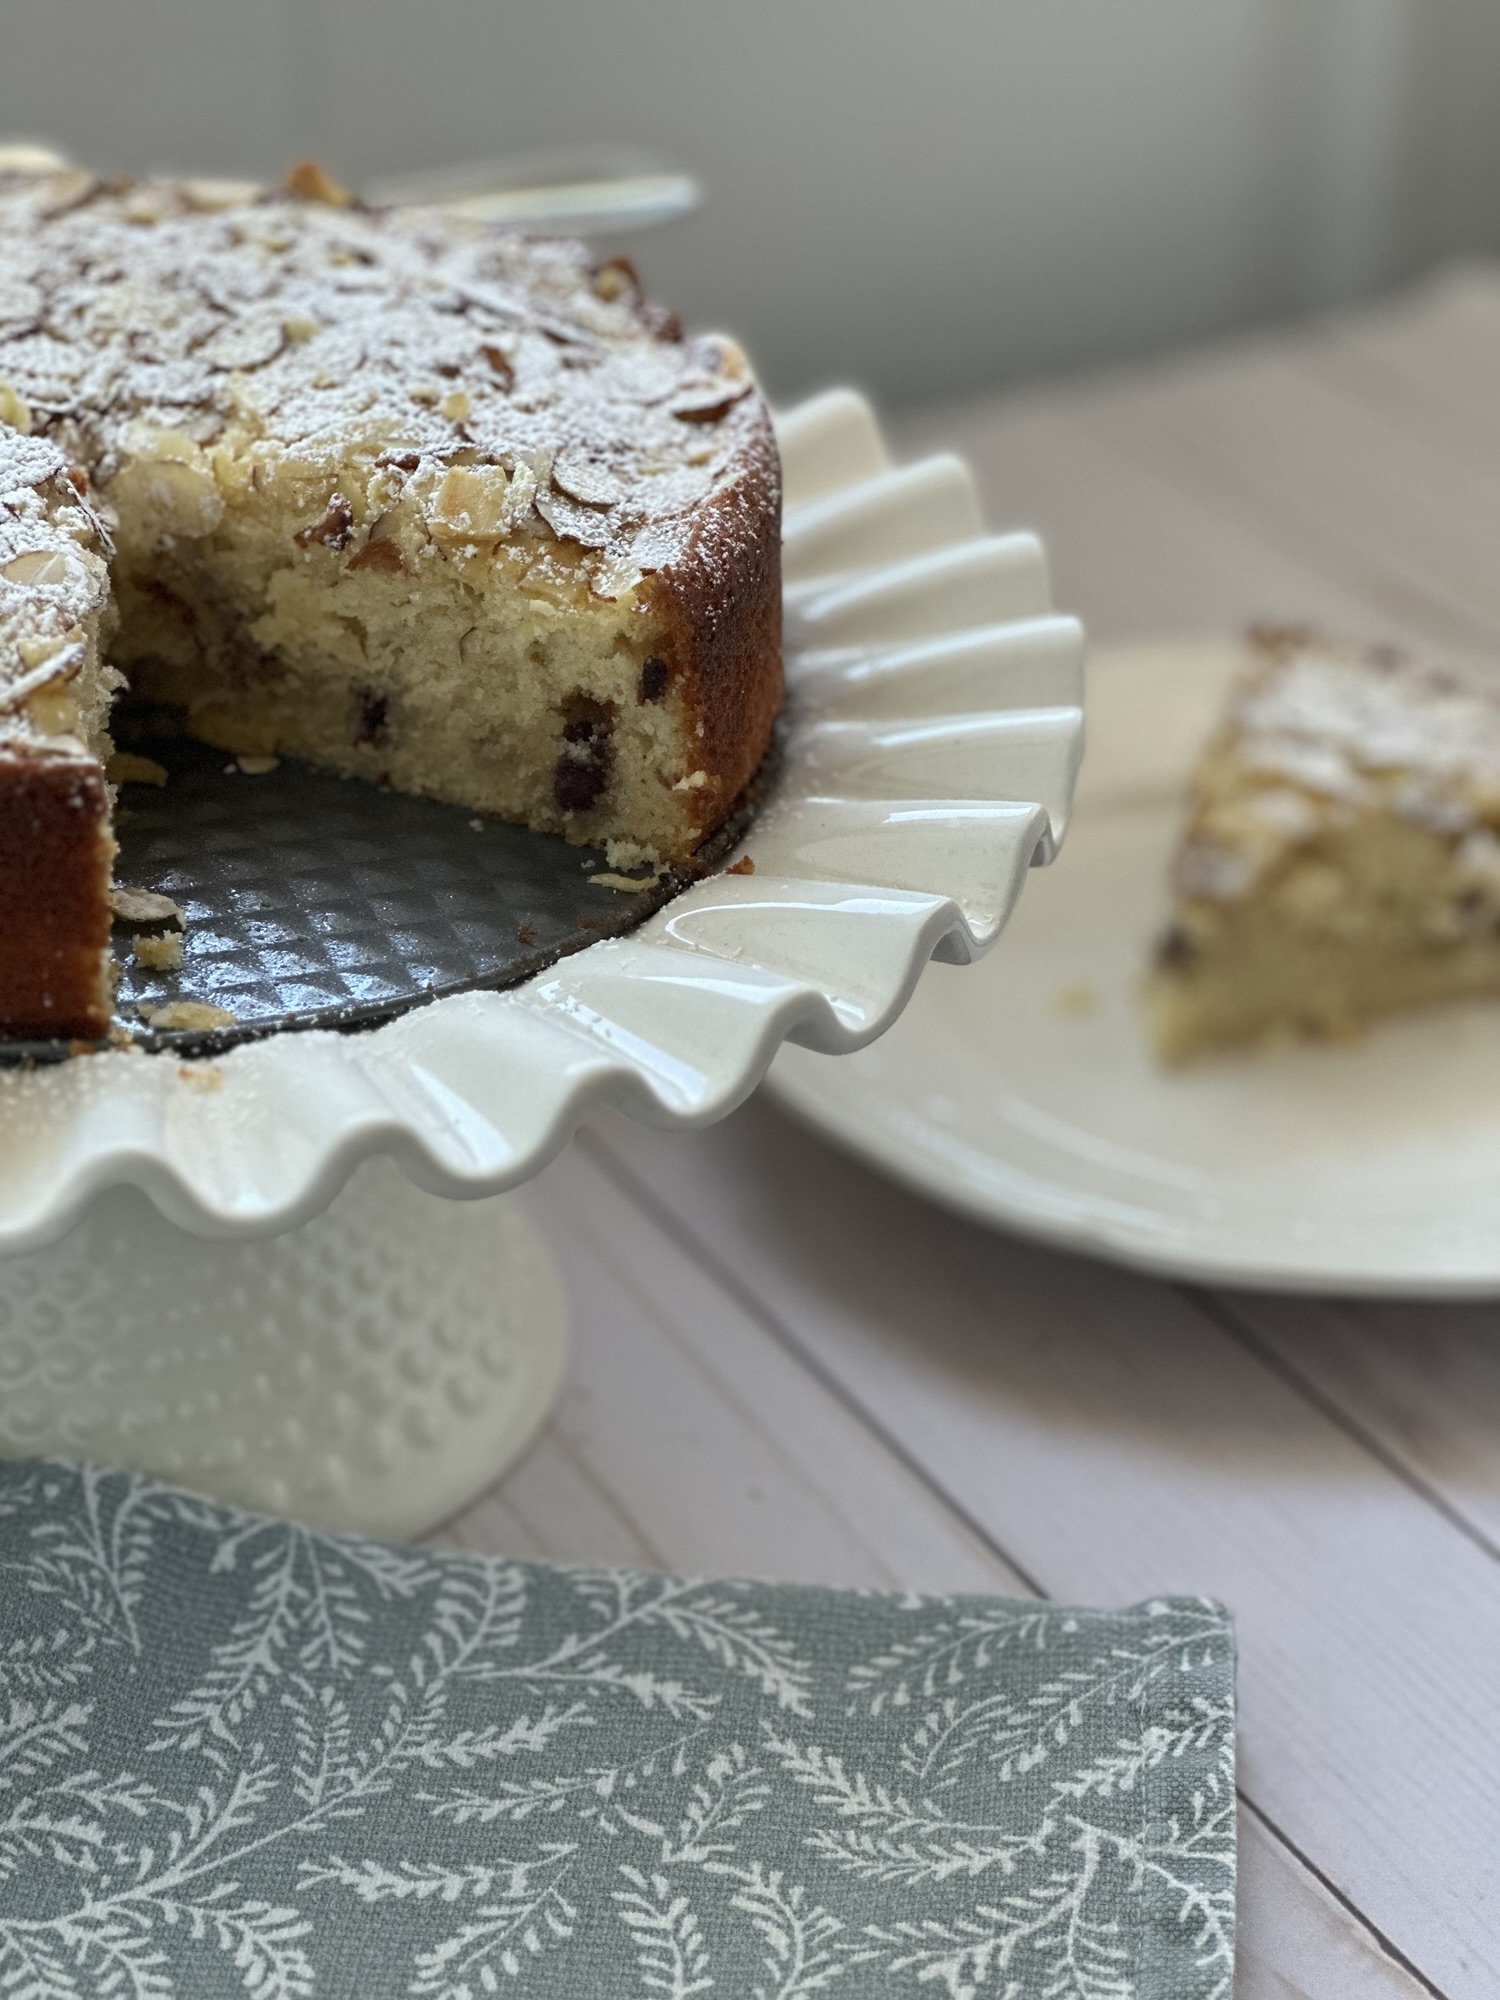
With the holidays quickly approaching you may be looking for new recipes to share with your loved ones. Today I am bringing you a Brown Butter Almond Cake with Chocolate Filling that I personally wouldn’t say is ideal for dessert but better suited as a breakfast / brunch treat. Or for an afternoon watching holiday movies, decorating or wrapping gifts while enjoying your favorite warm beverage.
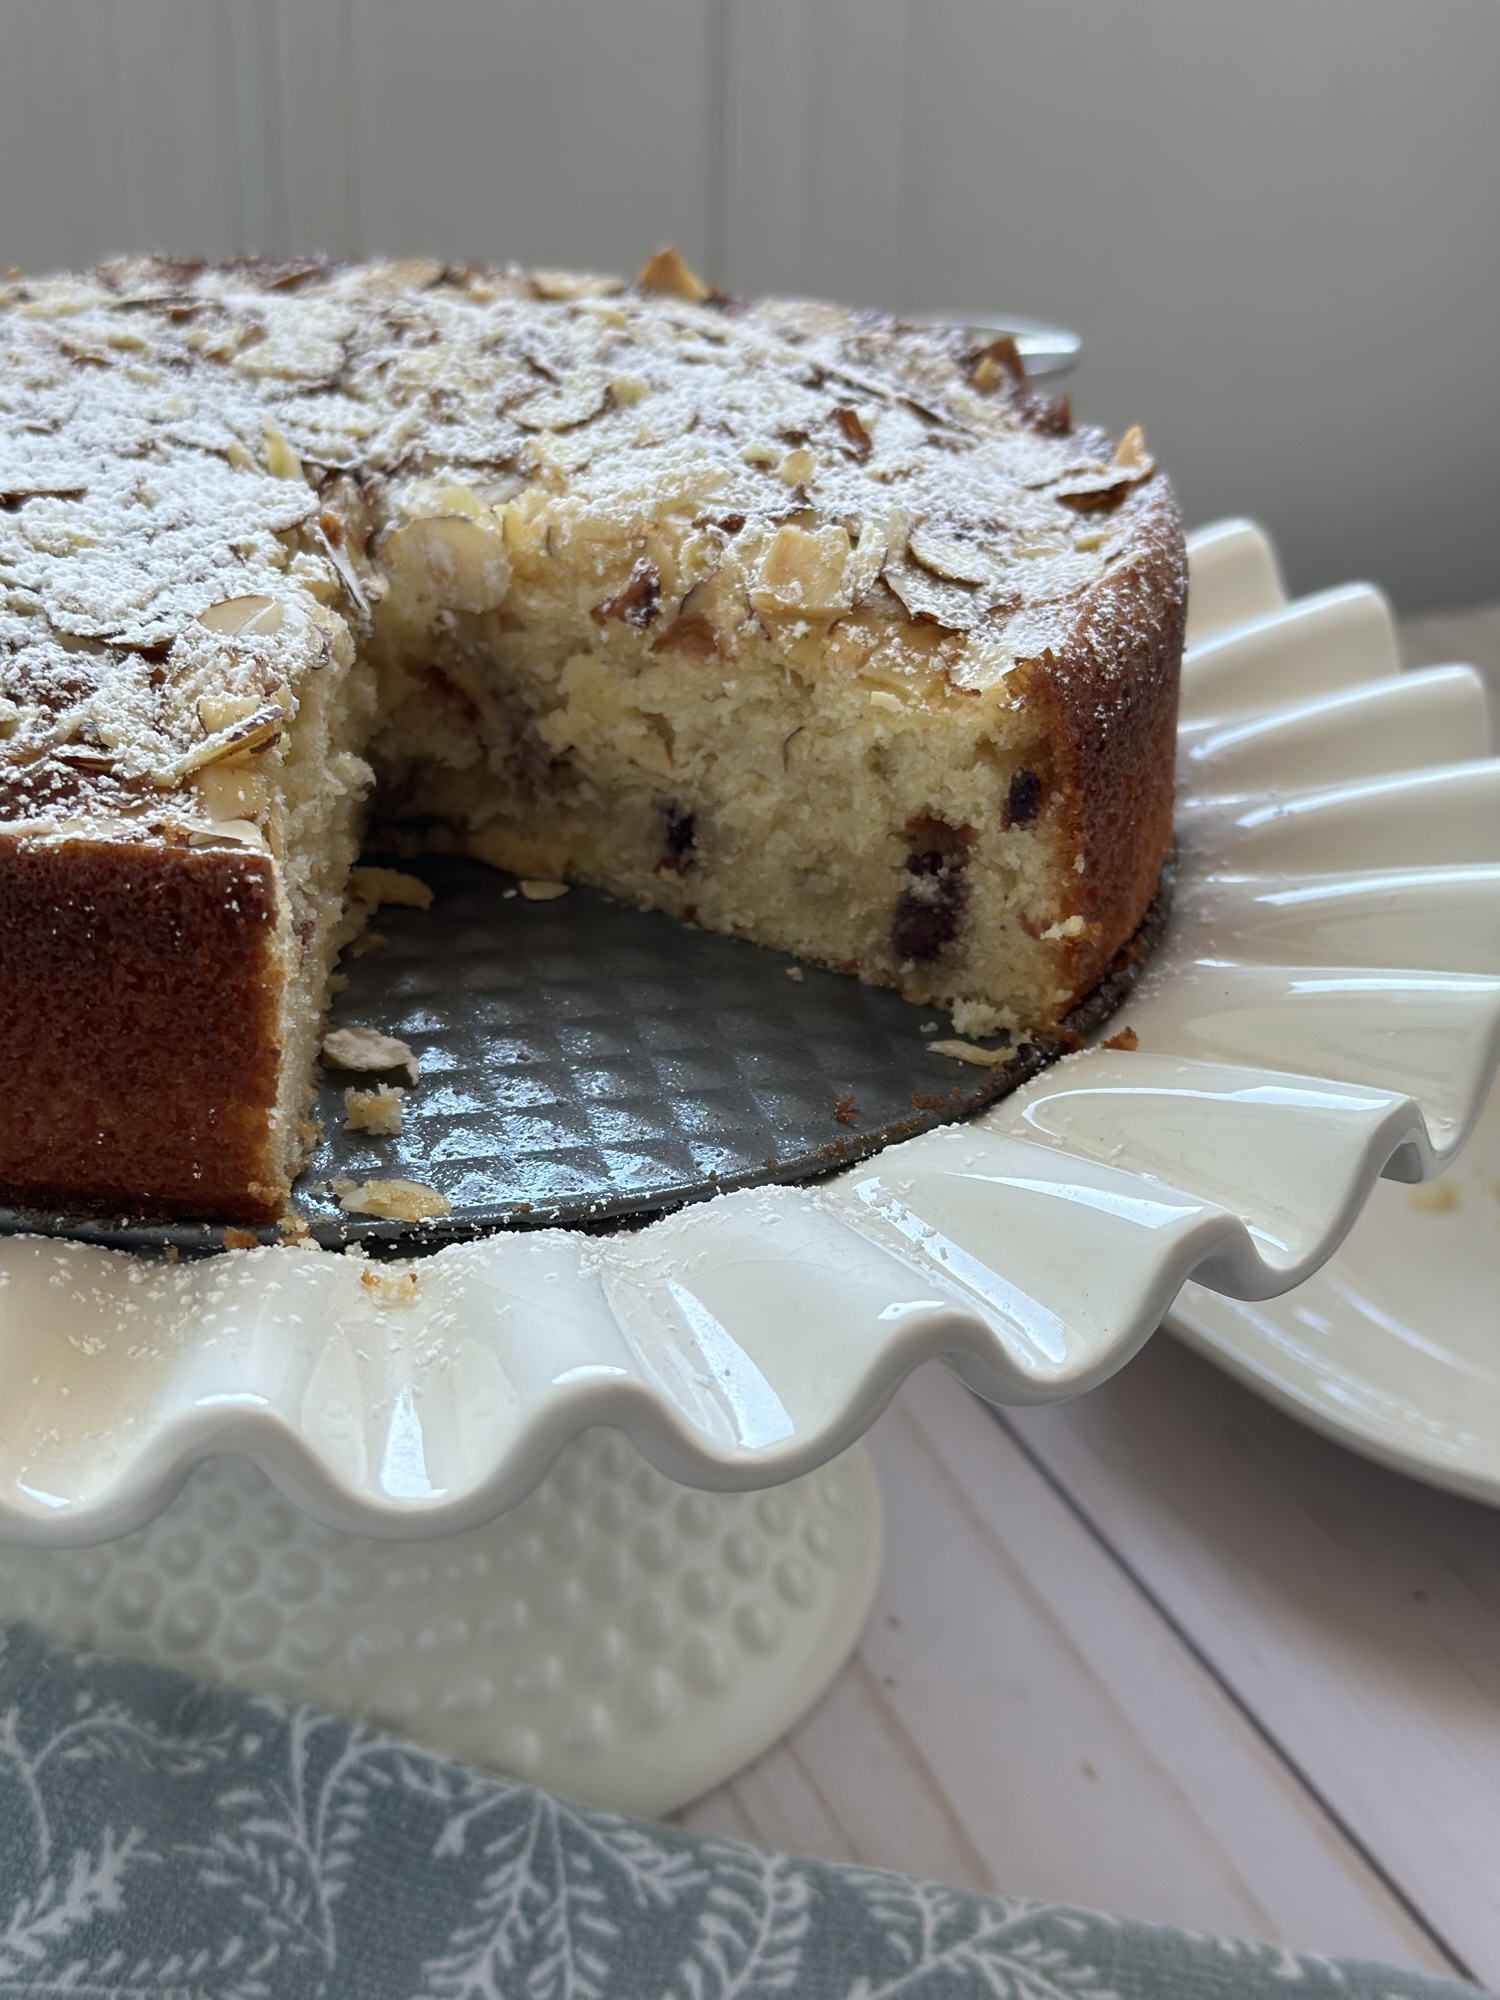
I started this cake by making brown butter. After letting it cool, I got to work on making the batter for the cake. I whisked the cooled brown butter with eggs, sugar and vanilla extract, until it was smooth. In another bowl I whisked together the dry ingredients – flour, almond flour and baking powder. I incorporated the dry ingredients into the wet ingredients in 3 batches alternating with buttermilk. While you can buy buttermilk, I always opt to make my own by combining whole milk and vinegar. Once the batter was ready, I poured half of it into my prepared pan and then topped it with diced almond paste and semi-sweet chocolate chips. I then topped it with the remaining batter and gently spread it with an offset spatula. Before placing it in the oven I sprinkled the top with sliced almonds. After the cake cooled I dusted it with Confectioners’ sugar before enjoying a slice.
You may be wondering why I said this cake wasn’t very dessert-y. Well, besides the fact that it wasn’t very sweet, the texture was more reminiscent of a muffin or scone to me. It did taste good, but I think the recipe title is a bit deceiving. I was really hoping the brown butter flavor would stand out more as it did in the batter – yes, I tried the batter raw – but it somehow melted away while baking. And while the title does say “Almond Cake”, adding almond flour to the batter didn’t really give the cake an almond flavor, that really came from the almond paste that was added to the filling along with the chocolate chips. The almond flour aided in making the cake extremely moist though – always a good thing when it comes to cakes. No one wants to eat a dry cake, regardless of how good it may be. It is possible that the brown butter and almond flour somehow cancelled each other out, both having a nutty flavor or that the almond past just overpowered everything. Maybe a better title for this cake would be Brown Butter Cake with Almond & Chocolate Filling. Apologies if I sound negative, as I mentioned, the cake was good just not really what I thought it would taste like based on the recipe title. I would be curious to try this recipe again by omitting the almond flour and increasing the amount of all-purpose flour. Maybe then the flavor of the brown butter would really shine through.
Brown the butter: Place the butter in a medium saucepan and melt over low-medium heat, stirring constantly until the butter reaches a warm amber color, about 5 to 7 minutes. Transfer to large bowl to cool.
Preheat oven to 350 F. Spray an 8-inch springform pan with baking spray and set aside.
In a medium bowl whisk together the flour, almond flour, baking powder and salt. Set aside.
Add the eggs to the cooled brown butter and whisk together until smooth. Whisk in the sugar and vanilla extract until combined. Add the flour mixture in three parts alternating with the buttermilk. Whisk until the batter is smooth.
Spread half the batter into the prepared pan. Scatter the chocolate chips and diced almond paste over the batter in an even layer right to the edge. Top with remaining batter and gently spread with an offset-spatula. Sprinkle the sliced almonds over the cake in an even layer.
Bake in the preheated oven for 40 to 50 minutes, until the cake is golden brown and springs back when pressed. Transfer to a wire rack to cool for 20 minutes. Run a knife along the edges of the cake to loosen from the springform ring. Remove the springform ring and let the cake cool completely before dusting with Confectioners’ sugar.
It’s been a while… well, a little over 3 months. I am sure I have taken longer breaks from blogging. I have been baking, but mostly things that I have made before. I recently tried a new pumpkin recipe that was a fail. It was a recipe for Pumpkin Snickerdoodle Brownies that sounded promising but, in the end, had no flavor whatsoever. That led me to a deep dive into whether people post “fake” recipes and I learned that thanks to AI people are now posting recipes that have never been tested and completely computer generated, recipe and pictures, in order to generate clicks, views and likes. Great! No need to worry though, everything I am bringing you today is completely real and created by me. While I haven’t been baking my fingers have been busy crocheting and knitting.
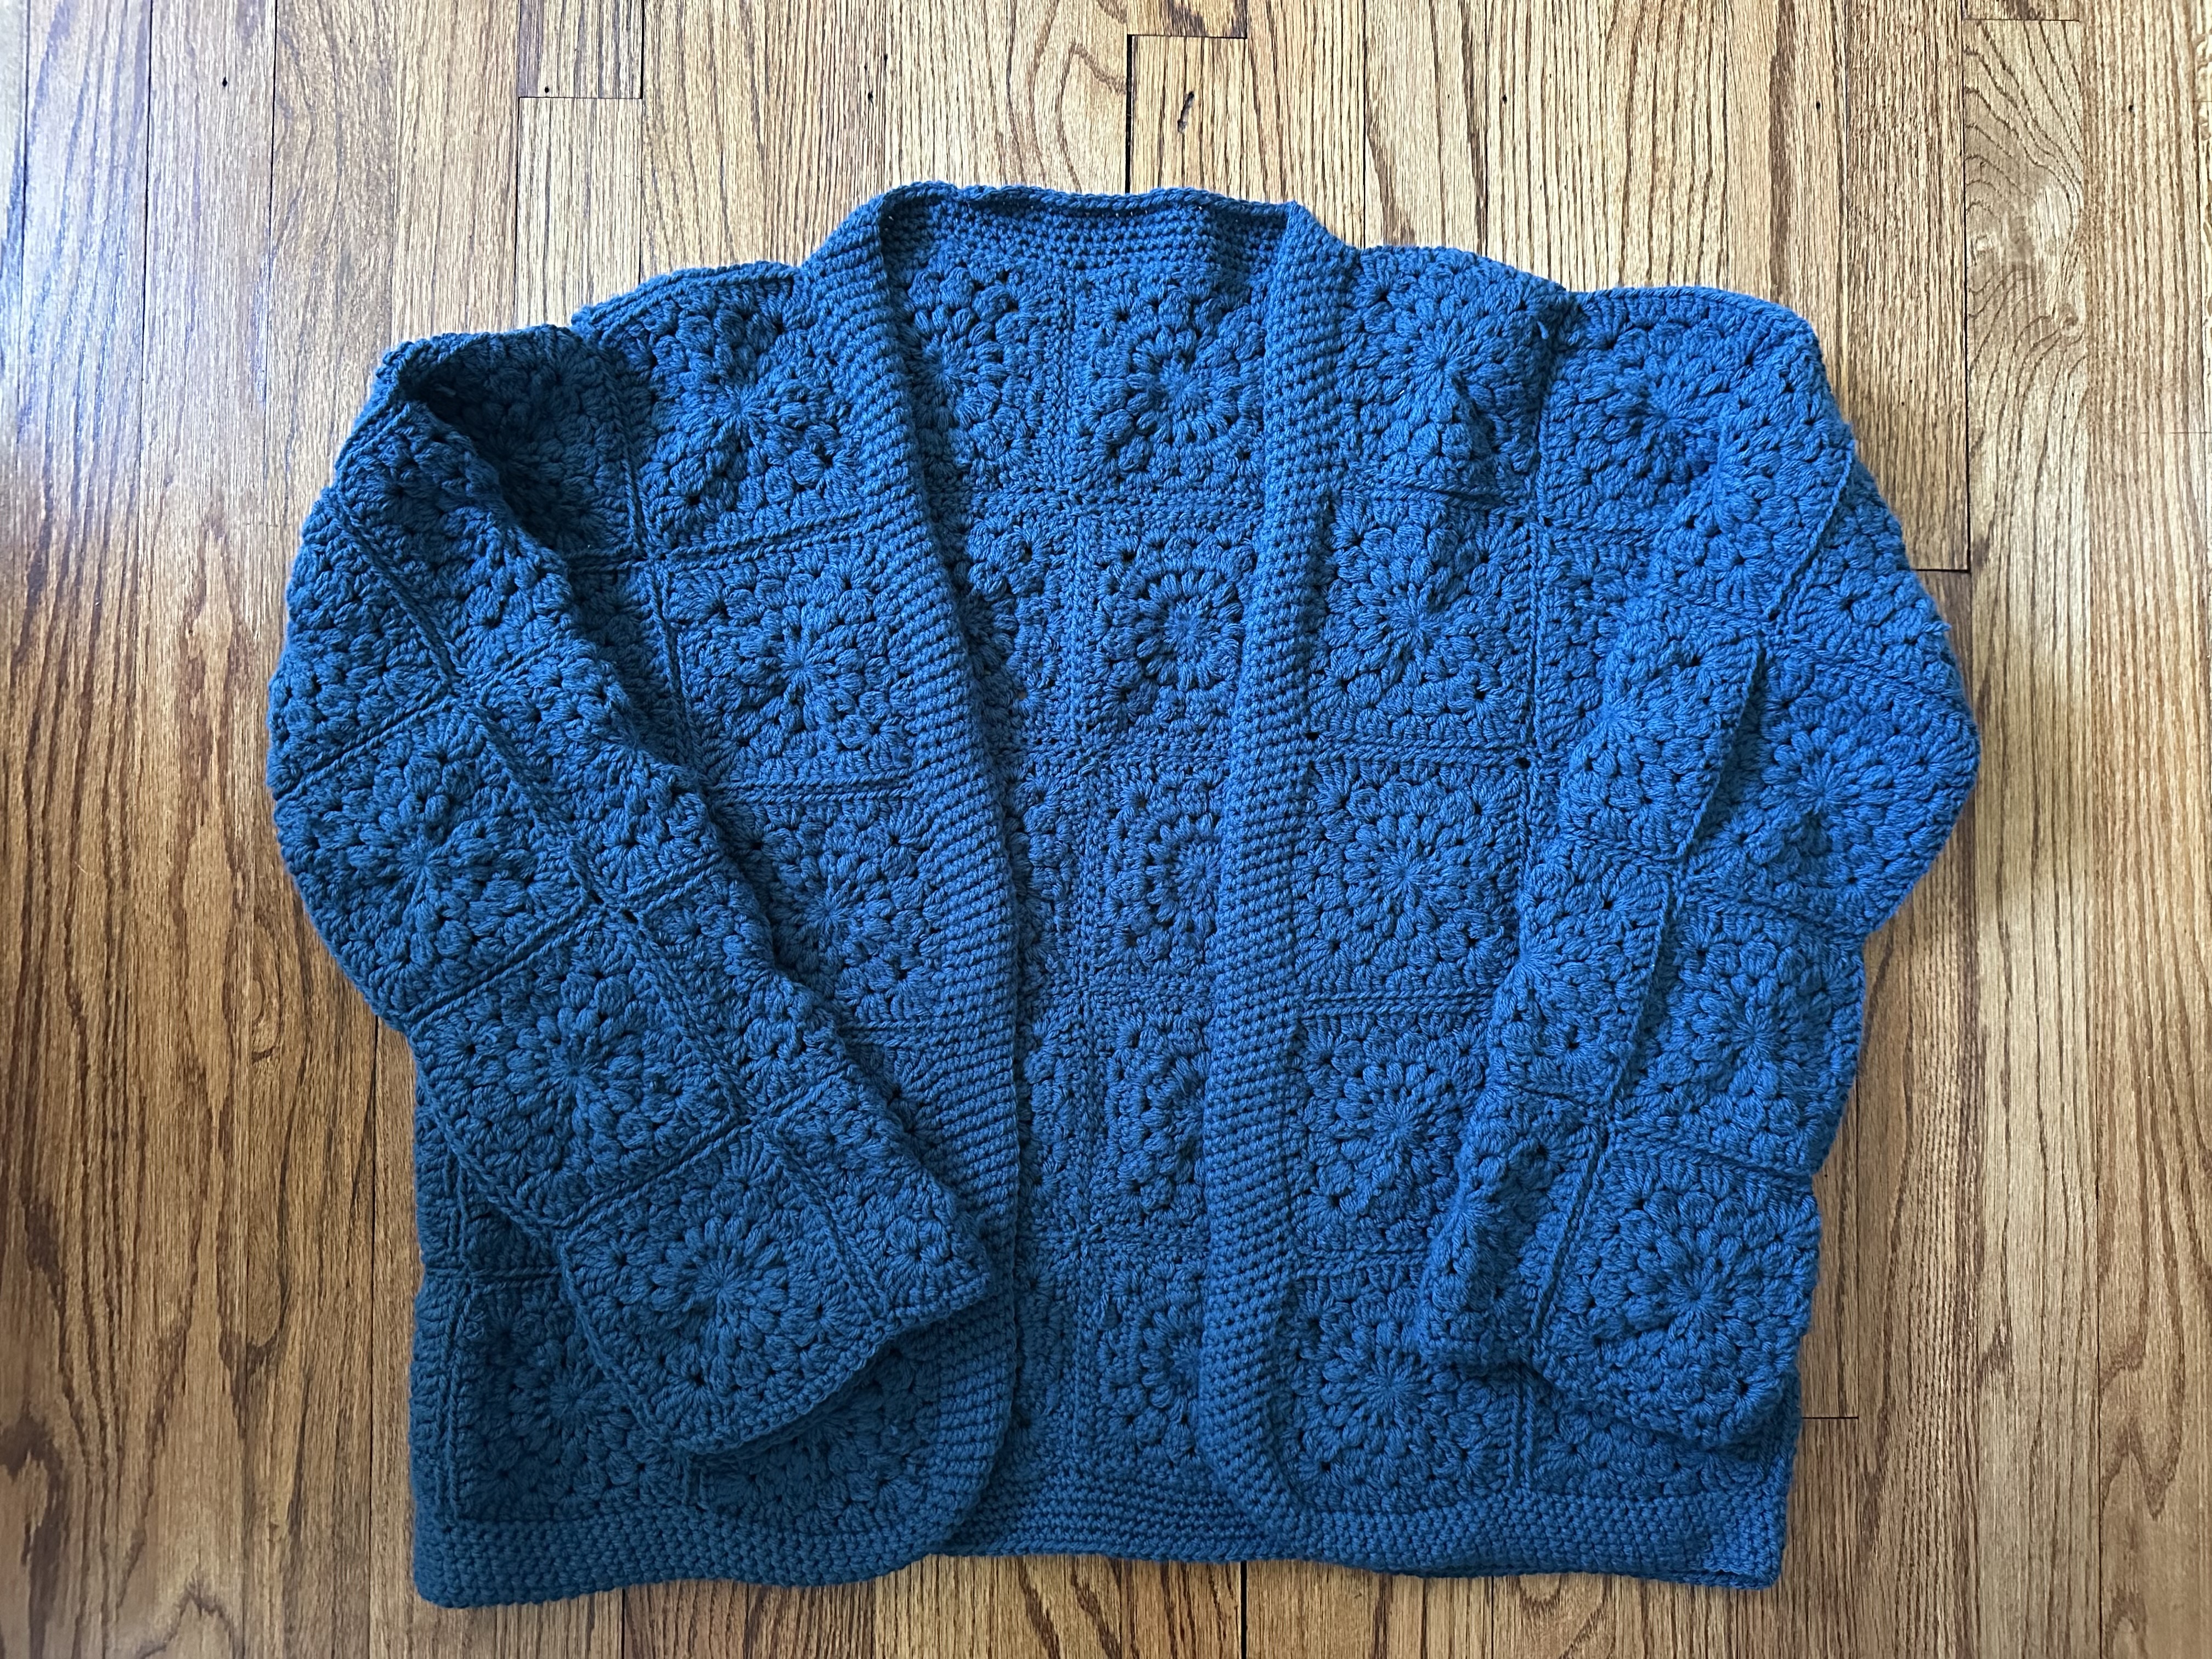
Up first a granny square cardigan that I made for myself. I made my first granny square cardigan a few years ago. It was a request – order – from someone and they were happy with the final product. Since then, I thought about making one for myself, but I didn’t want to make the typical granny square for it. After some research I settled on a sunburst granny square, which was a bit more involved than your typical granny square. I started making the squares last year and then took a break from making them, started up again, took another break and it wasn’t until this summer that I decided it was time to finish. When I laid out the squares to design my cardigan, I realized that I made way too many, so I probably could have finished it a lot sooner. Oh well! I’m really happy with how it came out, and I have quite a few of the squares left-over and a bunch of yarn in this color that I will need to decide what to do with.
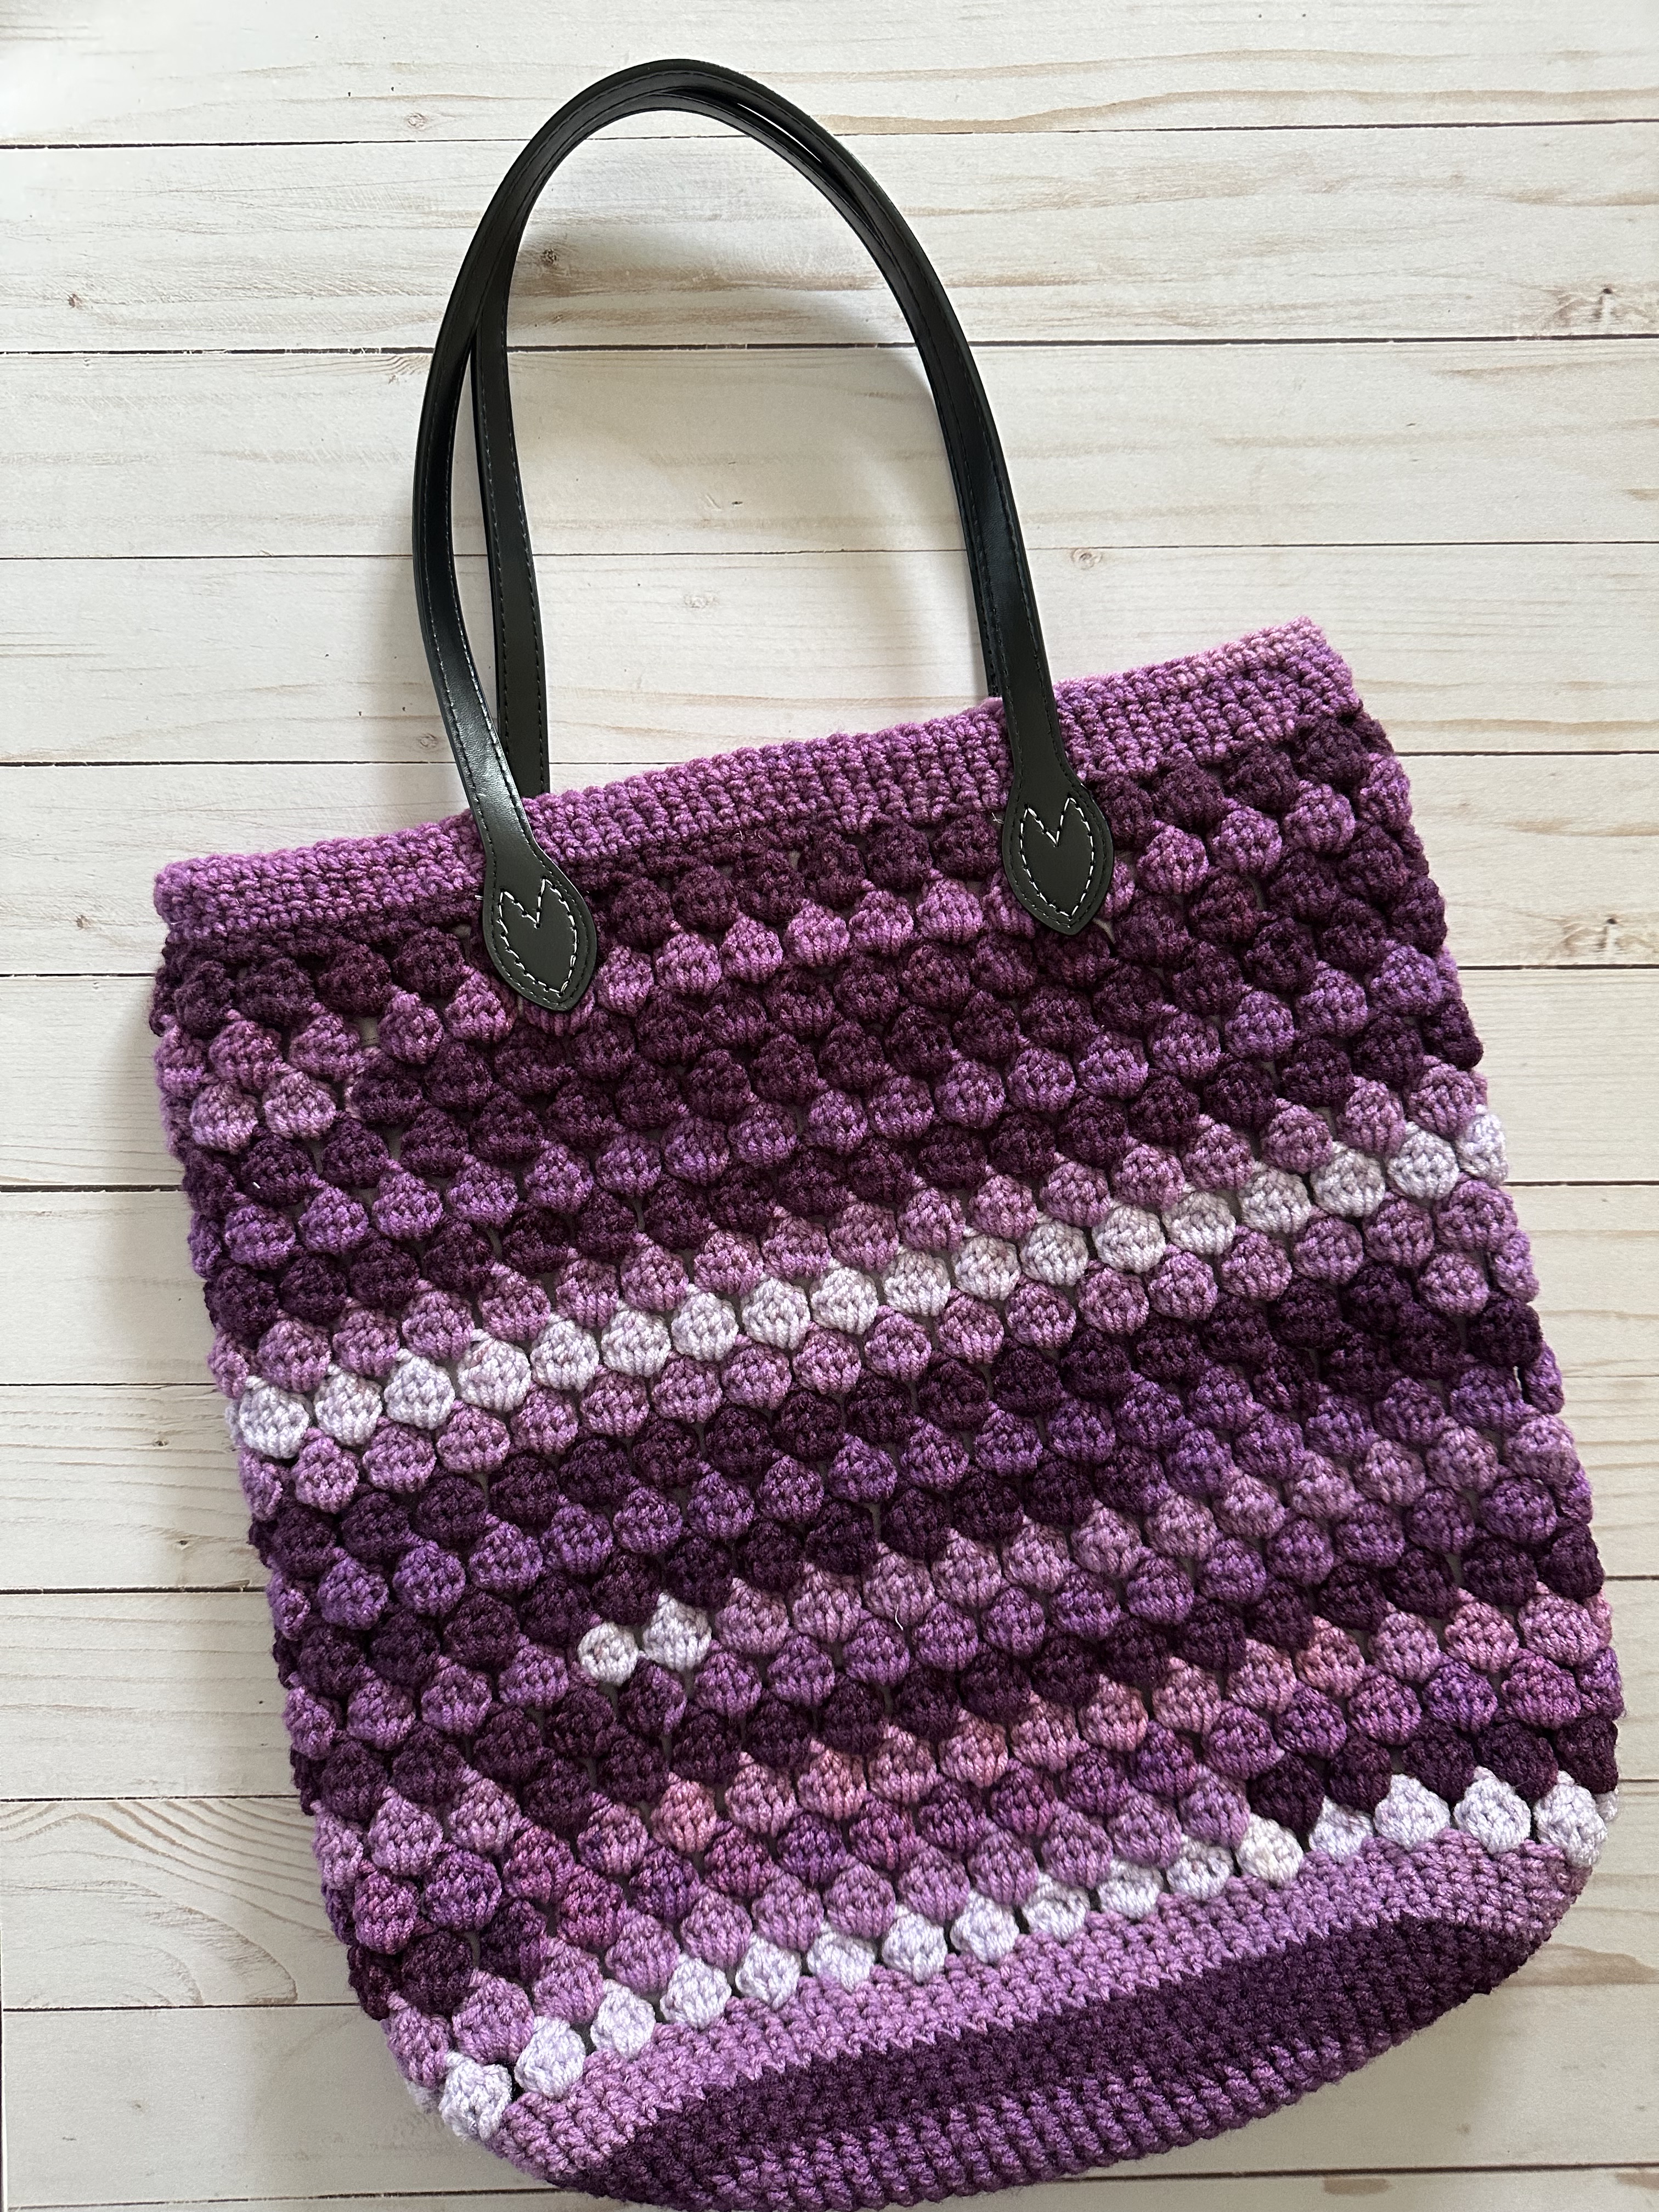
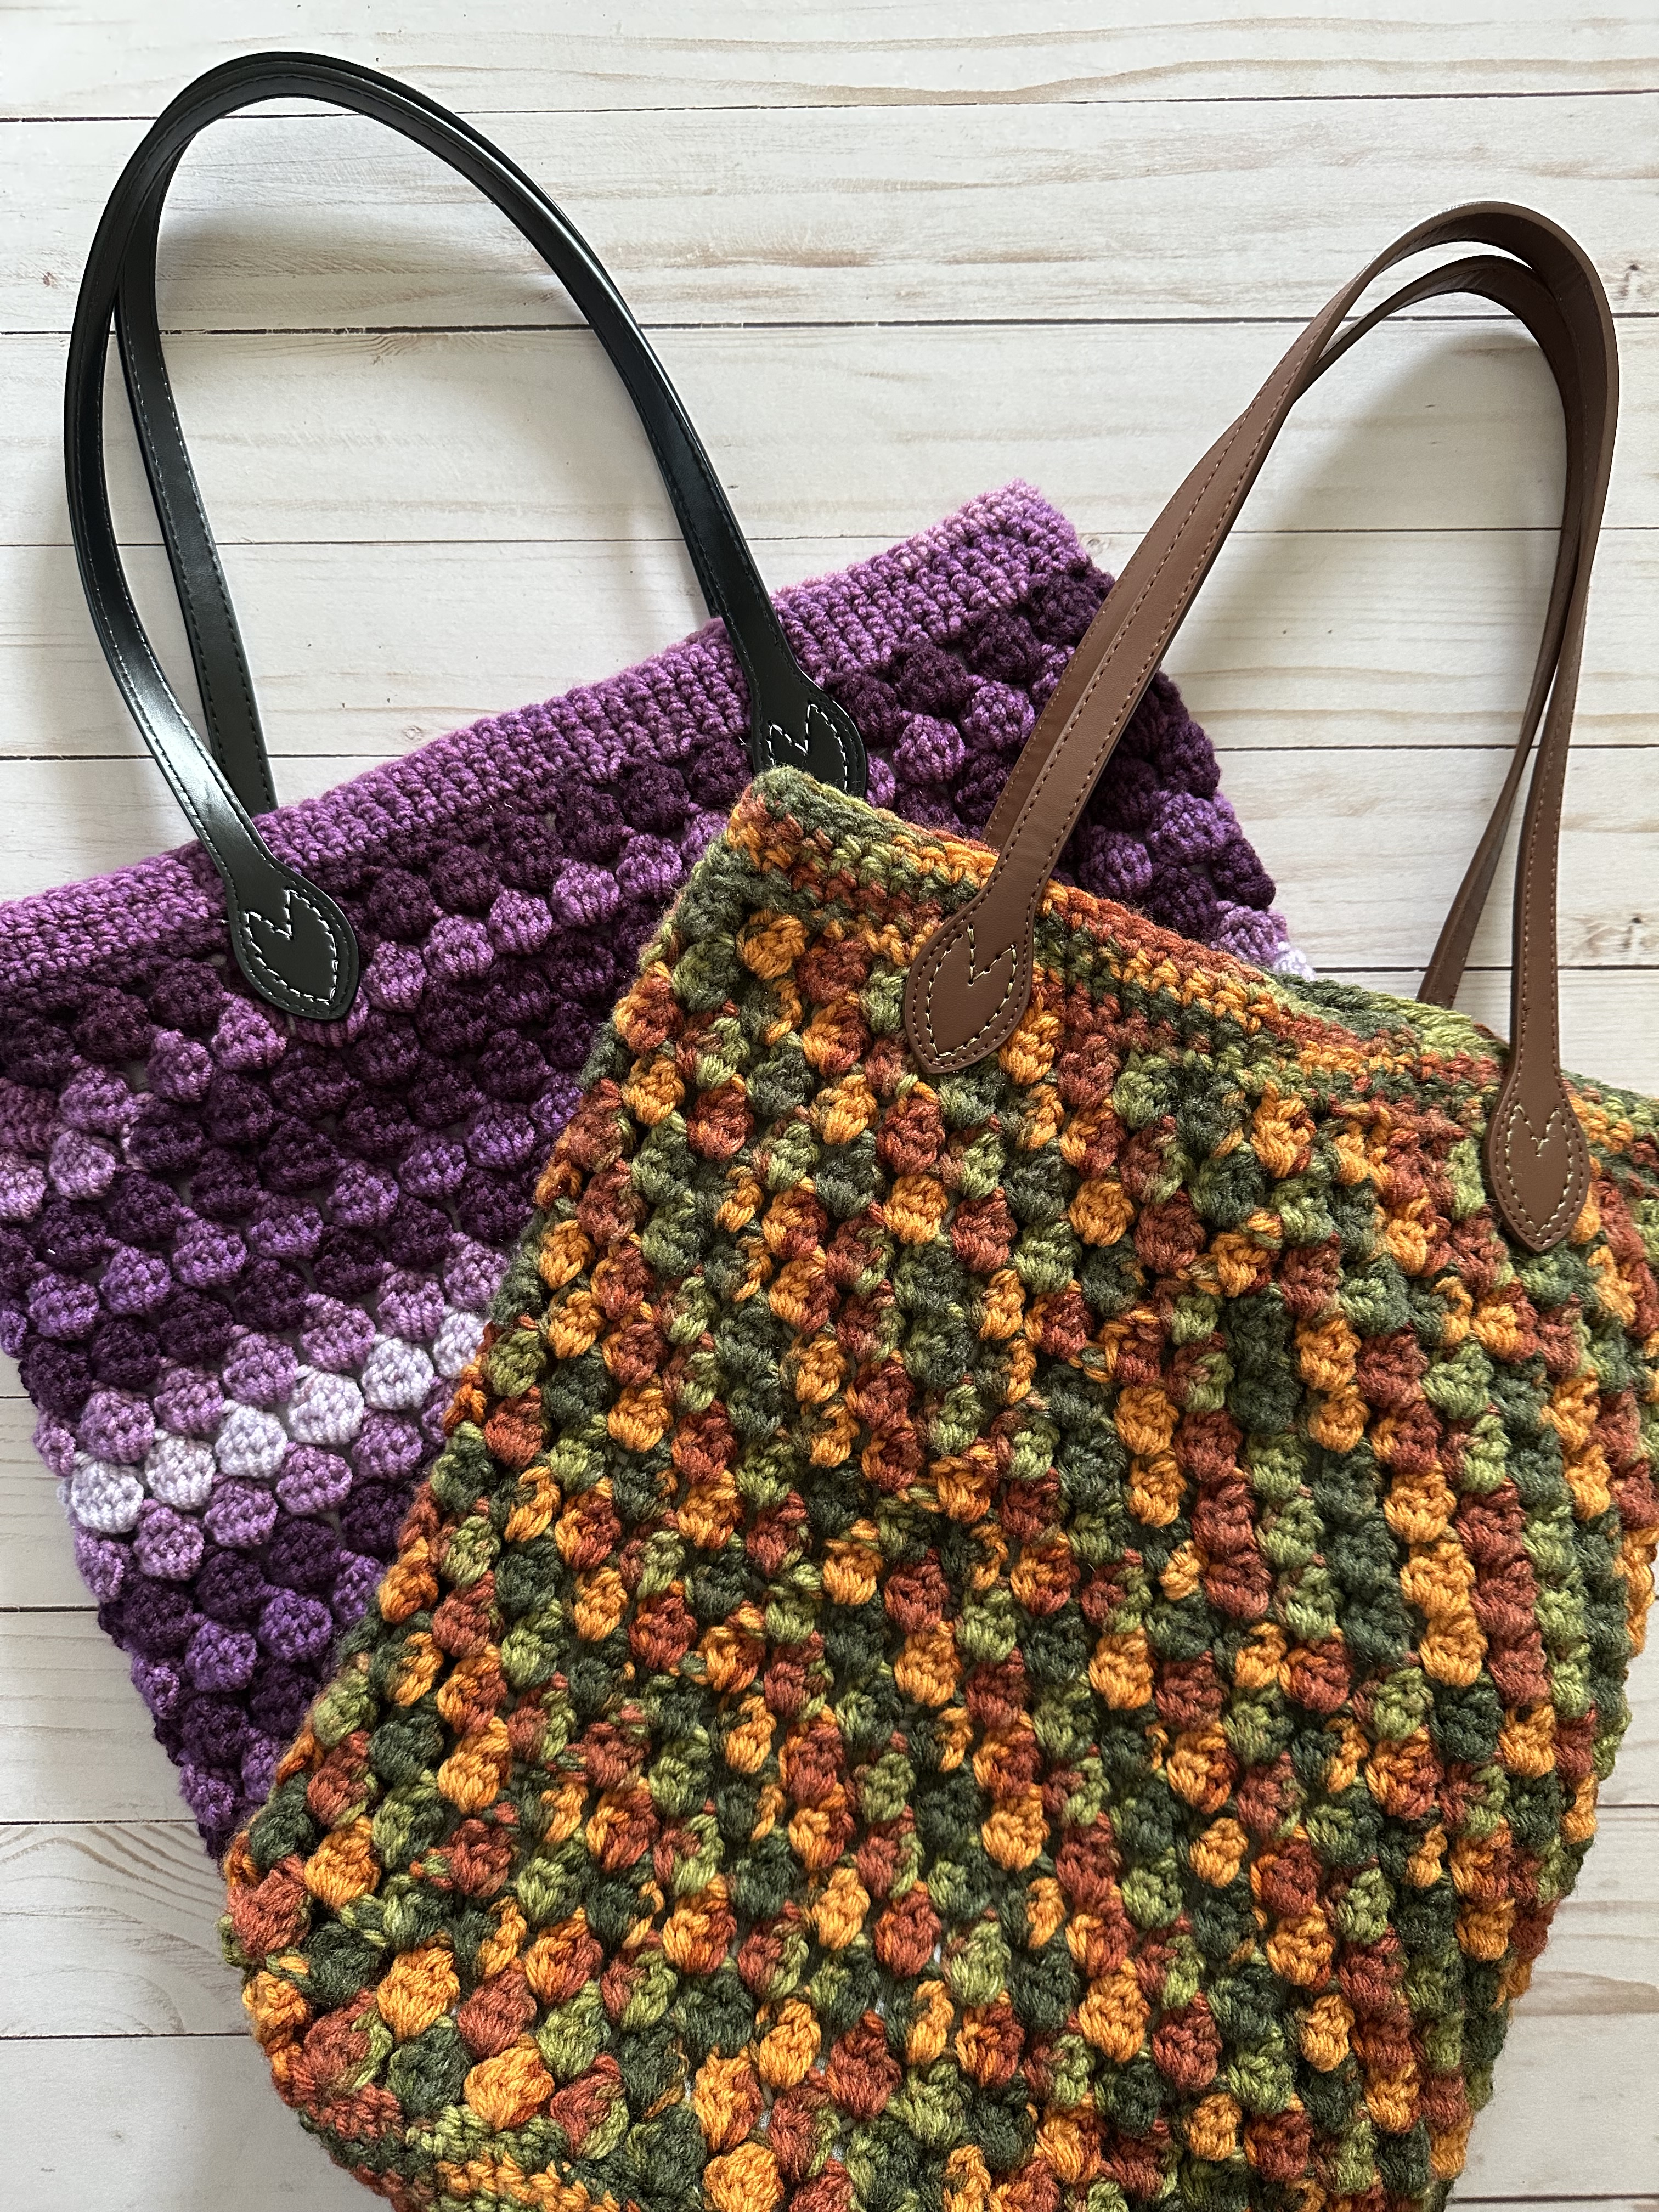
Next, another item – a crocheted tote bag – that sat for a while before I finally finished it. It’s the life of a crocheter though. More WIPs (works in progress) than they can manage. Actually, only one of these sat, the other one I got done fairly quickly. I started the tote bag in the fall colors last year. I worked this up without an actual pattern. I had an idea of what I wanted so I combined components of two different patterns to create it, and I was very happy with how it came out. But then it sat. The hold-up, having to sew a liner into the bag. Since I was hand sewing it and I haven’t had much practice doing so I psyched myself out and just put it aside. This summer though I decided it was time to finish. I think I got into a kick over the summer that it was time to finish the projects that I had started and left astray. Truthfully it weighs on my mind when I do this. I see the project half done and I just feel like something is amiss, that things are unraveling at the seams because I am not finishing things. Talk about a metaphor. So, I sewed the liner in, and I ordered handles that I stitched onto the bag. Truthfully, I was very proud of myself for how this tote came out considering I had no pattern to follow. I was so happy with it that I made another one in shades of purple for a friend. This was the one that I worked up quickly. No lagging whatsoever. Probably because her birthday was coming up and it was fresh in my mind how to finish it. I am thinking of making another one so that I can actually write-up the pattern to have for future reference.
And finally, a knitted cowl. I’ve made a few of these scarves, the pattern is super simple. It’s the seed stitch and it creates a scarf that looks good in basically any weight yarn. This was the first time I made it using a heavier weight yarn and I really like how full and warm it will be for the colder months ahead. Truthfully, I had to make this scarf two times. The first time I casted on too many stitches and the scarf didn’t look good in the end. It was too short and bulky to loop around my neck, so I sadly frogged the entire thing and started over by casting on fewer stitches and it came out exactly how I wanted.
And now, I am looking for my next big yarn project that will hopefully not take me over a year to complete!
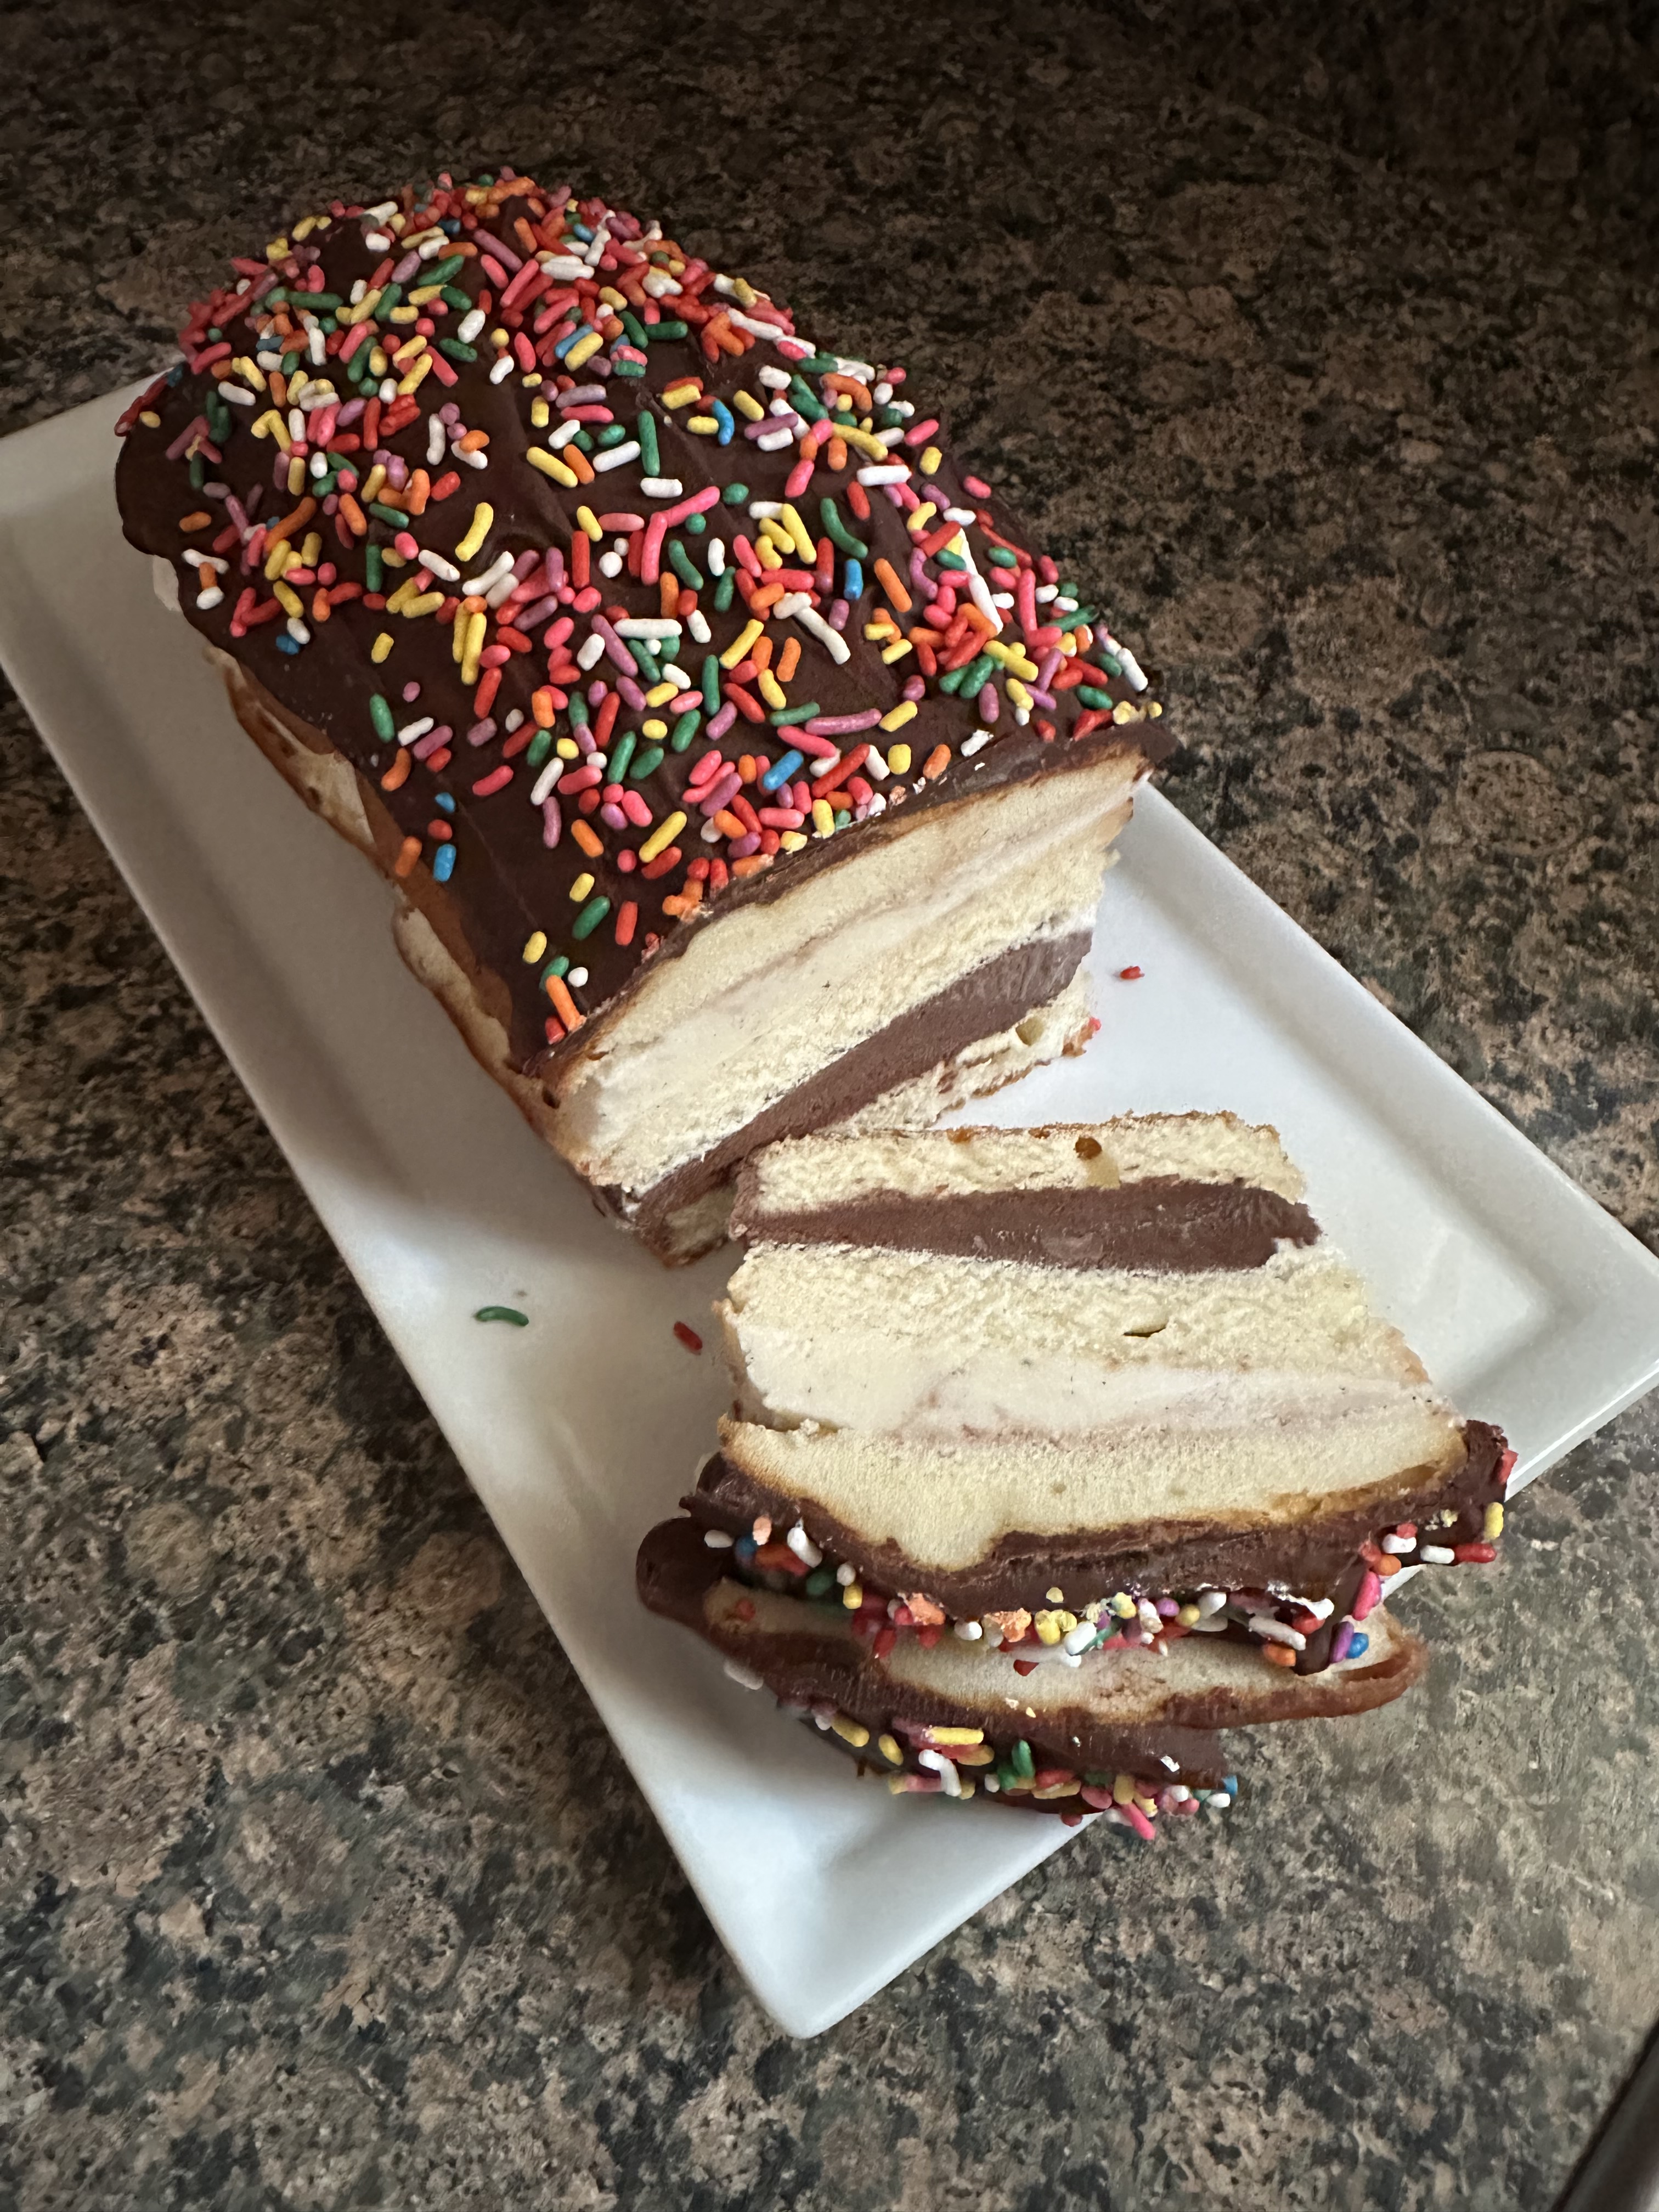
We are officially in the dog days of summer. And today I am sharing a dessert that doesn’t require you to turn on your oven or put forth much effort, perfect these hot and humid days. It only requires 2 ingredients – 5 if you are feeling fancy. What is it… An Ice Cream Loaf Cake.
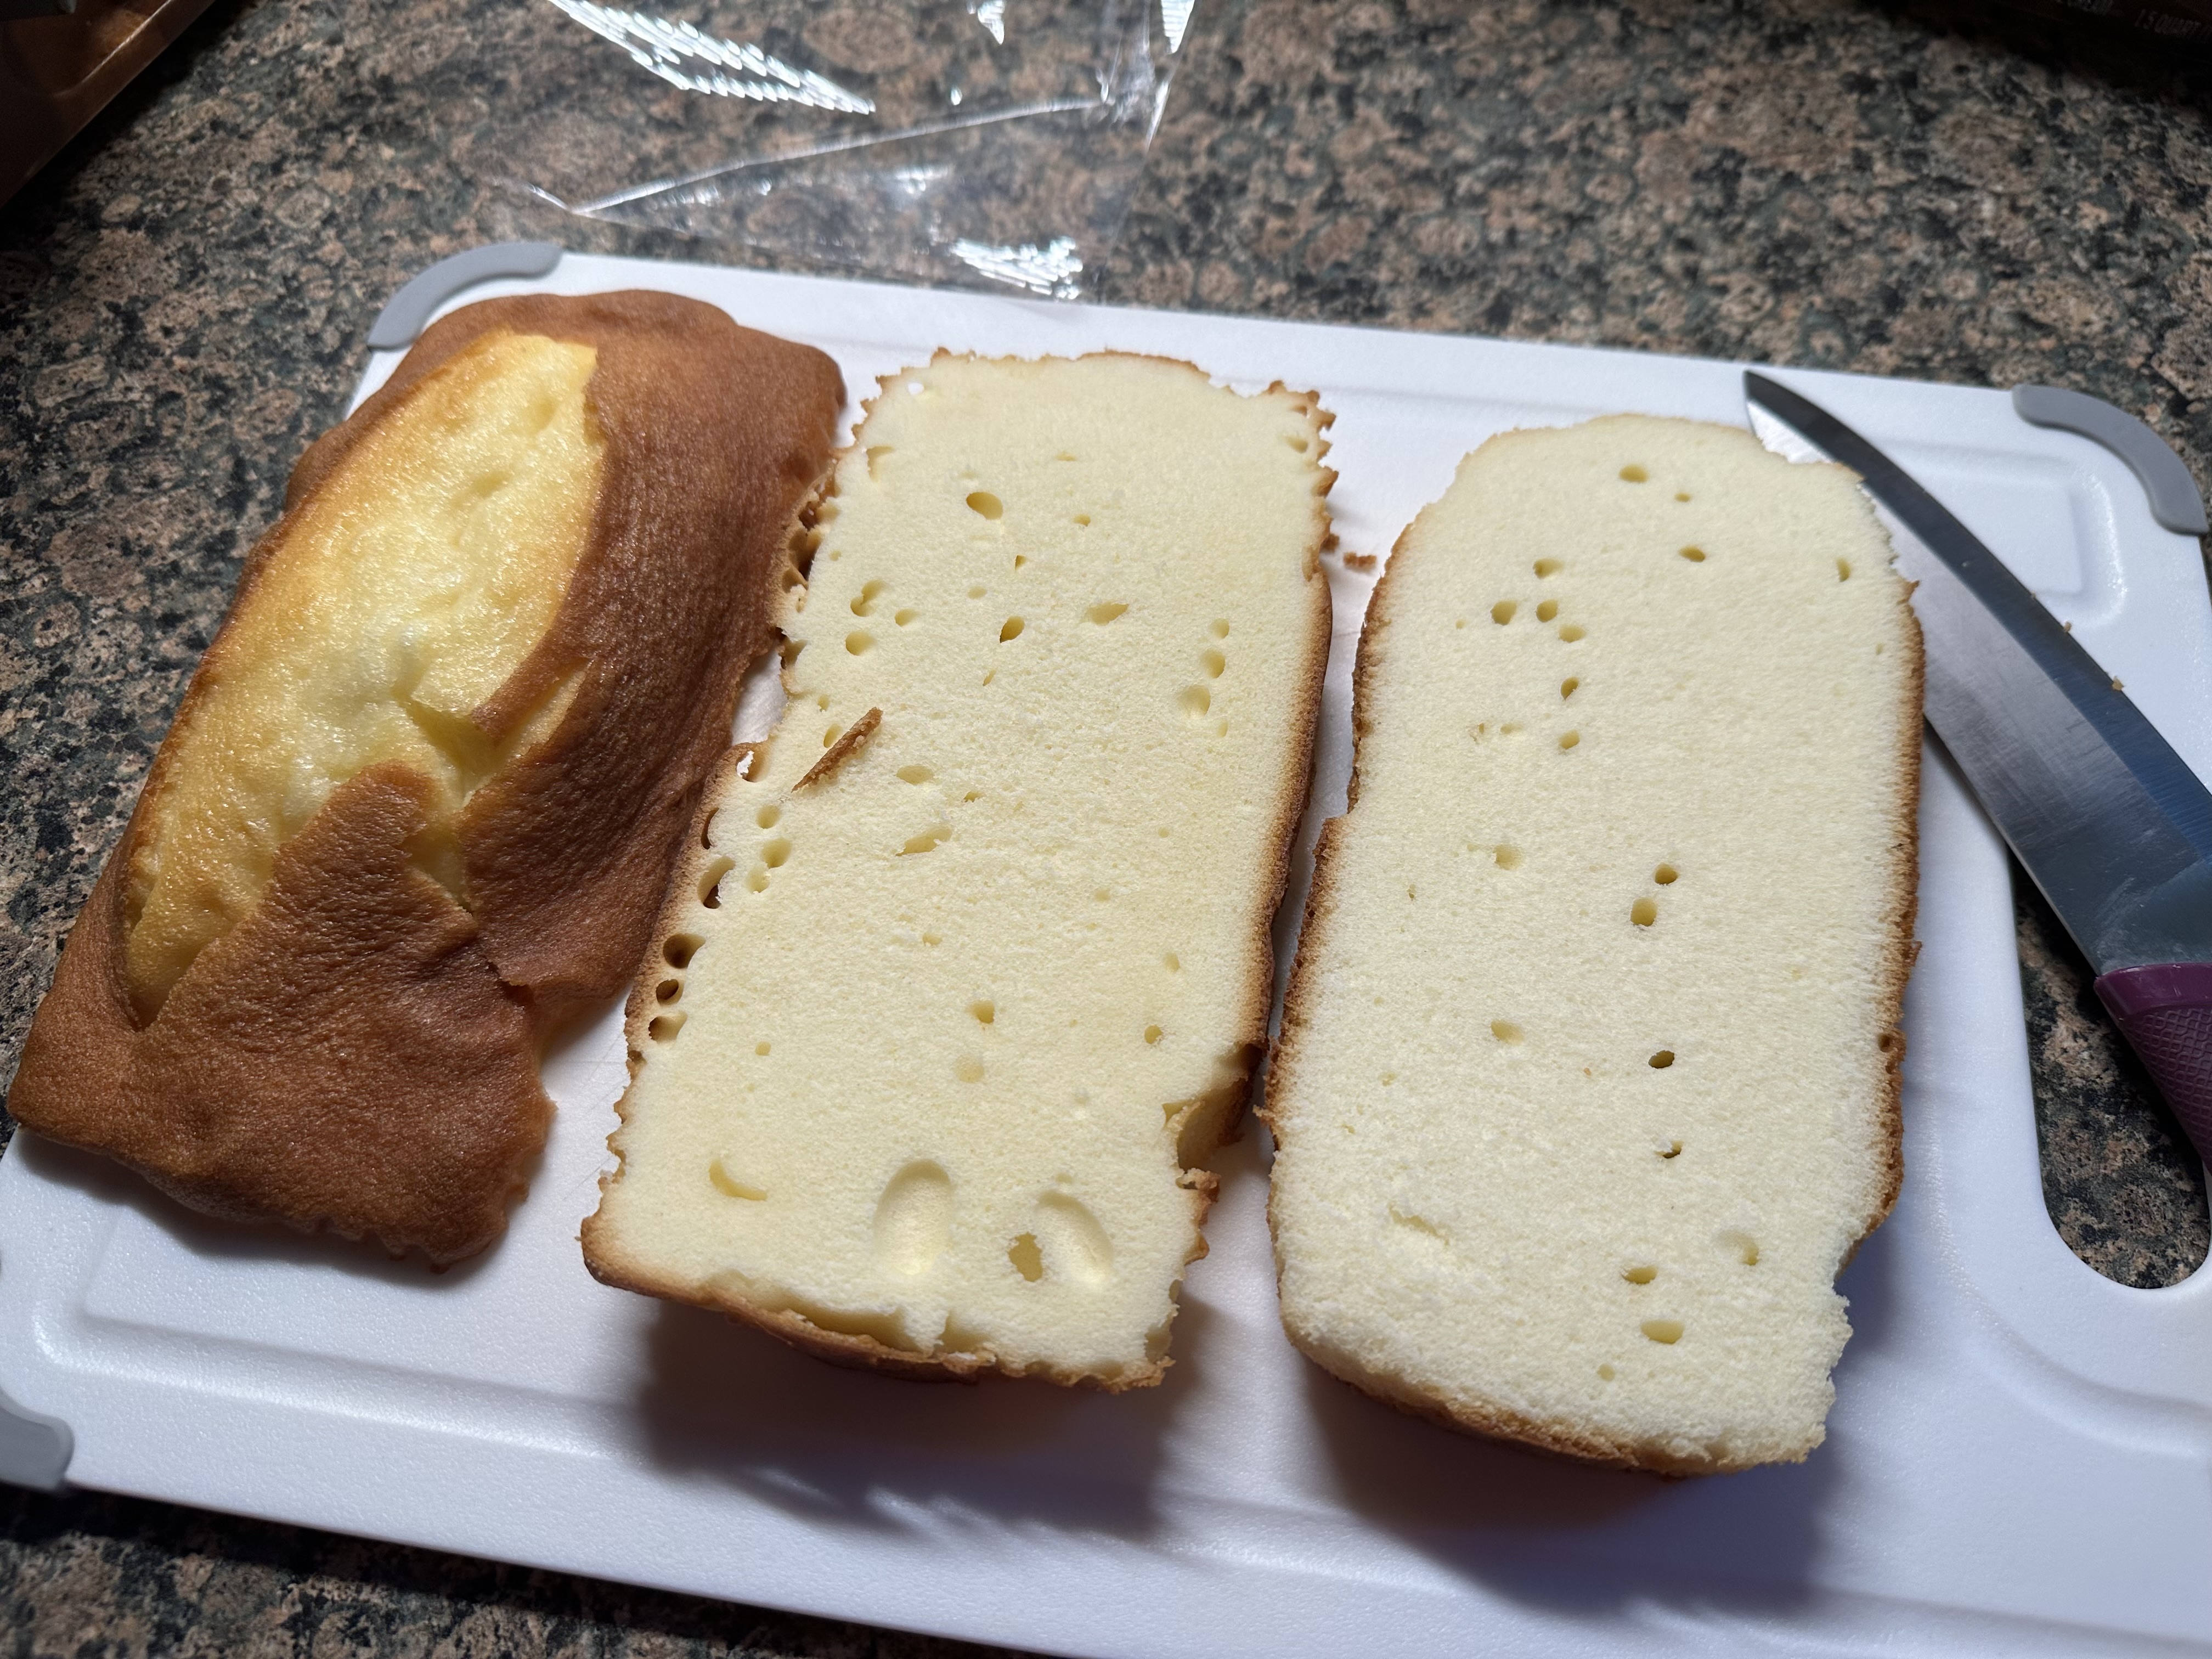
While I have seen recipes for ice cream cakes that involve baking the loaf cake from scratch using a store-bought loaf cake works just as well. I opted to use an Entenmann’s All Butter Loaf Cake, but you could also use a frozen one. As for the ice cream, your favorite flavor works best. I decided to go with chocolate and vanilla.
The first thing I did was slice the loaf cake into thirds. To make slicing the cake a bit easier and to reduce the number of crumbs I refrigerated the cake for about an hour.
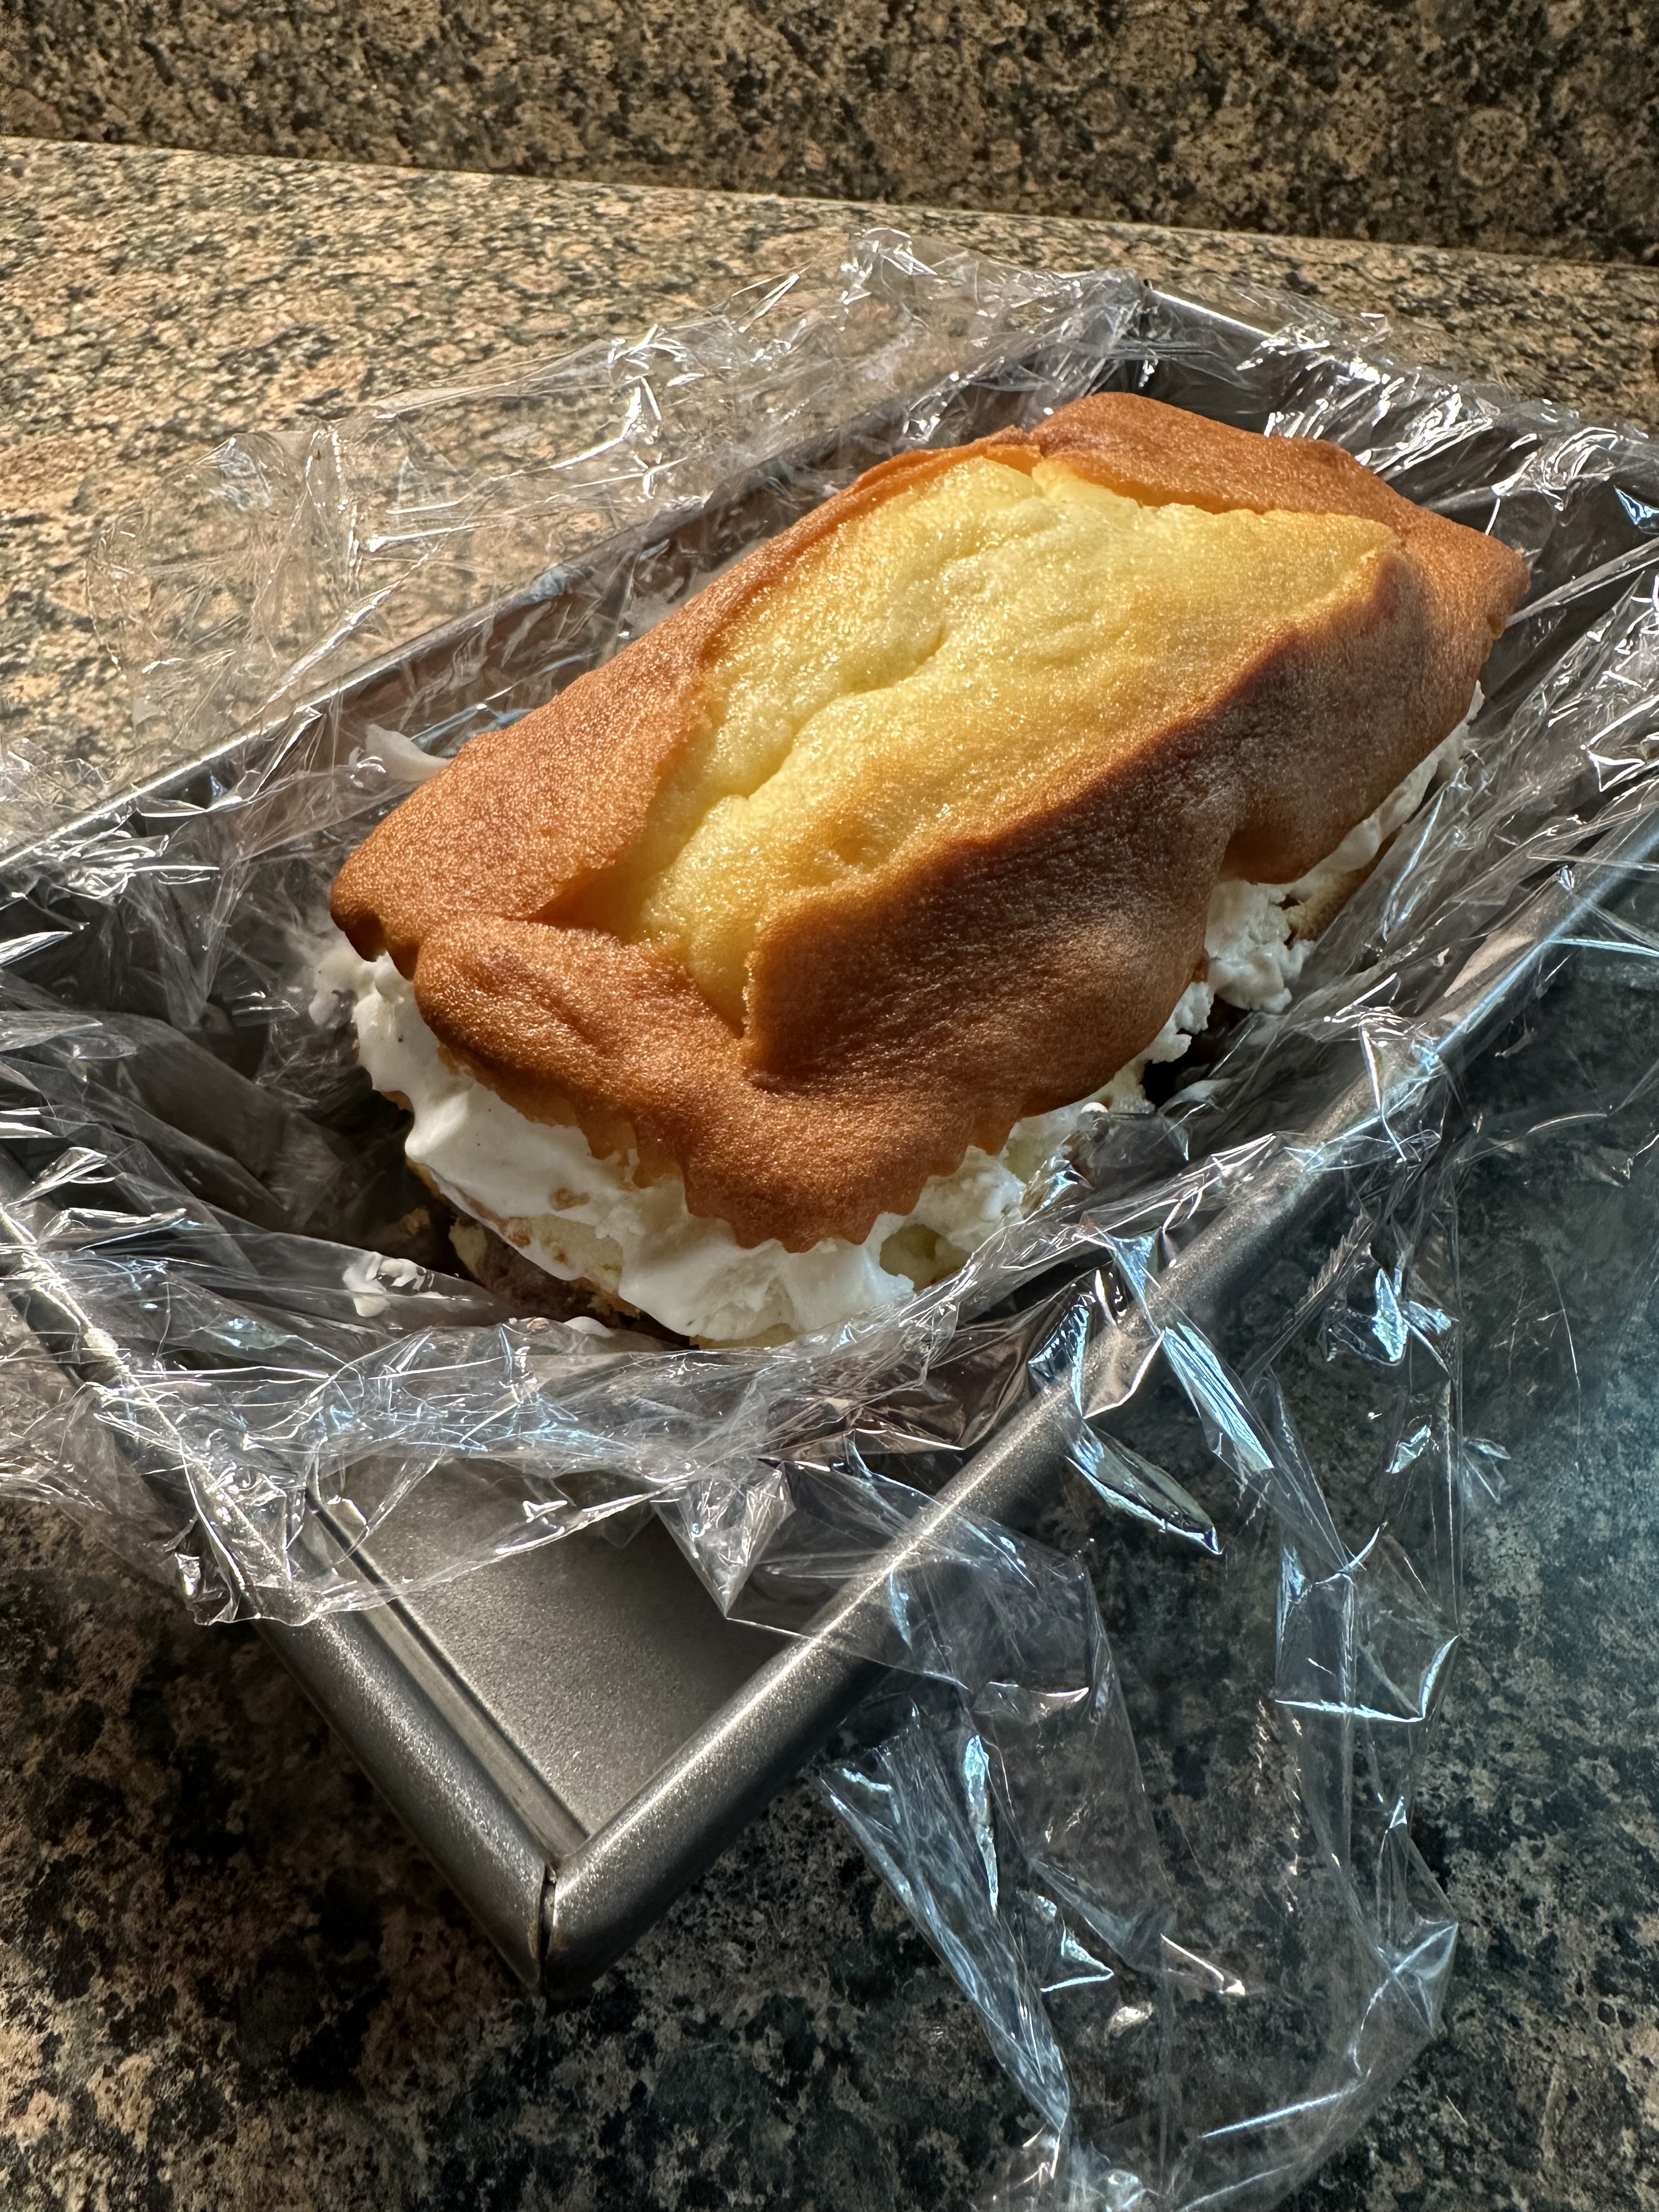
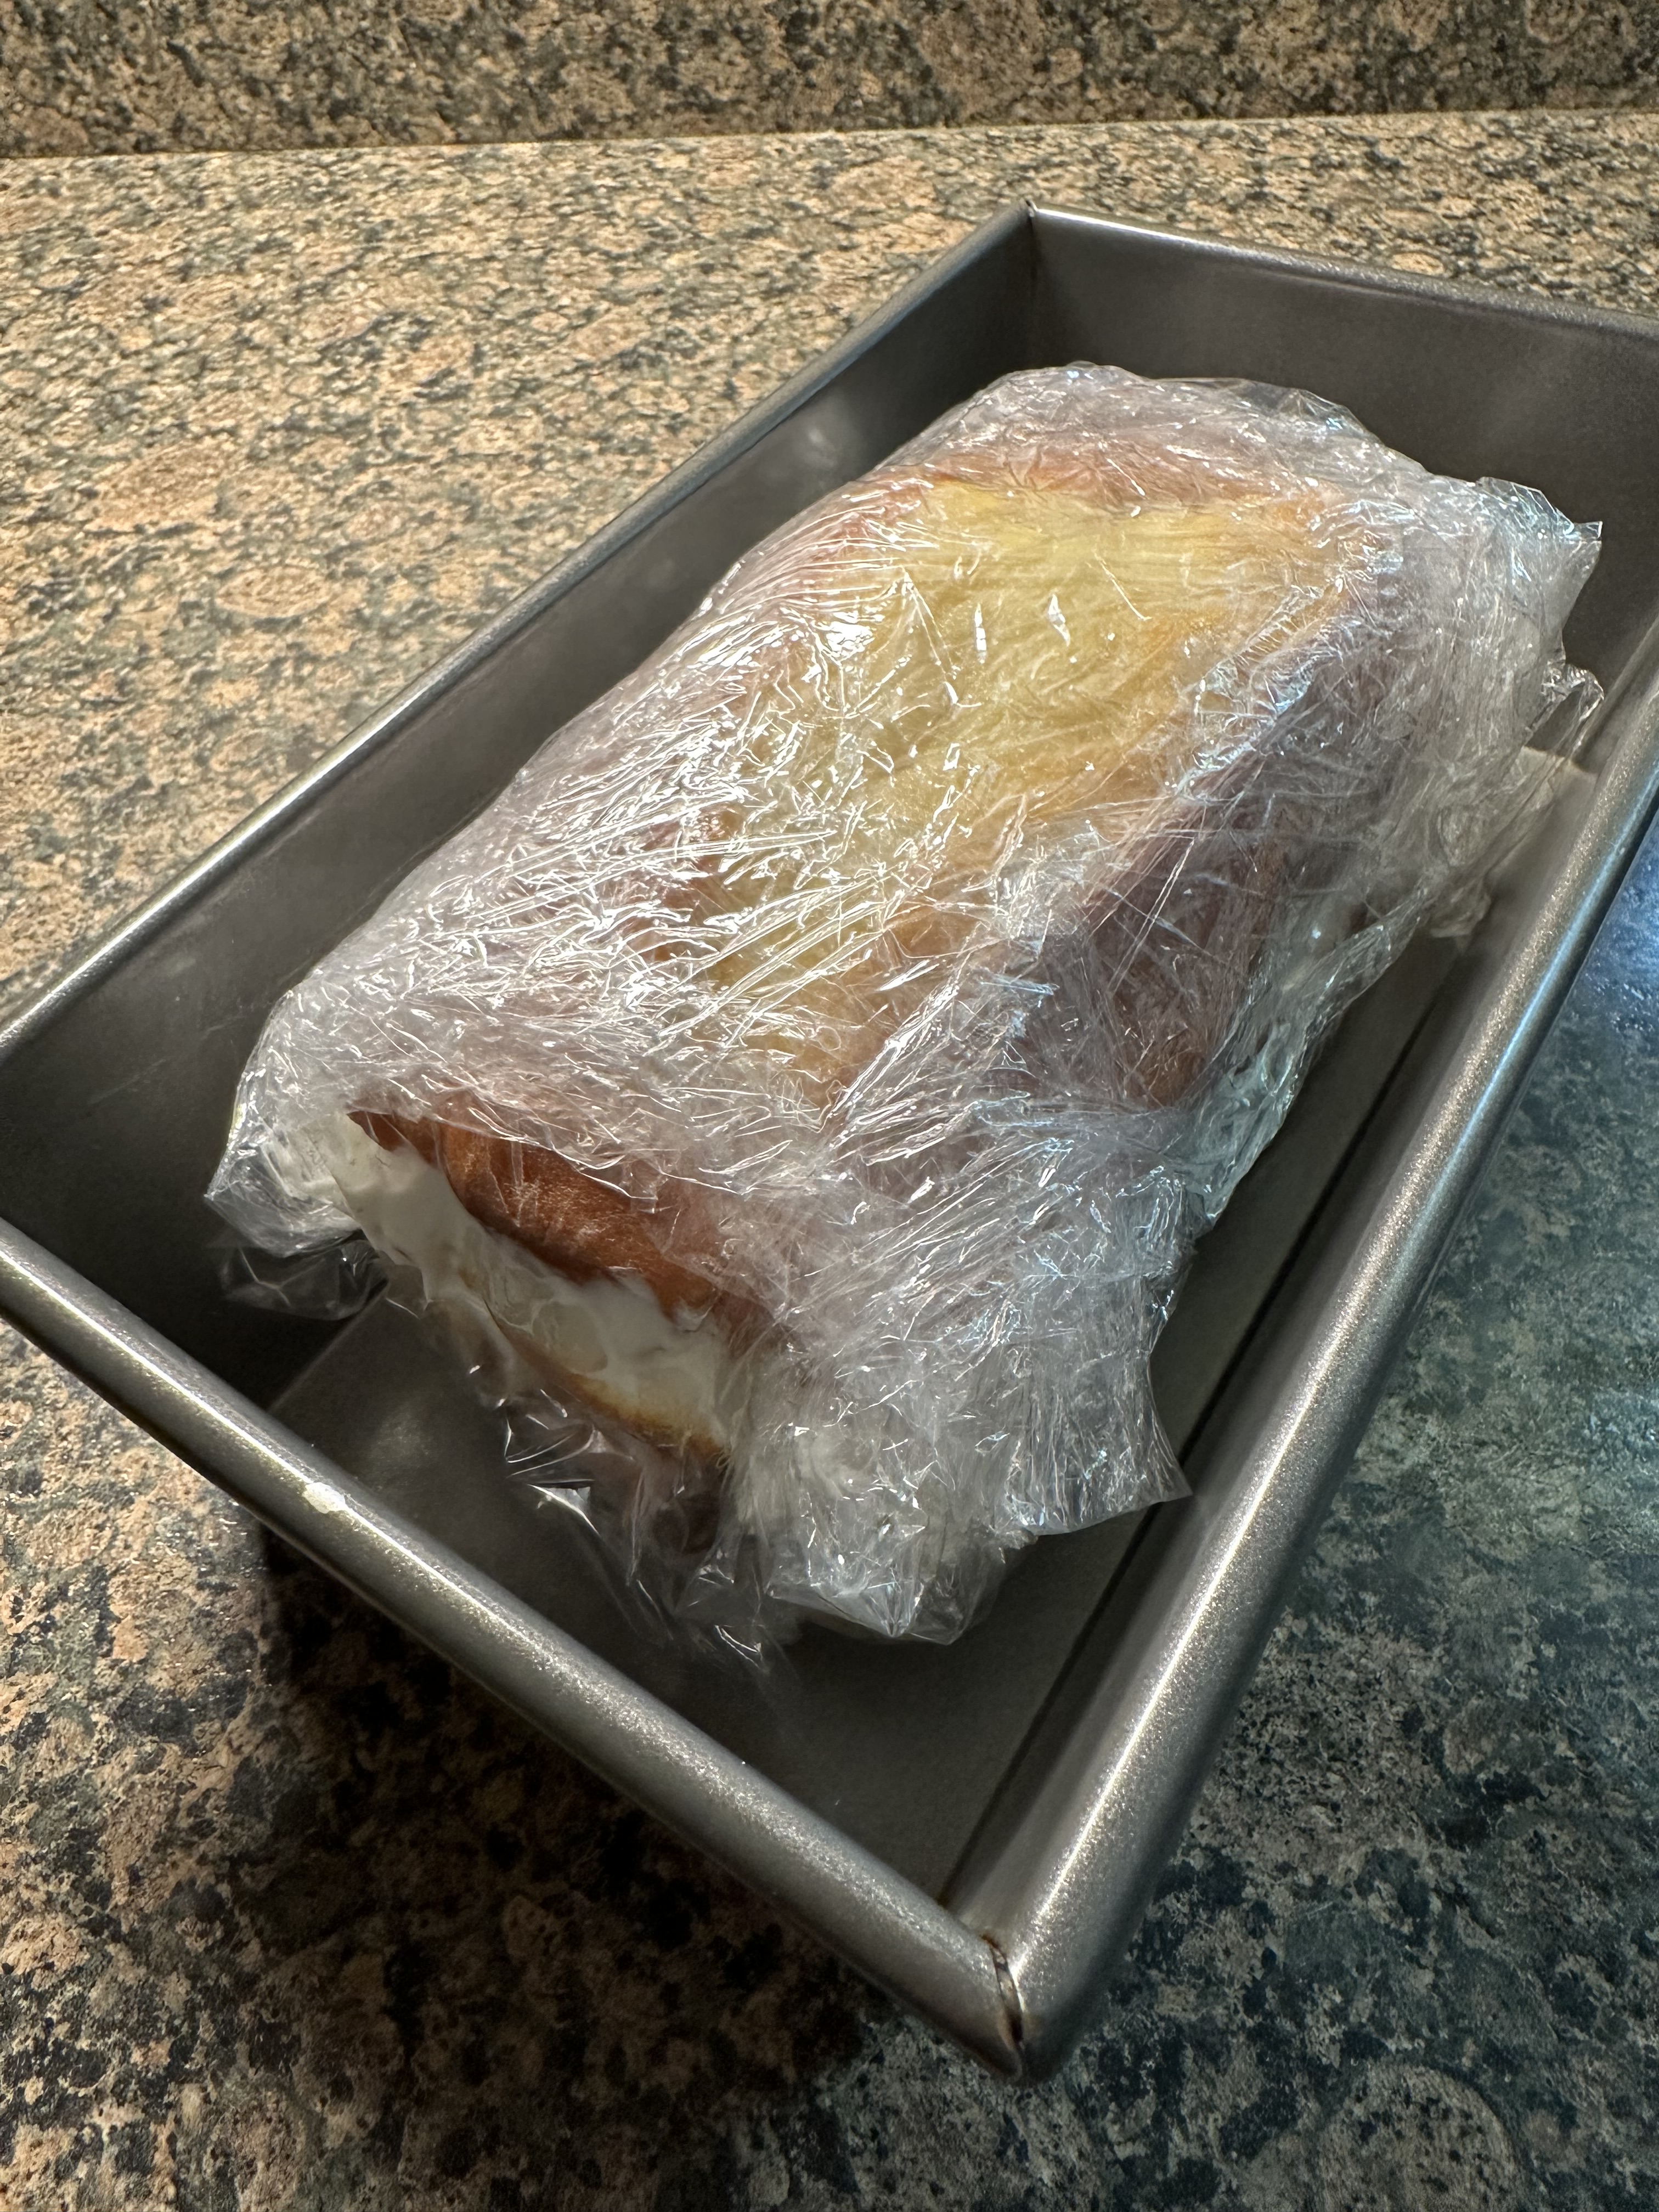
After that, I laid the bottom of the cake in a loaf pan lined with plastic wrap. To line the pan, I placed one piece of plastic wrap vertically and another horizontally to ensure the corners of the cake would be covered. Next, I spread about 1 ½ cups of ice cream over the cake. You want a nice layer of ice cream but not so much that it starts to overflow from the sides once the cake is fully assembled. To make spreading the ice cream easier I let it sit at room temperature for about 5-10 minutes. You don’t want it so soft that it becomes a soupy mess, just enough to make it easy to spread. I repeated these layers with the middle slice of the cake and more ice cream. Finally, I topped the cake with the top third and wrapped it tightly with the plastic wrap and placed it in the freezer overnight.
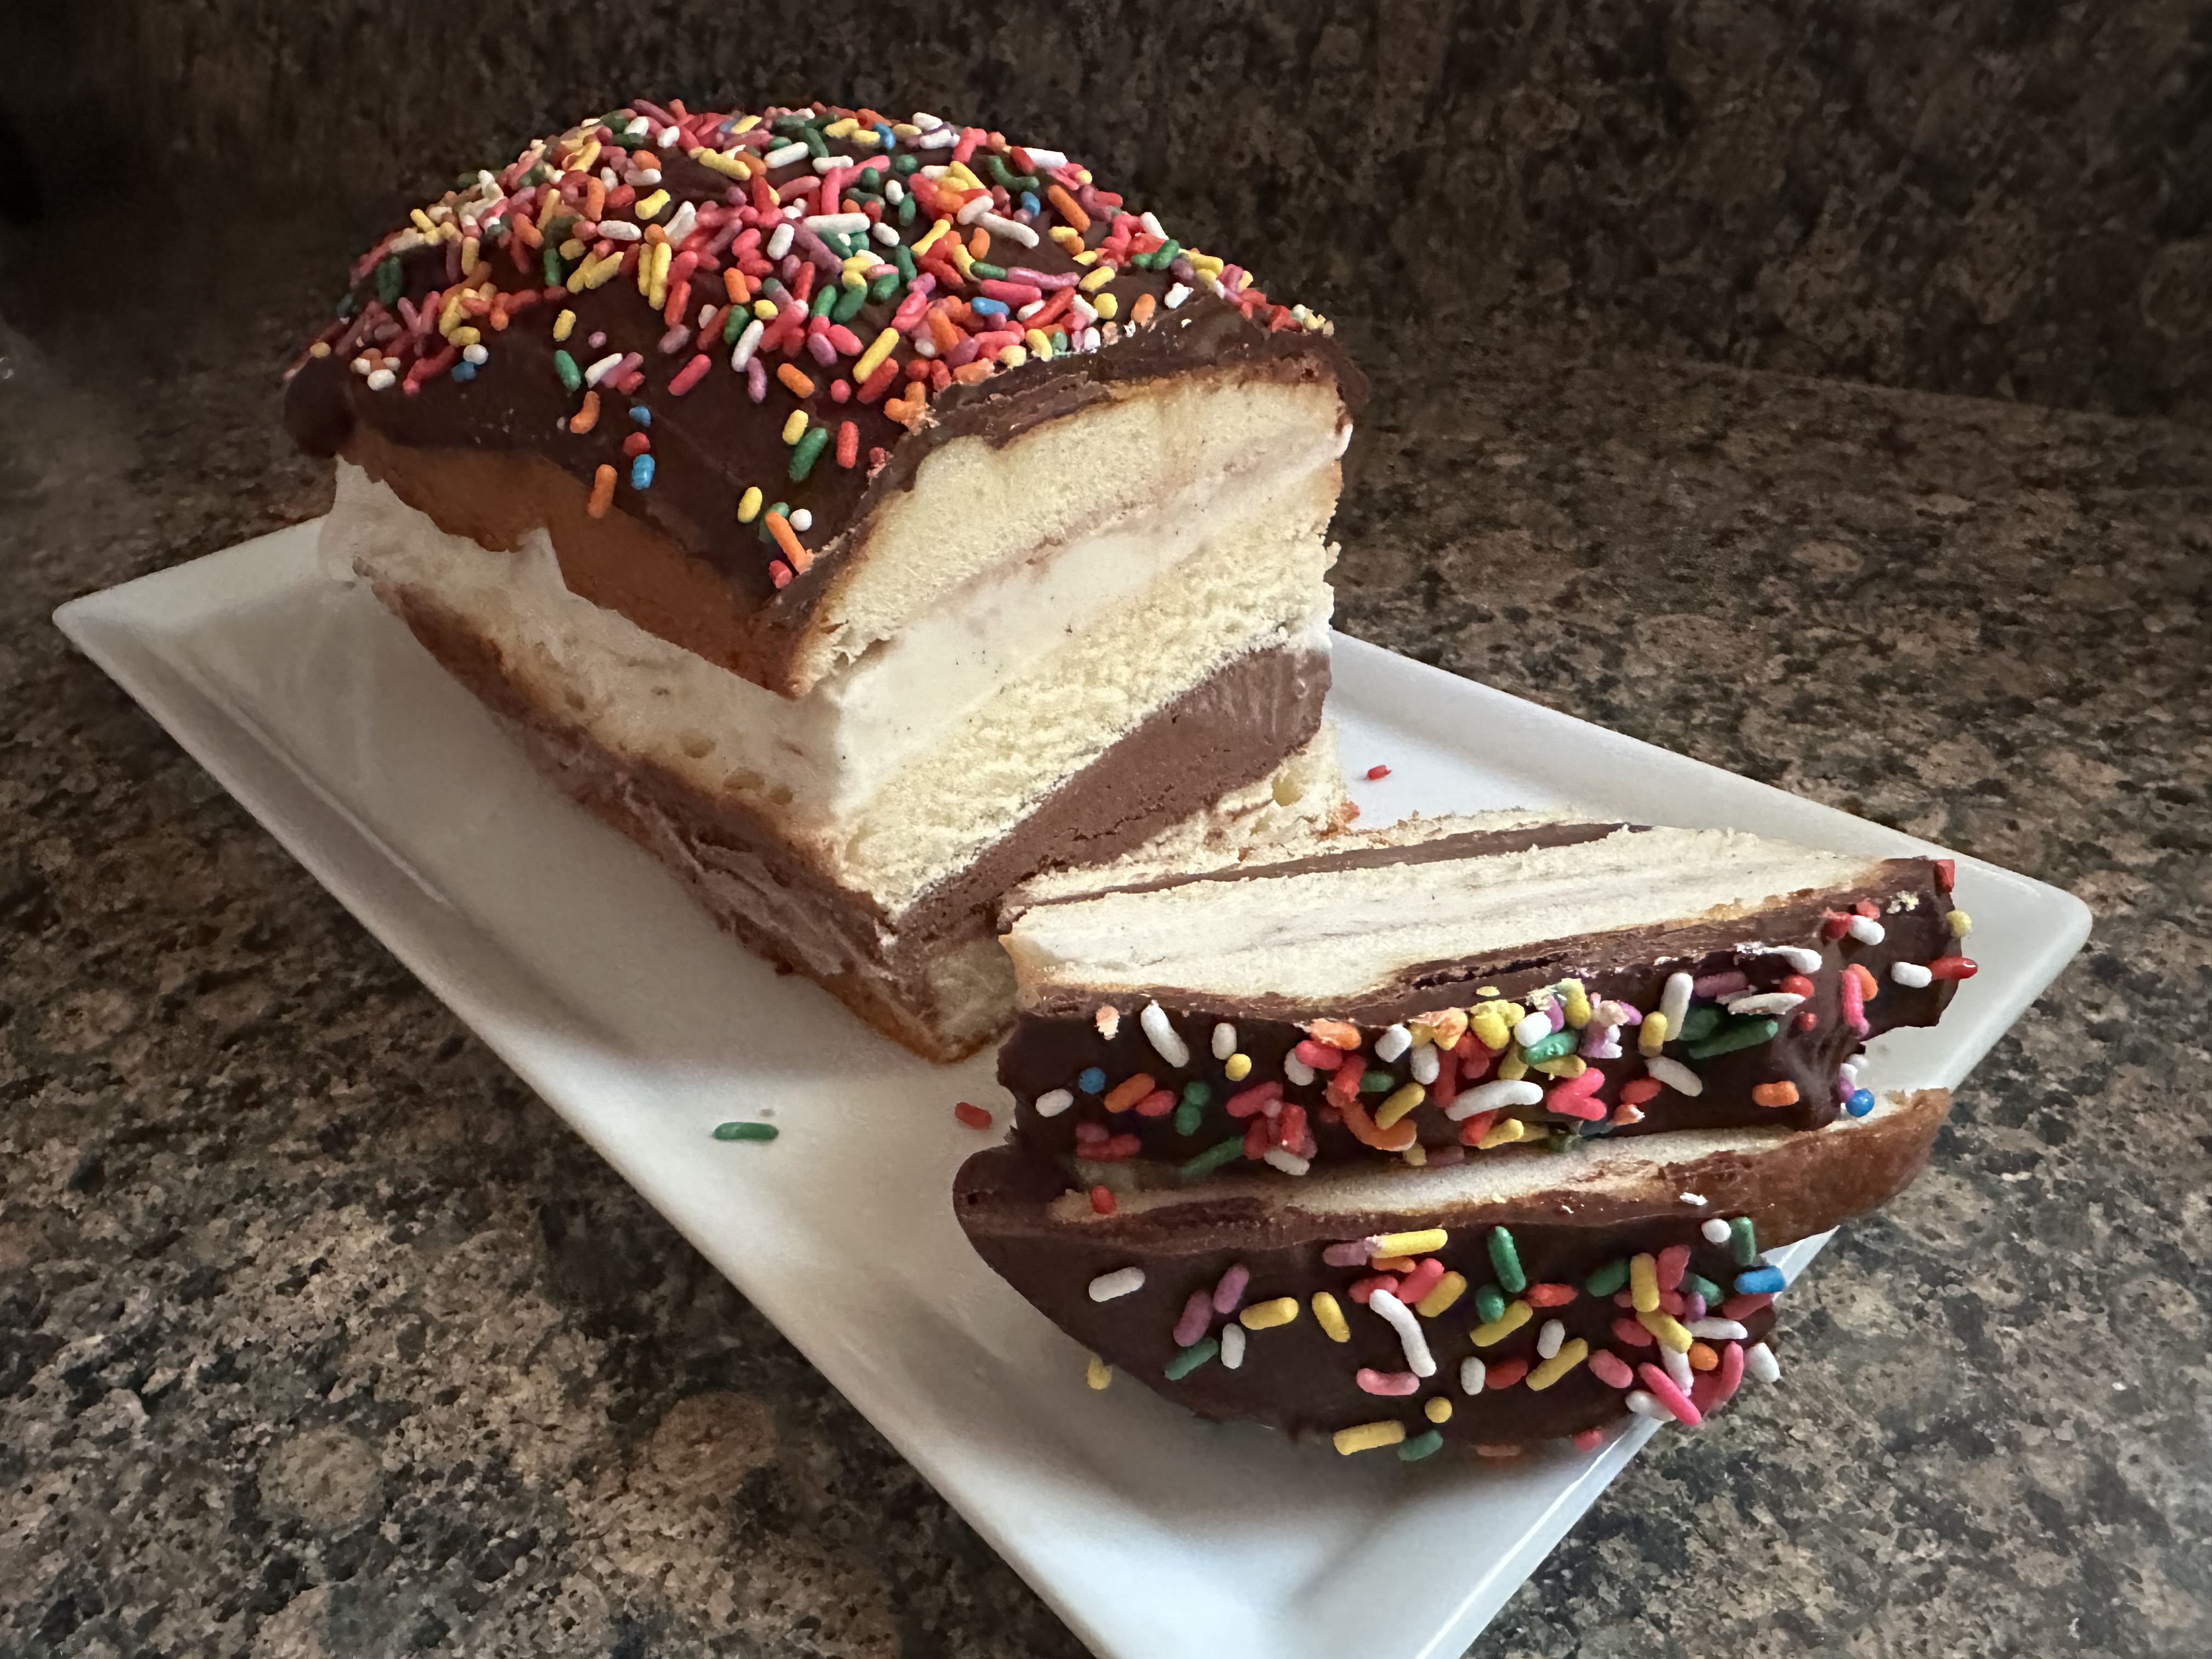
While I could have enjoyed the cake as is I decided to get a little fancy and topped it with a quick and easy chocolate ganache and sprinkles. What’s ice cream without sprinkles??? To make the ganache I stirred together warmed heavy cream and chocolate chips until the chocolate melted. After letting it sit for a few minutes I poured it over the cake. I added some sprinkles on top and then popped it back in the freezer so the chocolate could set.
Once the chocolate was set it was time to enjoy a slice (or two)!
To make your cake really unique use a flavored loaf cake. Think marbled, chocolate chip, lemon, etc. A lemon loaf cake with a raspberry sorbet would be the perfect refreshing treat for these warmer months!
No-Bake Ice Cream Loaf Cake
Ingredients:
1 store-bought loaf cake, chilled*
2-3 cups ice cream, softened
1/4 cup heavy cream
1/2 cup semi-sweet chocolate chips
Sprinkles
*You could also use a frozen loaf cake; you may need to let it thaw slightly before slicing though
Directions:
Line a loaf pan with plastic wrap – horizontally & vertically. Any size loaf pan works, just make sure it’s big enough to fit the cake you’re using. If you opt to use a frozen loaf cake, use the pan the cake comes in.
Slice the cake into thirds horizontally so you have three pieces about the same thickness.
Place the bottom piece of the cake into the prepared loaf pan. Spread half of the ice cream over the cake. Repeat these layers with the middle piece of the cake and the remaining ice cream. Finally, gently press the top of the cake onto the ice cream. Cover tightly with the plastic wrap and freeze for a few hours (or overnight) so the ice cream can set.
Just before serving the cake place the chocolate chips in a heatproof bowl. Heat the heavy cream in the microwave or stove until it’s steaming (but not boiling). Pour the heated heavy cream over the chocolate chips. Let it sit for a few minutes and then stir together so the chocolate chips can melt. Once the mixture is smooth let it sit for about 5 minutes so it can thicken.
Remove the cake from the freezer and unwrap. Slowly pour the ganache over the cake. Spread the chocolate evenly over the cake using an offset spatula. Top with sprinkles and then place the cake back in the freezer – unwrapped – for 10-15 minutes so the chocolate can harden.
To serve, carefully remove the cake from the pan and plastic wrap then slice. Store leftovers in the freezer for 3-5 days.
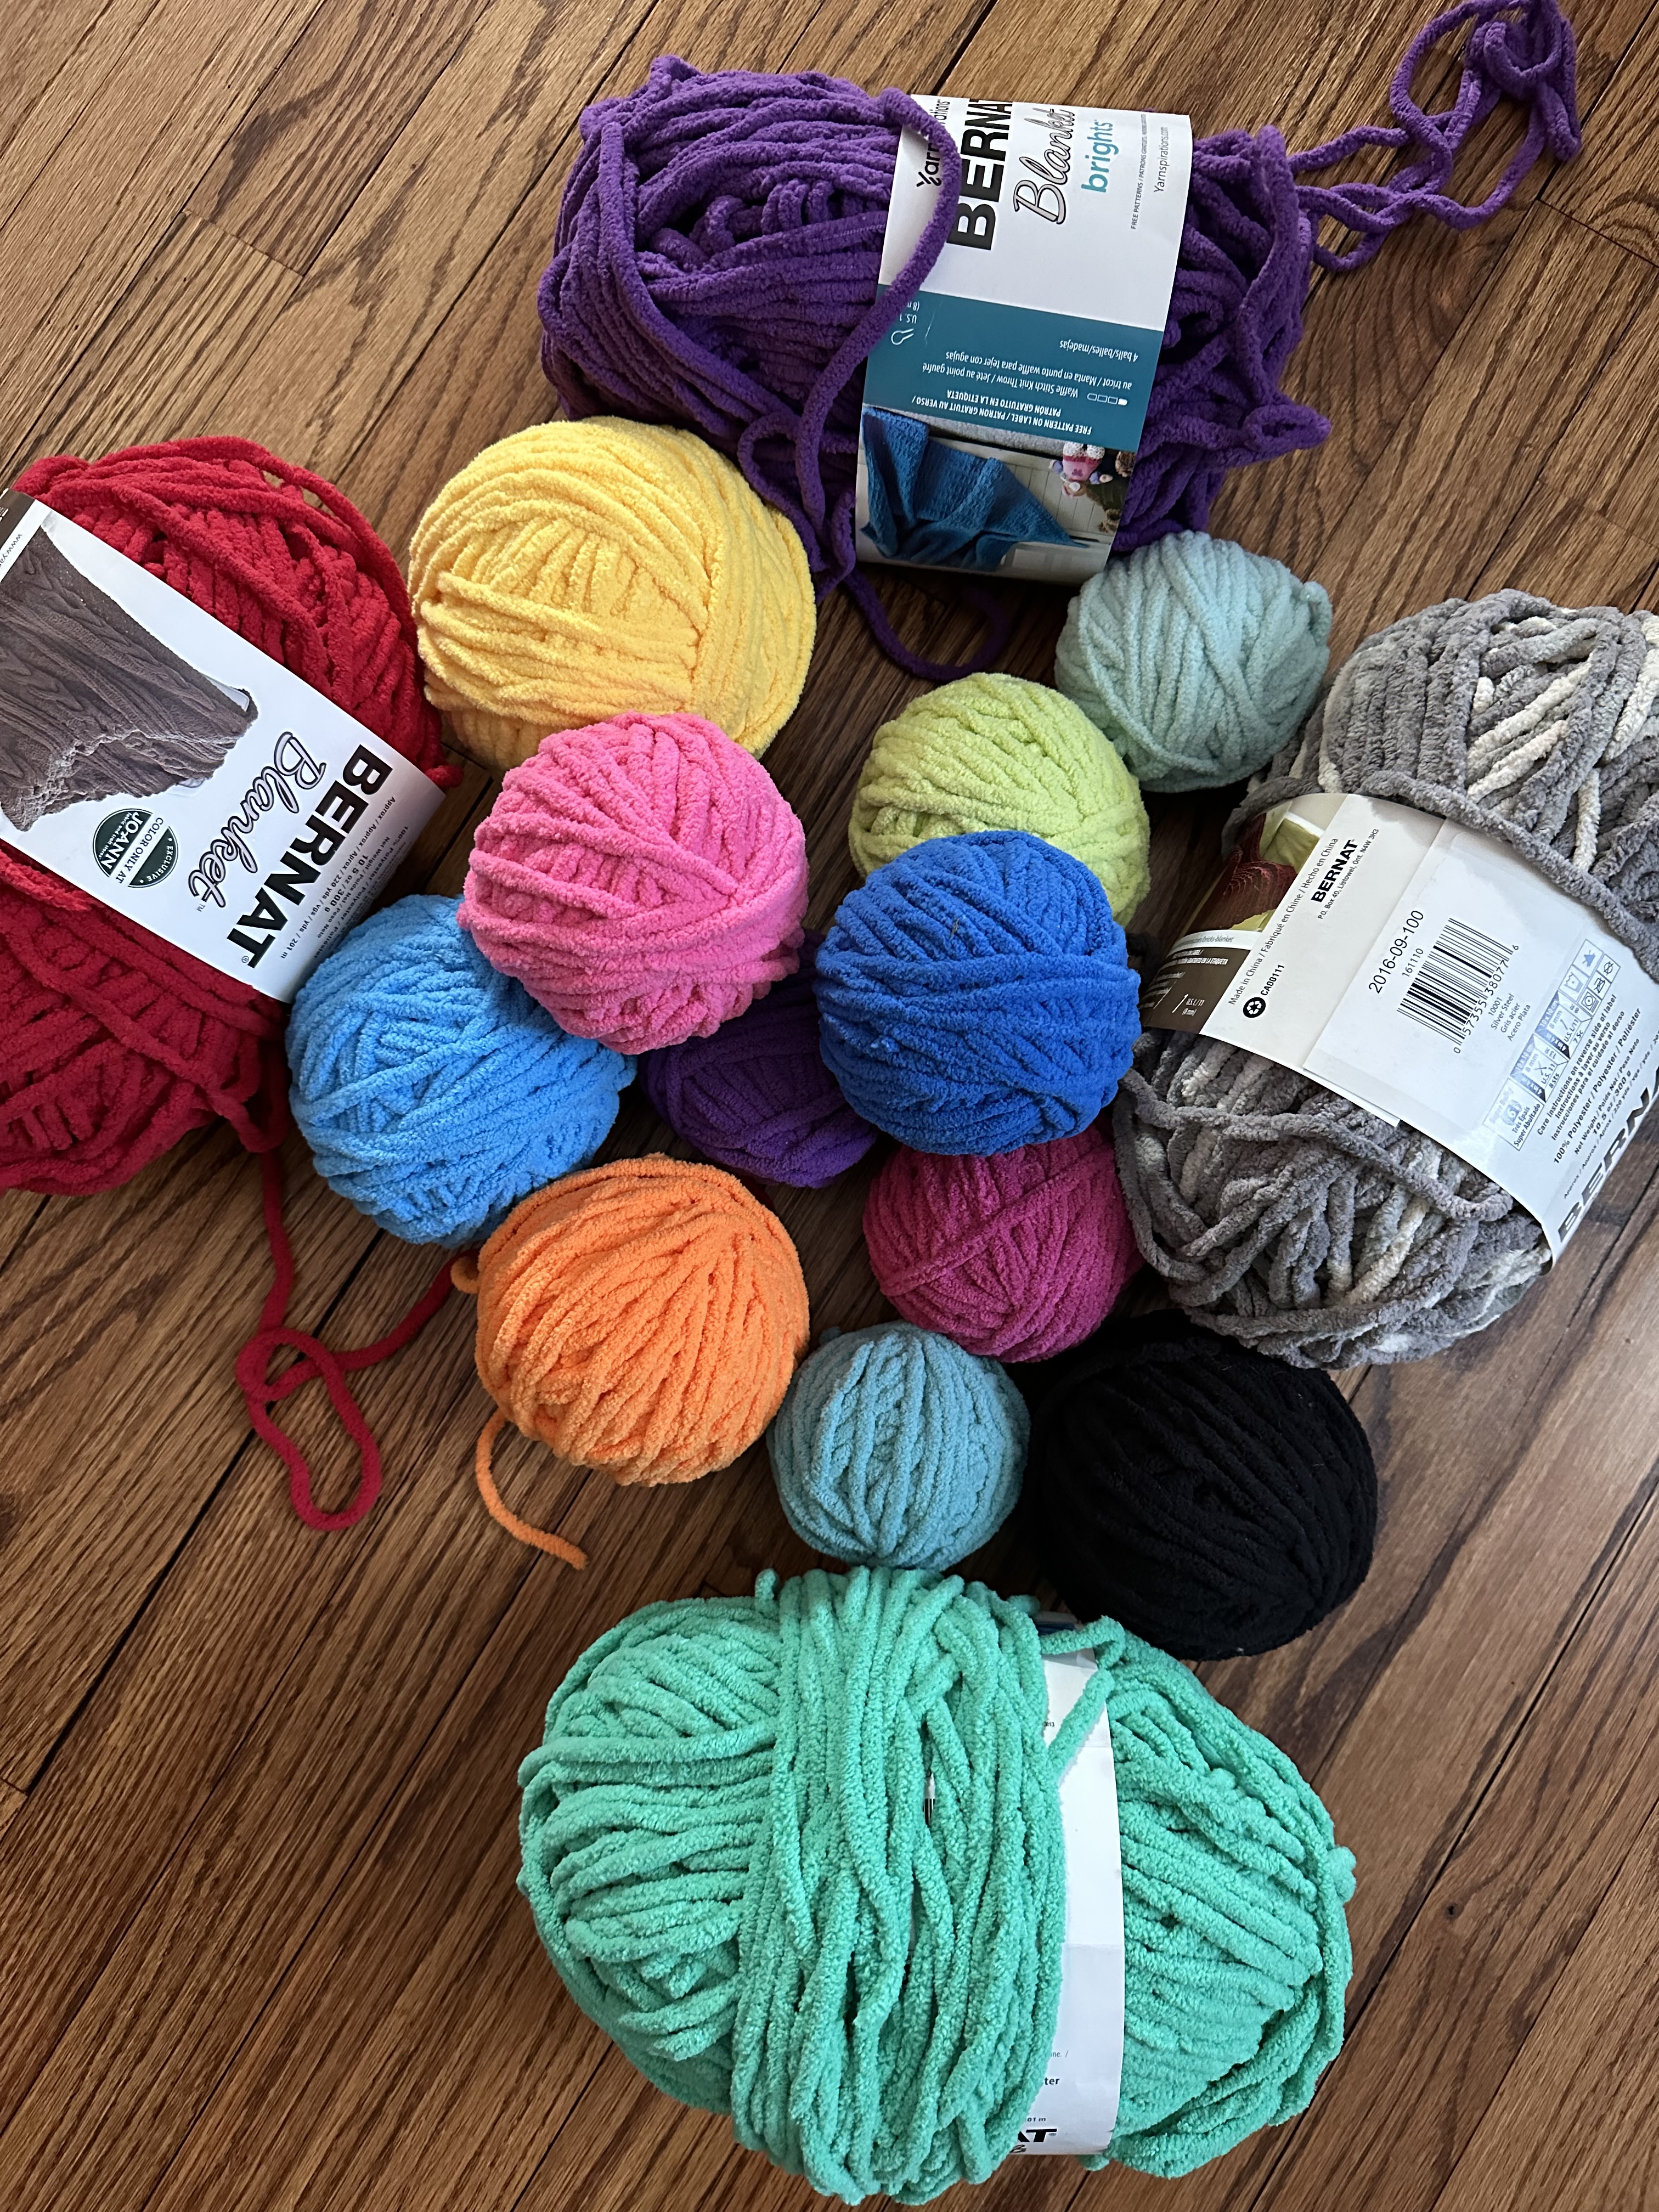
Recently I decided it was time to clean out my yarn stash. While some crocheters/knitters may save every bit of their scrap yarn, after a while I feel the need to purge it. Often, it’s not enough yarn to do anything with. I have thought about making a yarn ball wreath – I made one years ago for Christmas – but I just haven’t gotten around to it. I have a laundry list of yarn projects I want to make, and it just keeps getting longer. While going through my yarn I noticed that I had quite a bit of Bernat Blanket Yarn leftover from numerous projects in an array of colors. Since it was so much, I thought to myself that there had to be something I could make with it. Of course, the best thing was a blanket. It is called Blanket Yarn after all.
At first, I wasn’t sure what pattern I wanted to use. I thought maybe doing a simple pattern and using each color haphazardly until it ran out and then moving on to the next color. But when I envisioned that it didn’t look very aesthetically pleasing. So, I decided the best way to use up the yarn and to make a somewhat cohesive looking blanket would be to make a bunch of granny squares and then stitch them together. Which I was a bit apprehensive about because I am like most crocheters… weaving in ends is my least favorite task when it comes to crocheting and there would be a lot of ends to weave in with this pattern. Which could have meant that this project could have sat for quite some time once the squares were done. Thankfully, I am trying to be more proactive when it comes to weaving in ends, so it doesn’t seem like such a daunting task at the end of my project. I’ve started to weave as I go. Which has been helpful and has made some of my recent projects go a little quicker.
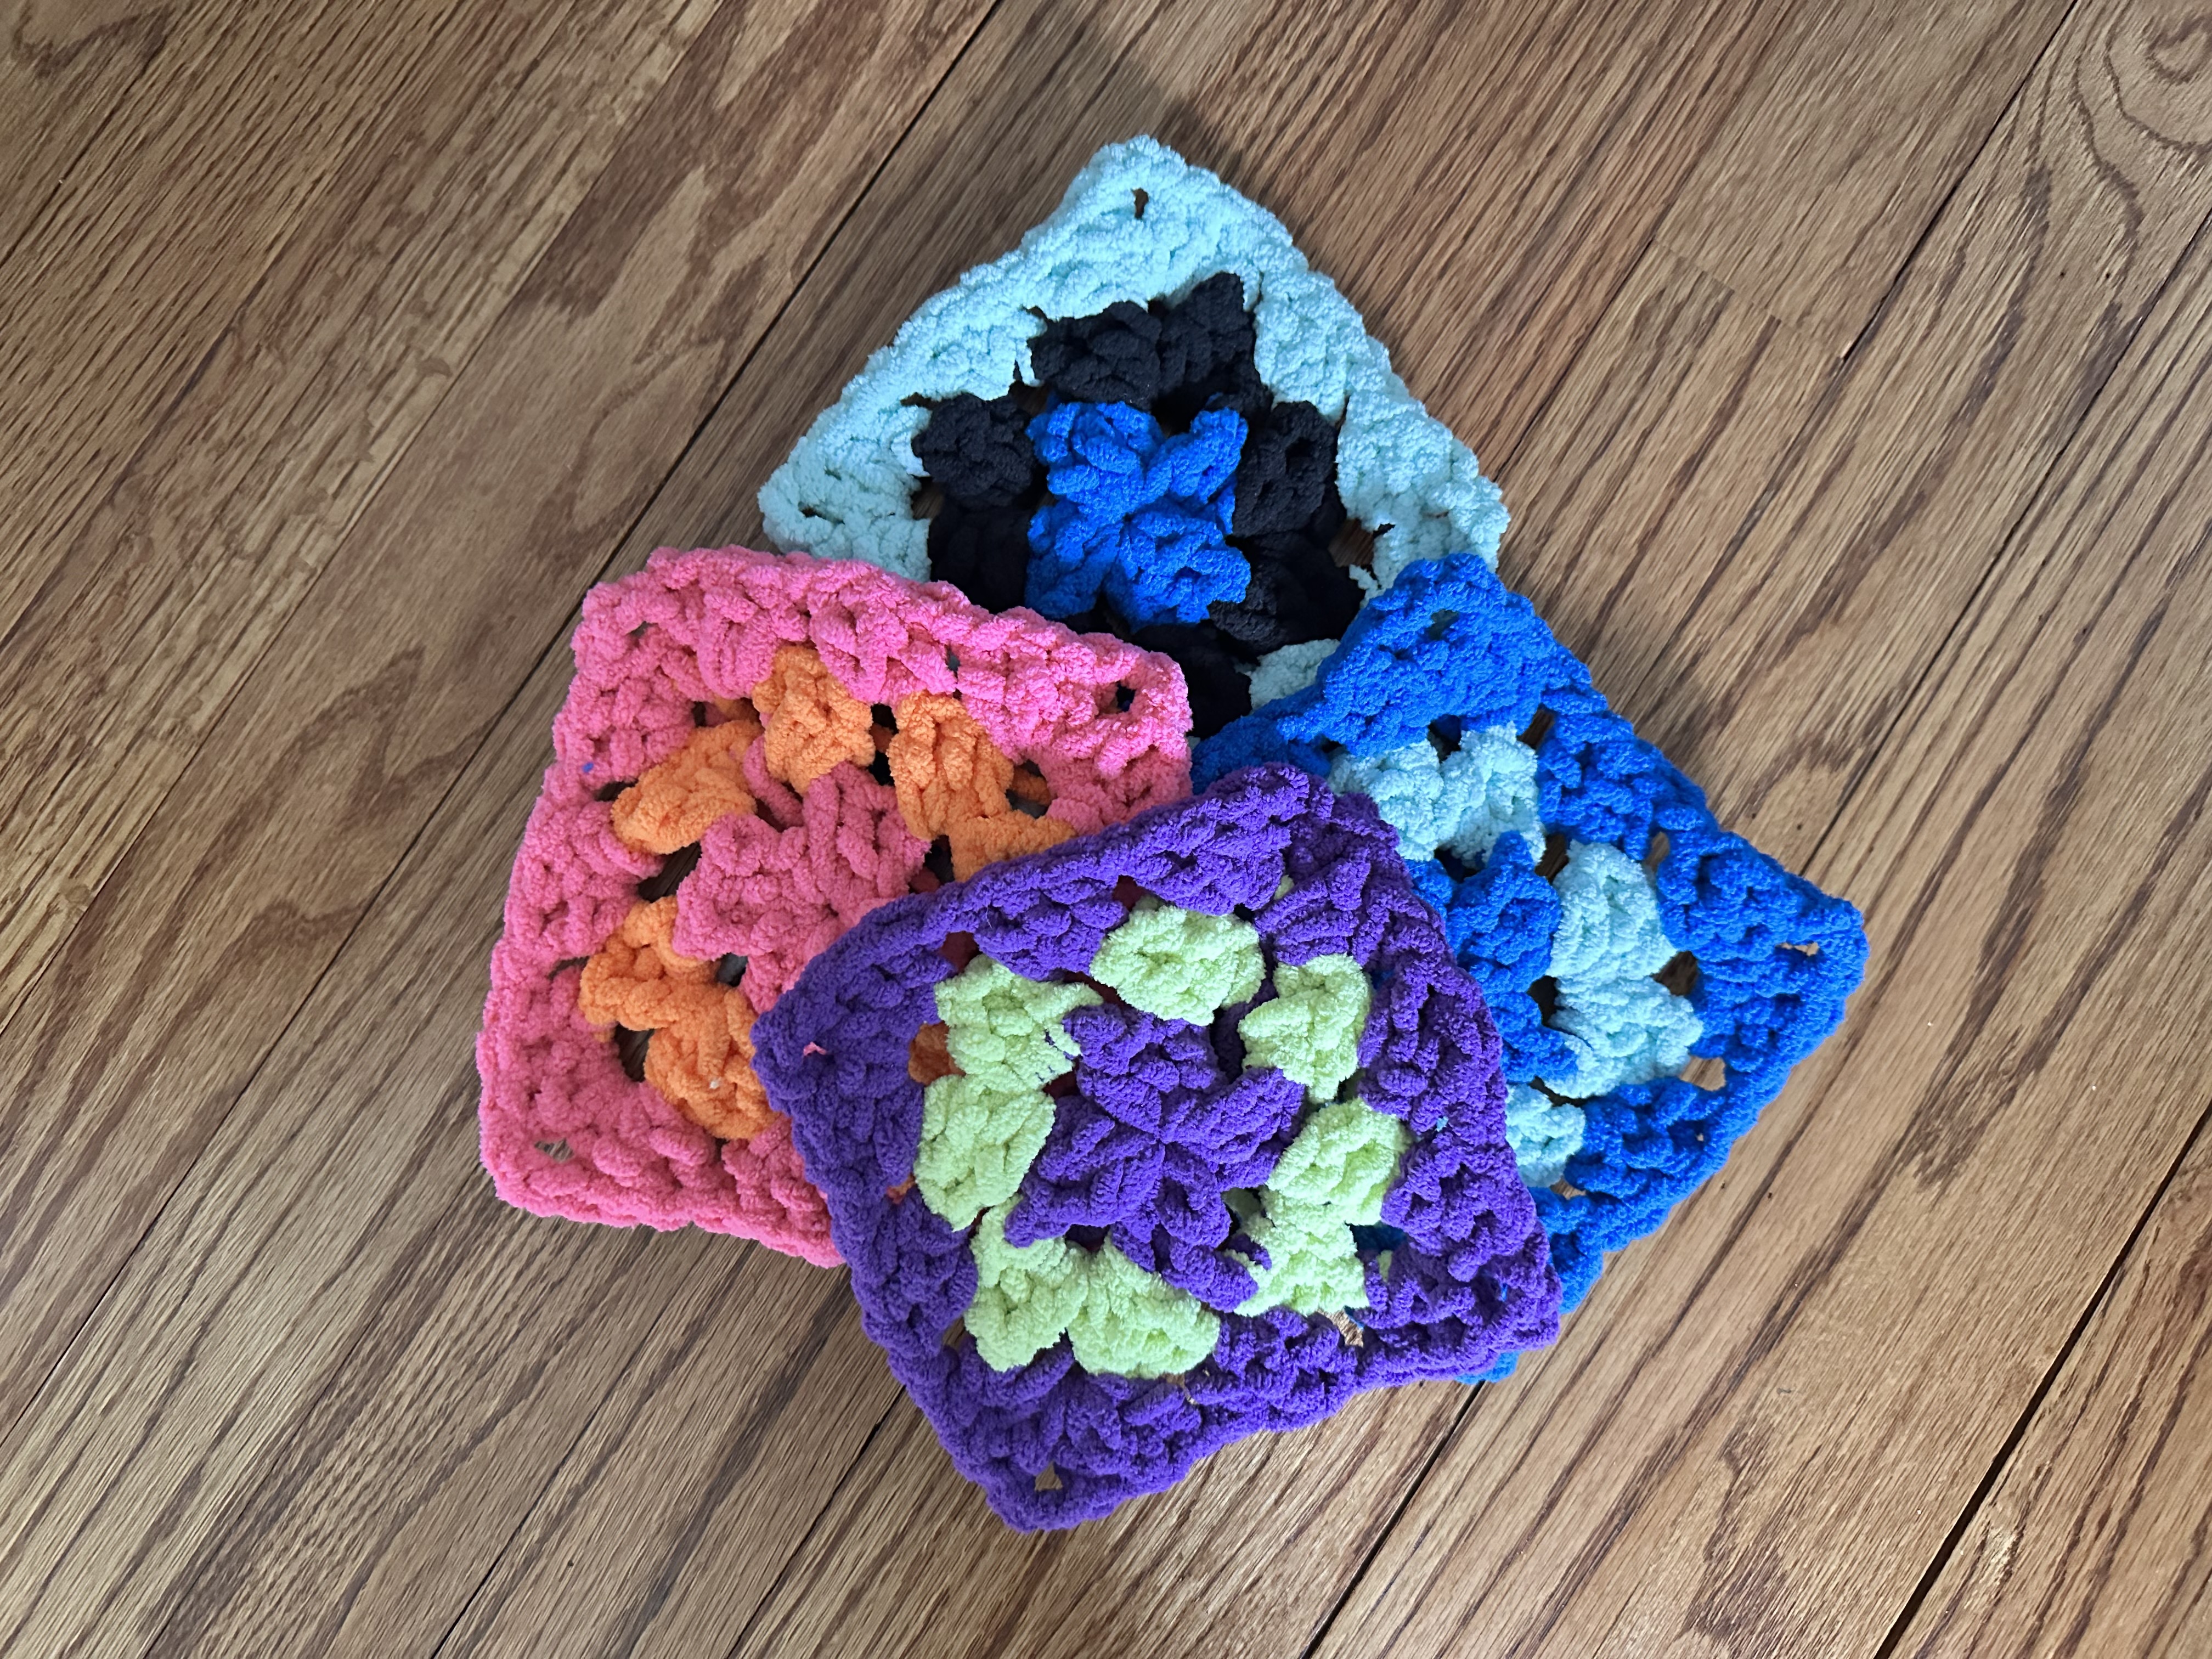
Initially I thought I would make some of the granny squares multicolor, but after making a few of them and laying them out with the solid color ones I made I didn’t like how it looked. So I decided to stick with making all the squares a solid color.
Which meant that I did have to buy a few skeins of yarn to make sure I had enough yarn to make all of the squares I would need. Thankfully (but unfortunately) I was able to get them at JoAnn’s during their going out of business sale at a discount. This also meant that it was easier for me to create a somewhat pattern with the squares.
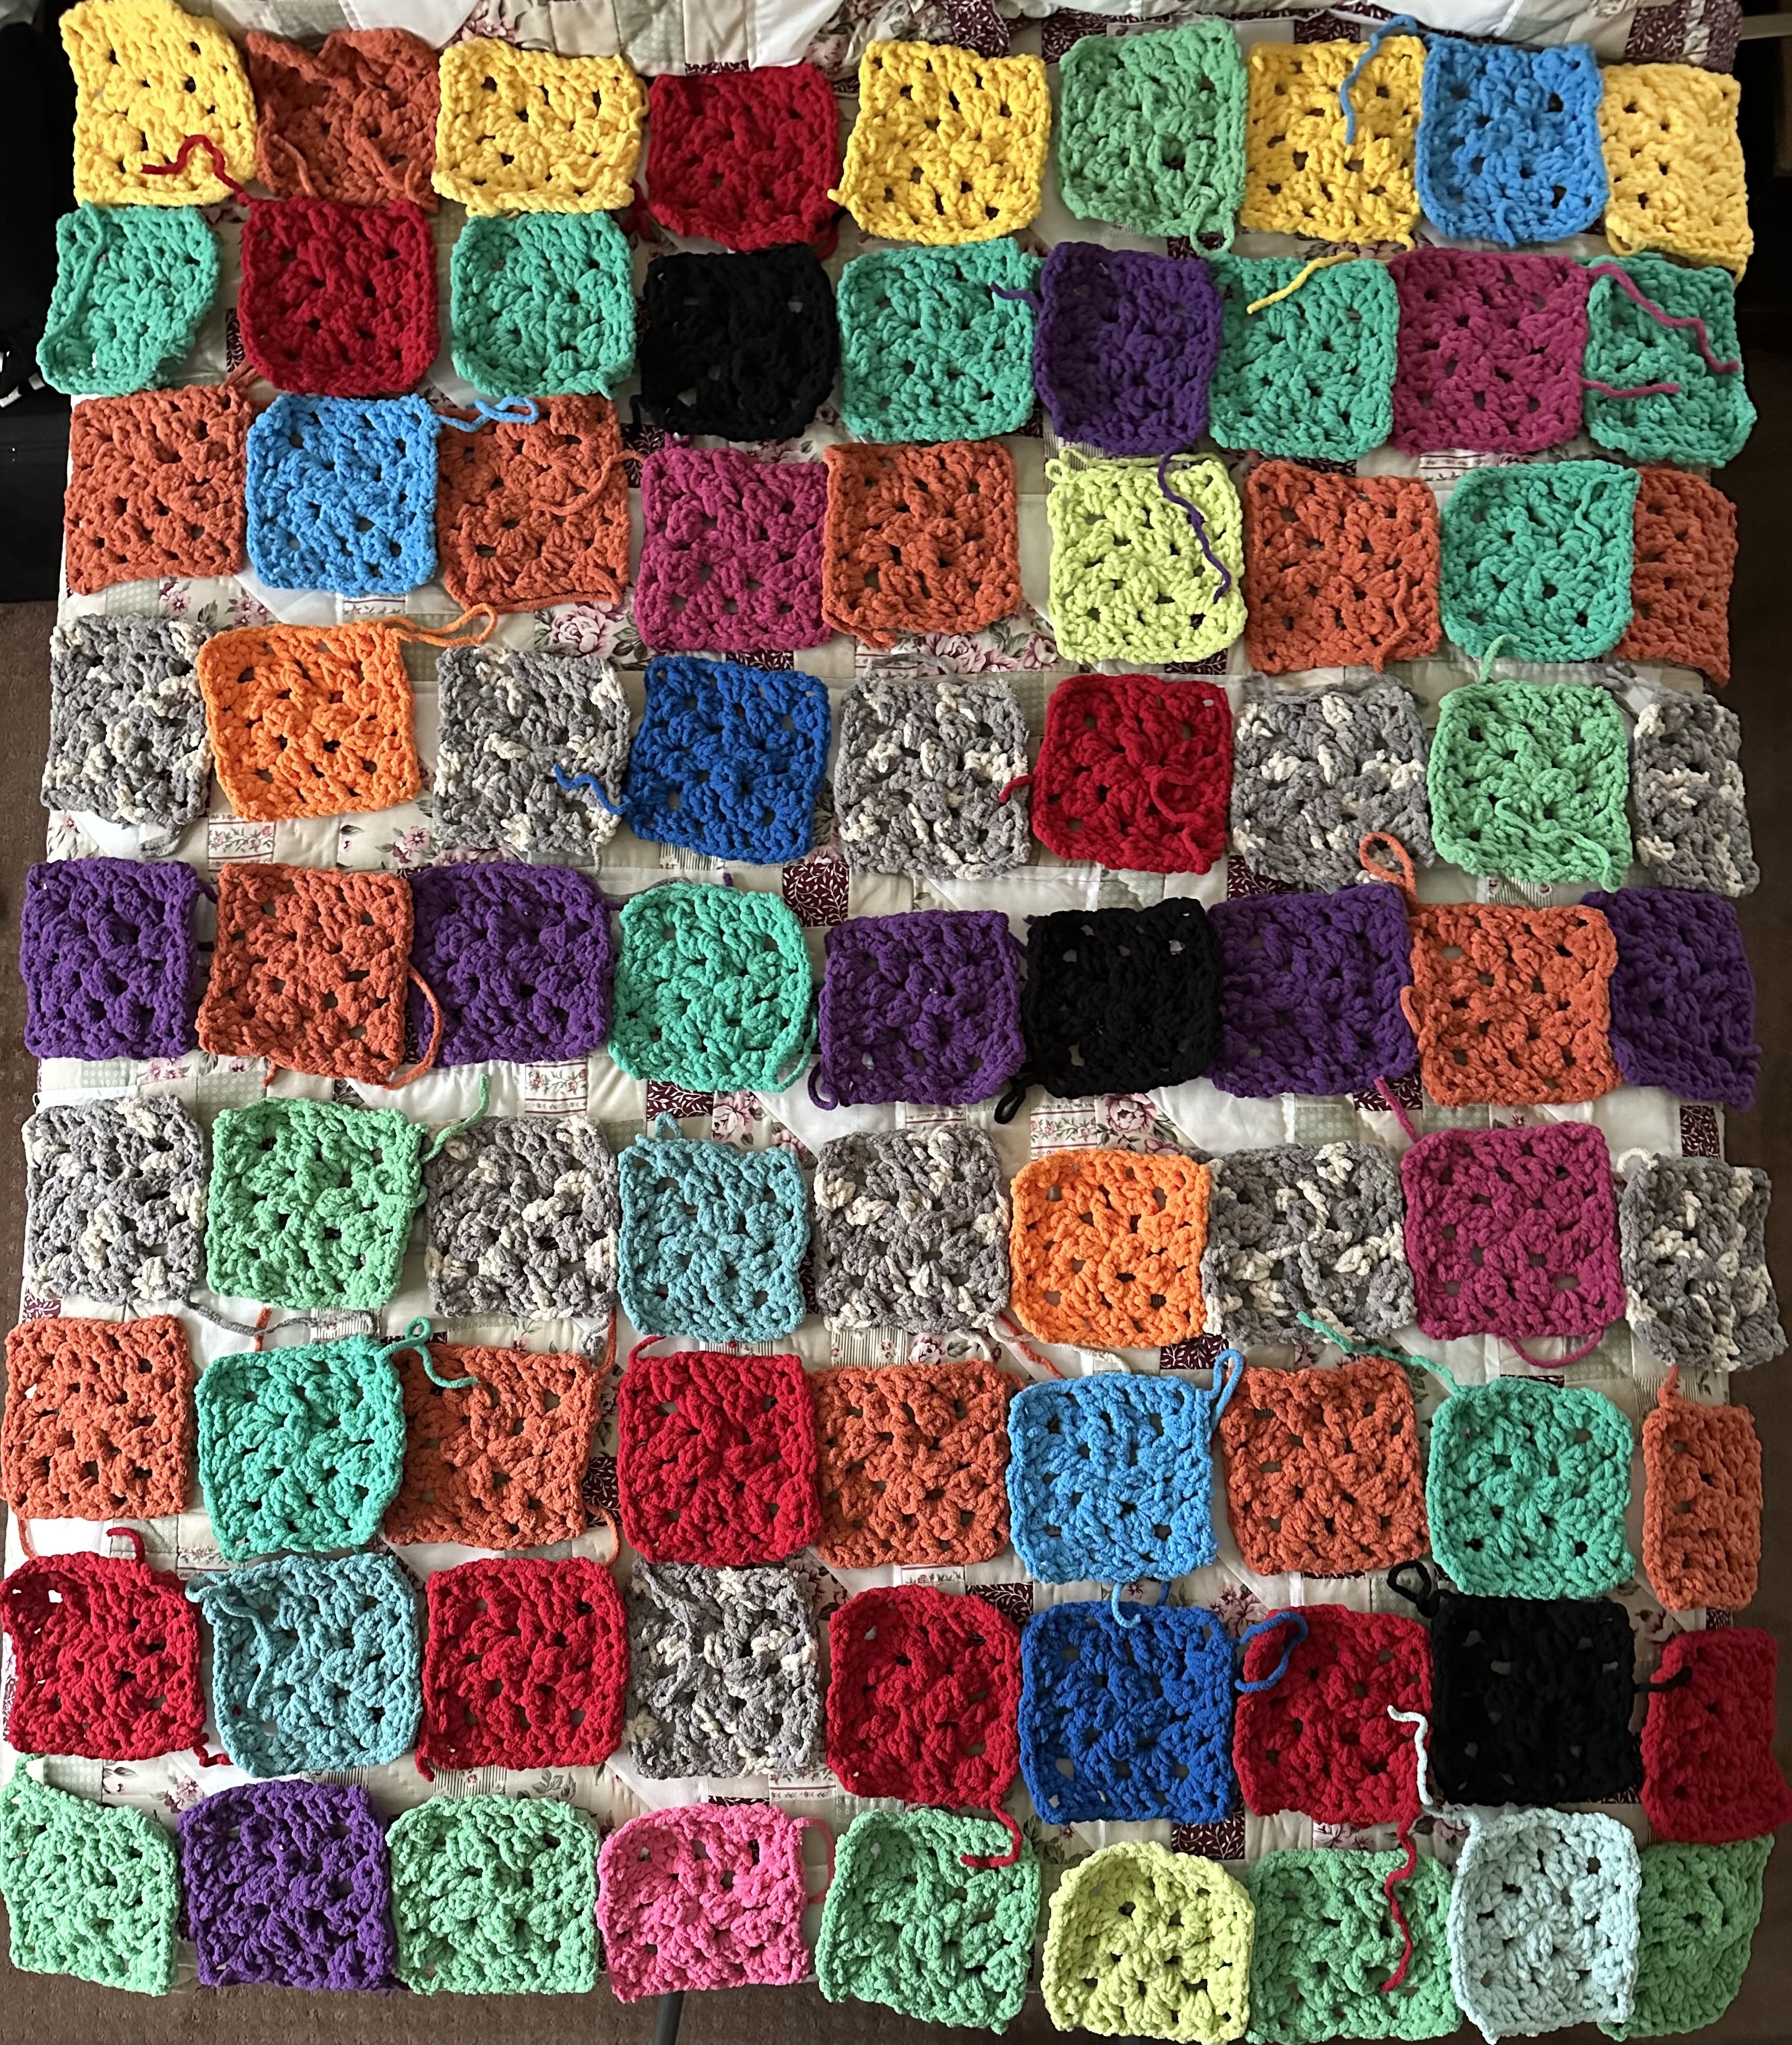
So, once all my squares were done (and the ends weaved in) I began to lay them out to figure out the best position for each of them.
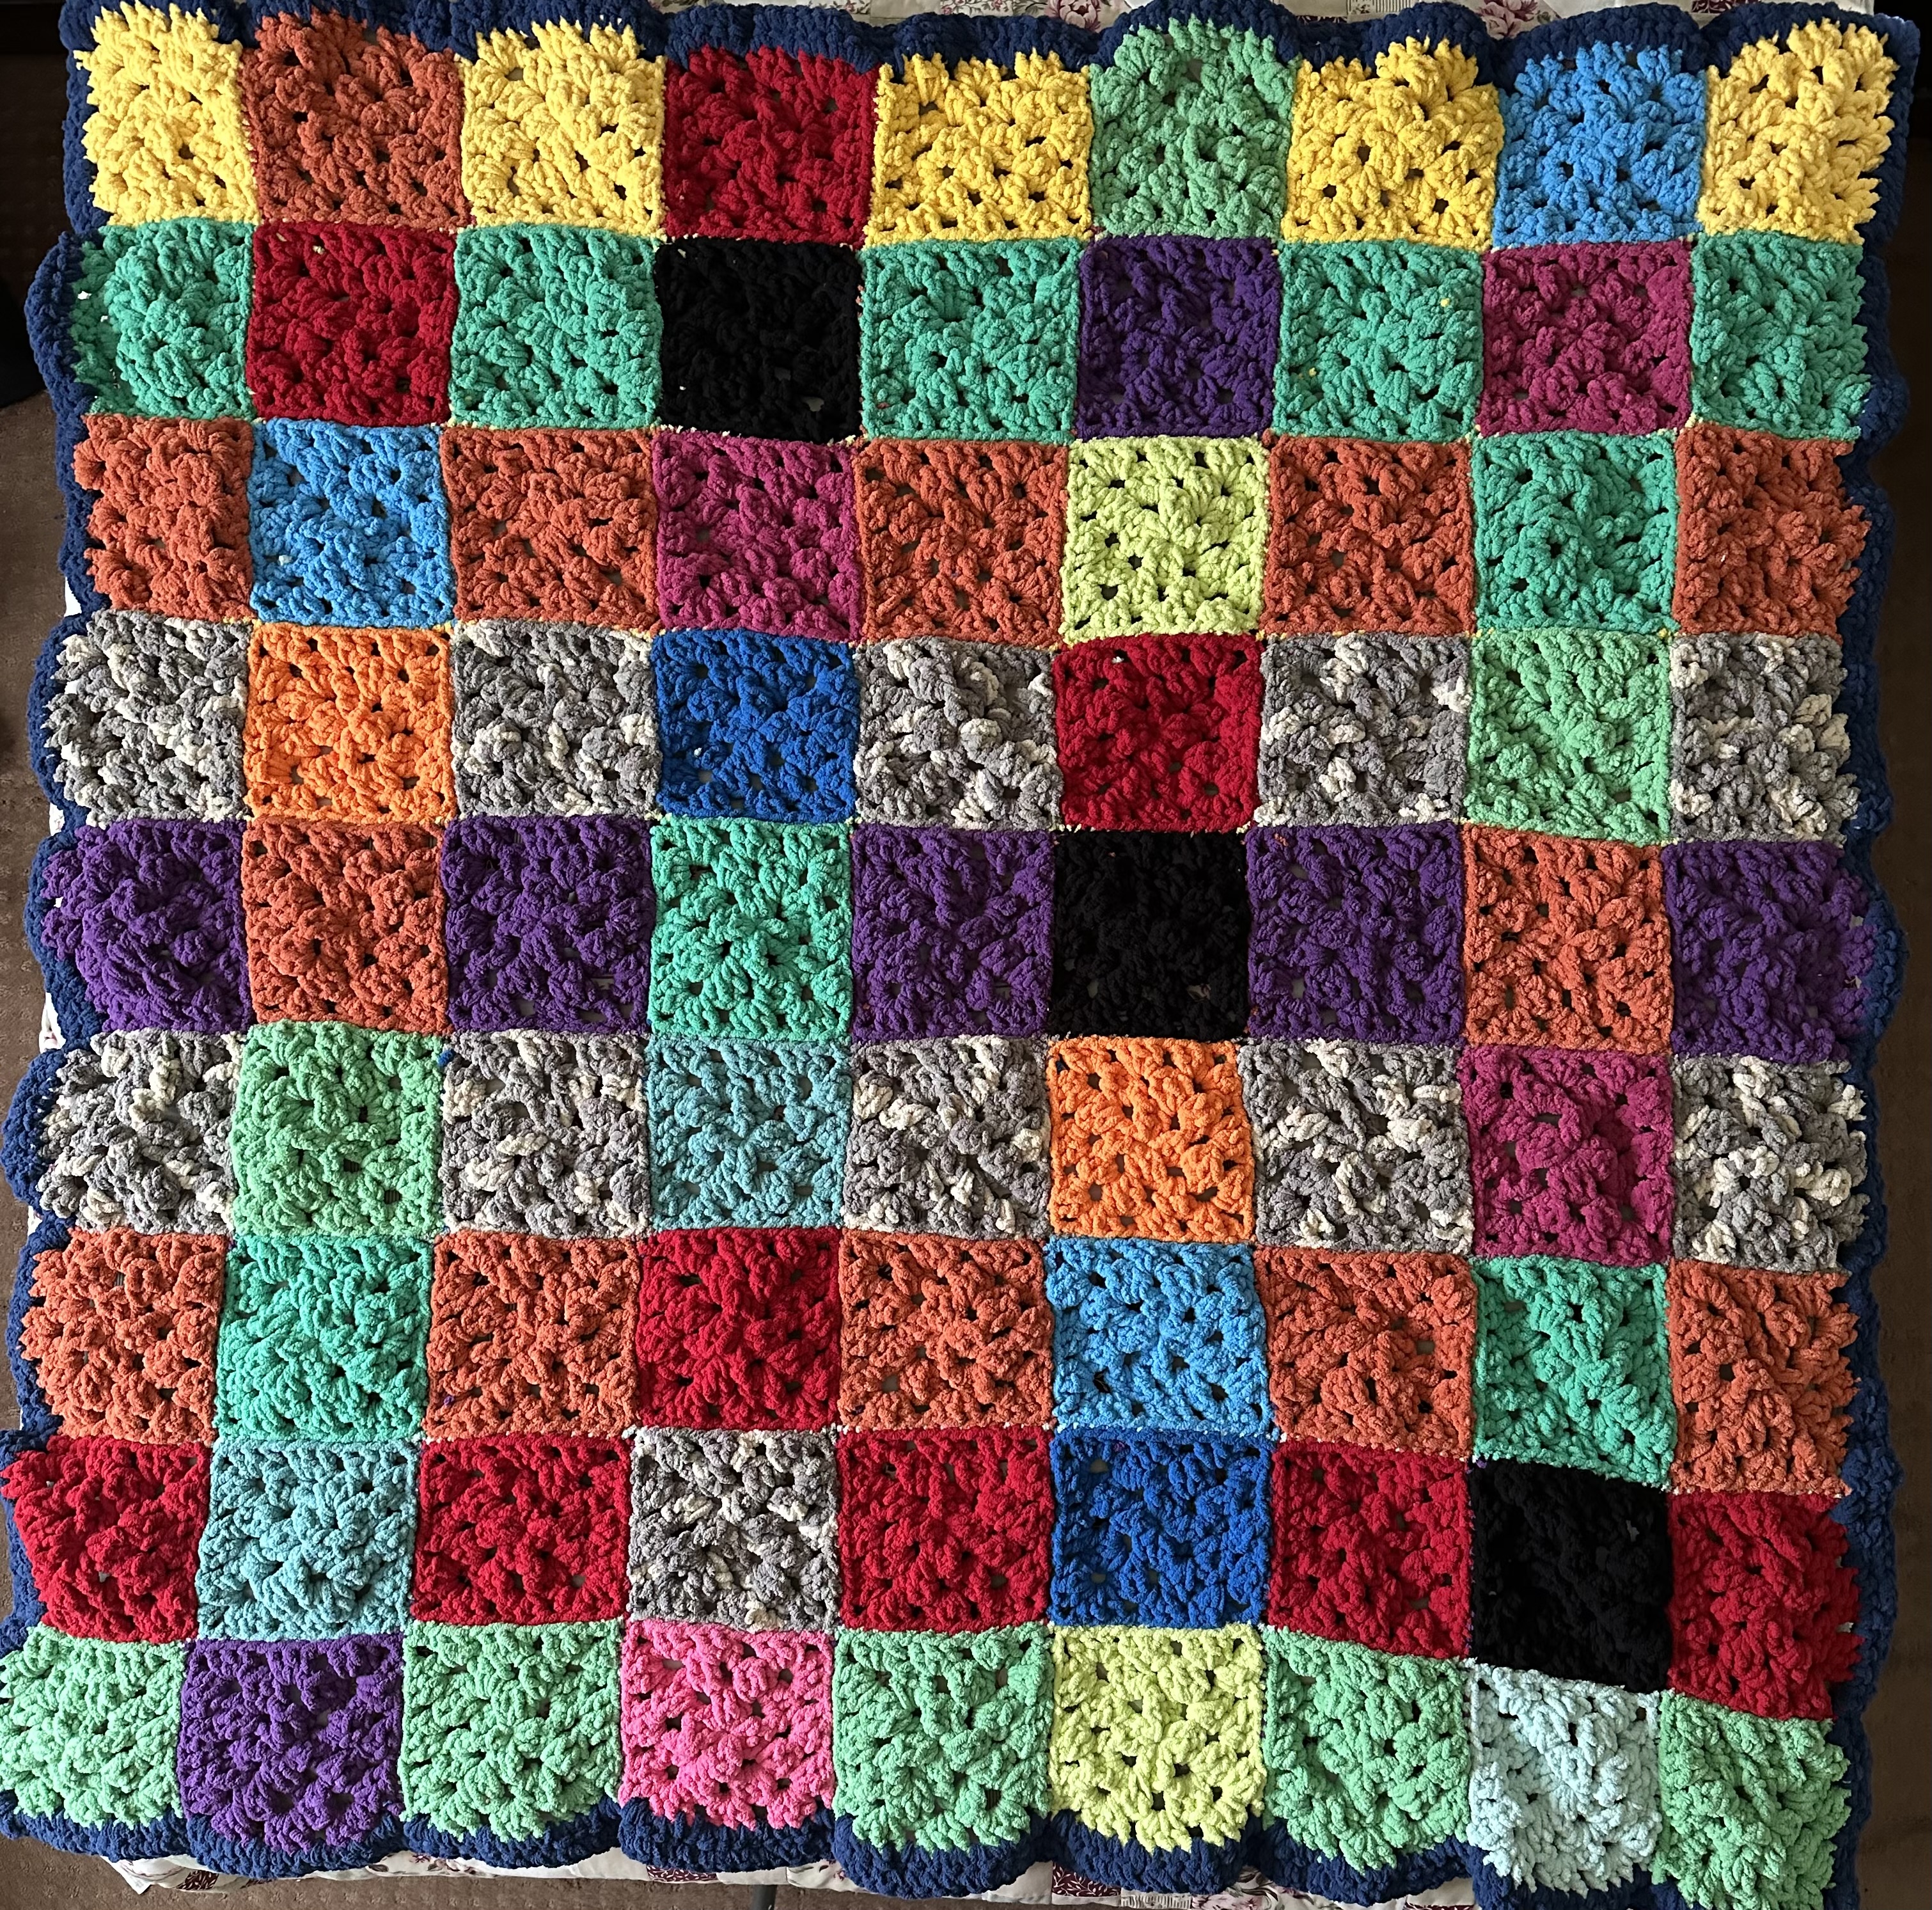
Once I was happy with the placement of all the squares, it was time to sew them together to form the rows and then sew all the rows together to finish the blanket. One thing I noticed about the yarn while making the squares was that even though they were all the same weight (Super Bulky) the texture was a bit different for some of the colors. Some of the yarn I’ve had for over 5 years, and I am thinking that over the years the manufacturer has made the yarn a bit smoother/silkier. Which kind of left the border of my blanket looking a little wonky and unfinished. So, after all the squares were sewn together, I decided to add a simple border in a contrasting color. I was very happy with the final product.